Vault-Tec Logo Themed Desk Clock from Fallout V2


Print Profile(2)

Bill of Materials


Description
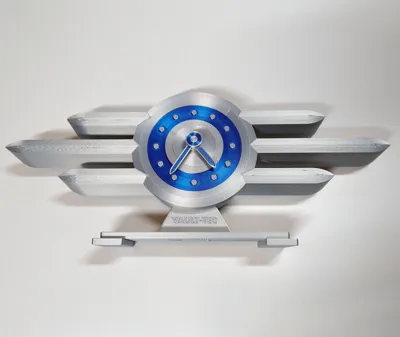
The basic design concept for this Fallout themed clock was proposed by @vaultworkshop on Instagram, with some minor changes recommended by my son. Thanks to both of them. The design was also influenced by aluminum airplane desk clocks of the 30's.
When using Silk + filament, dry is better. Your results will be better if you dry your filament before you use it.
The Base is optional. The rear Cover has a key hole for hanging it on a wall.
It uses the Bambu quartz movement to drive it, but any movement of the same dimensions should work.
The clock requires 3 M3x16 Flat Head screws to hold the Cover in the back of the Body. The Post is attached to the Base with 2 M3x16 Flat Head screws, and the Post is attached to the Body with 2 M3x16 Flat Head screws and 2 M3 nuts.
You may need to take a razor knife and scrape out the holes in the hands to get them to fit.
The clock measures 320x135mm.
Follow me on Instagram @mcmaven.pdx
V1 251201 - Initial release
V2 260213 - 3MF changes to improve the print quality. For the main body, using Layers I slow down the print speed by 50% when printing the top surfaces, and enabled variable layer height operation. I also changed several of the top patterns to Archimedean. Thanks to @AD3DStuff for these suggestions. Below is a test print that I did of the top tips using these settings. It demonstrates the quality that I was able to achive, which was an big improvement over the previous version. This was printed with a P2S with the Aux Fan is on the left.

Comment & Rating (16)