Search models, users, collections, and posts

Dog Hole Jigs: Imperial (3/4") and Metric (20mm)

Print Profile(2)

All
P1S
H2S
P2S
X1E
P1P
X2D
H2D
X1 Carbon
X1
A1
H2C
H2D Pro
A2L

Metric: 20 mm Version
Designer
12.1 h
2 plates
5.0(24)

Standard / Imperial: 3/4" Version
Designer
5.9 h
1 plate
5.0(23)

Open in Bambu Studio
Boost
397
1541
89
46
988
597
Released 

Description

Description:


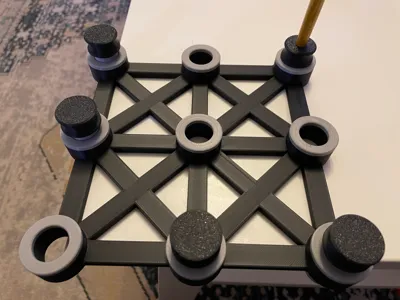
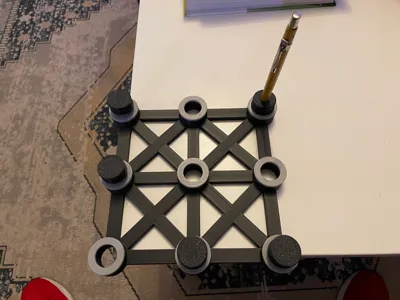
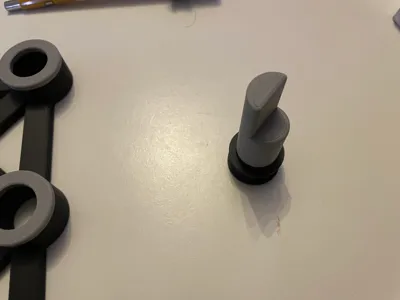
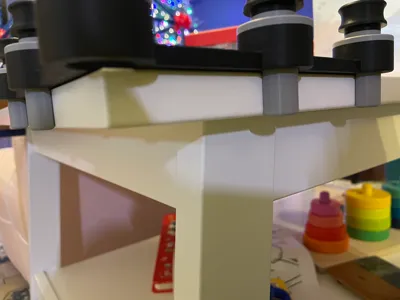
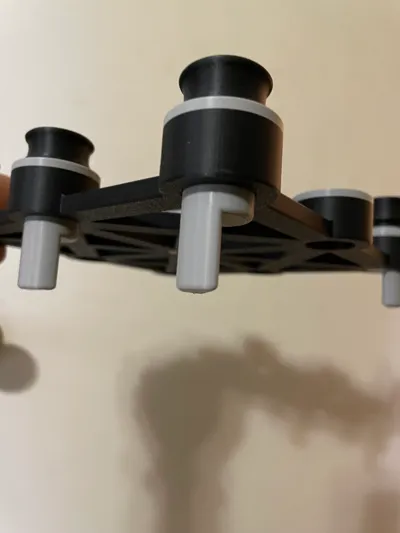
This is a jig to mark and drill holes to make an MFT bench dog work bench. The alignment dogs include both a fully rounded and half round portion allowing them to be used to reference off of previously drilled holes or off of the tables edge. There is also a marking dog tool that can be used to mark or punch the centers of the holes to be drilled. I used this with a transfer punch to help prevent the drill bit from walking. Ignore the color change in the display photos. I just ran out of black part way through the print. 


Other Tools Required:

  • Drill
  • Drill bit

Other tools recommended:

  • Center Punch

Comment & Rating (89)

(0/1000)

Print Profile
Metric: 20 mm Version
Replacing the surface top of my workbench in the next few weeks and I am looking forward to an accurate dog hole layout now. Thanks for sharing!
The profile uploader has replied
profile
4
Reply
Love the color combo.
(Edited)
1
Reply
I'm not sure why the dogs aren't fitting all the way. I printed the 20mm version. I know I had an issue the last 1.5 hours with an extruder error I rushed but the dog holes should still be able to fit all the way through right?
The designer has replied
designer
1
Reply
They were designed to be tight. I worked mine in and out a few times to wear them in.
0
Reply
Replying to @user_501593334 :
Okay, thank you for the reply. I'll try and work them in.
0
Reply
edit: after VERY minimal sanding on the dogs, they slide in perfectly. looking forward to using this soon. Thank you!
designer
1
Reply
Tried this out and it definitely works as advertised. The hole spacing was a bit closer than I wanted for the 20mm holes, just my preference as I felt the holes were either to close or far with this jig, but other than that a top notch effort. The holes reamed out easily using the 20mm bit and a drill press, for squareness. May I suggest that a guide for a 100mm by 3.75mm Pasload nail, or similar, be included that could be used like a centre punch for the hole locations. Would allow for a little more flexibility in hole size for other uses. I am actually thinking of this variation for an assembly table.
(Edited)
The designer has replied
designer
8
Reply
I went with the standard spacing for MFTs.
(Edited)
0
Reply
Did not turn out right. The pegs printed with this didn't fit in the holes. None of my 3/4" bench dogs would fit in this either. 3/4" drill bit wouldn't fit.
(Edited)
The designer has replied
1
Reply
Interesting. I haven't had or heard of any other problems. Is it possible that the scaling was altered?
0
Reply
Replying to @user_501593334 :
I did not touch any settings. I simply loaded, chose filament and printed.
0
Reply
Replying to @mattstache :
Was it just a little tight? It is meant to be tight for max accuracy. With mine the dogs fit but they took some effort which lessened as I worked them in and out. The drill bit also fit but had to be aligned perfectly. Of course the bit can also be used to create the perfect sized hole.
2
Reply
A truly superb template! It printed flawlessly on the A1 in PETG using the standard settings. The only change I made was increasing the wall count to 4. A few tips:Invest in a high-quality 20mm Forstner bit (e.g., from Fisch or FAMAG). it makes the whole process much easier! I printed an additional vacuum attachment (https://makerworld.com/de/models/776717-40mm-vacuum-hose-holder-mft-20mm-dog-holes#profileId-729372) for my setup to suck up the wood chips. Otherwise, they tend to clog the drill hole.
designer
1
Reply
Print Profile
Metric: 20 mm Version
Nice print and functionality. When you take time to place jig, then it gives a very good result.
profile
1
Reply
Print Profile
Metric: 20 mm Version
Hot off the plate. will be testing it later today to do a dry run before I do a full top. Will be using a 8mm brad point but with a straight hole jig to ensure precision.
profile
1
Reply
I am just about to try this. I was thinking of changing wall order from inner/outer to outer/inner to see if that helps with fit. Is that worth trying?
The designer has replied
designer
1
Reply
Not sure. Could be worth a shot.
0
Reply
Replying to @user_501593334 :
It does seem to make a slight difference. Could be the difference between a snug fit and no fit. I would recommend people use the cut function to reduce and test how it works out before printing the whole thing.
designer
1
Reply
Replying to @it_really_is_me :
Outer then inner wall results in the overfill being inside the object instead of outside the object so it's more likely to be dimensionally accurate.
designer
4
Reply
Turned out great A1 add:north petg
designer
1
Reply
Very nice print! Looks more solid than I was expecting. I’m wondering which router you used to drill the holes? Thank you
The designer has replied
designer
2
Reply
I used a woodowl drill bit and my drill.
0
Reply

License

This user content is licensed under the MakerWorld Exclusive License.

You may create derivative works based on this object, provided that all such derivative works are published exclusively on the MakerWorld platform and include proper attribution to the original creator. You may not share, upload, host, distribute, or publish this object—or any derivative work of this object—on any other digital platform, marketplace, or distribution channel. Commercial use of this object and any derivative works is strictly prohibited. This includes, but is not limited to, selling, renting, sublicensing, or using the object in any context in which you receive monetary compensation or other financial benefits.