Leonardo Da Vinci Catapult


Print Profile(1)

Description
PLEASE READ ENTIRE DESCRIPTION BEFORE PRINTING!
Hello, welcome to the leonardo da vinci catapult that I designed. I did add two extra tension arms to increase the strength of the catapult. In order to make this yourself, you will need PETG and also some string.
Link to parts needed:
Bearings: https://a.co/d/4Mq5sLK
String: https://a.co/d/9Q3gmXp
HOW TO ASSEMBLE:

First. insert the 4 tension arms into the slots at the base. Note that you want the whole of the tension arm to be visible, NOT in the base. Also note that this is a pretty tight friction fite so you will need to push hard.

This hole did not come out as clean as I would have liked, so I ended up having to use a 1/8 inch drill bit to clean it up.

Once cleaned up, make sure that this green piece fits in the hole.

Next, you put the green pin in the blue arm and all that into the black base. I did not glue this, in that if it ever broke I want to be able to easily replace it.

Next, insert ther 2 bearings into the base. I will link below the bearings that I used.

Now, glue the 4 pins into their respective hole. I used hot glue here and I would recommend you do the same.

This is what it should look like after it is glued.

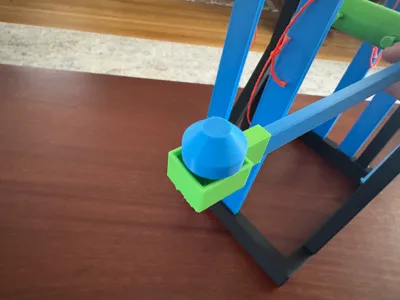
Now you can but the green gear shaft into position and slide the skinny black shaft through the whole thing, securring it all in place. Make sure the gear is towards the side with the blue locking arm, as seen in the picture.

Now you can slide on these black collars that will prevent the shaft from sliding out. This is a very tight friction fit and I did not need any glue here. If yours is loose, then you can use a little glue.

Here is a look at the other side.

Now glue the catapult basket to the arm. (I used hot glue)

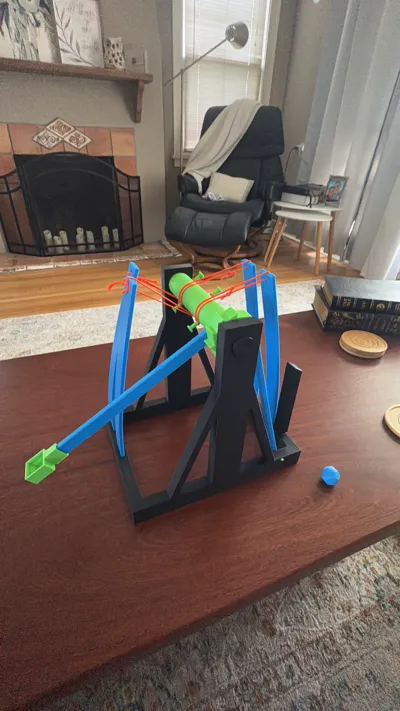
Now glue the arm with basket to the green shaft. Make sure the basket is UP and in the same orientation as seen in the picture.

Now glue the black stopping block to the main base. This piece is what will stop the catapult arm from hitting the ground when fired. Use the catapult arm as a guide and it'll show you where it needs to be glued on (I used hot glue).

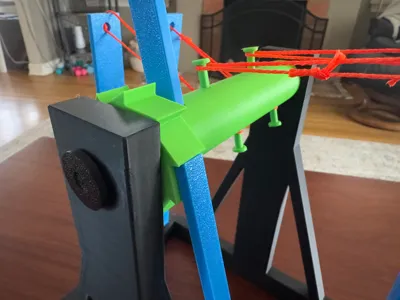
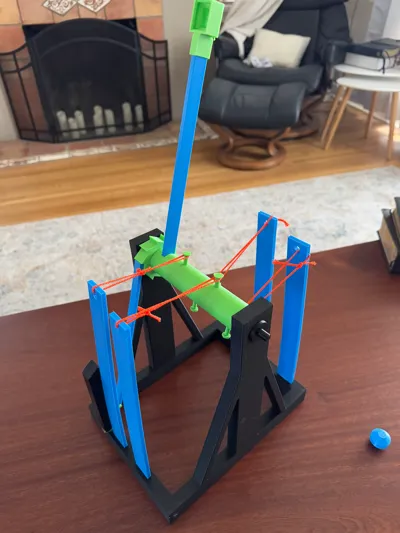
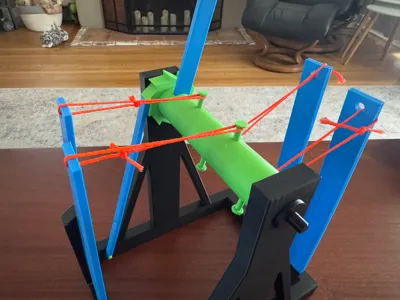
Now use a clamp or something to temporarily hole the arm straight up. Not tight some strong attacking the elastic arms to the central shaft as seen in the picture. You can play around with tension here, which will impact how strong your catapult is.

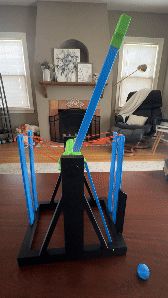
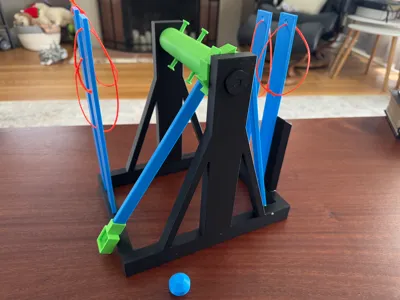
Here is a final picture of the catapult locked and loaded, ready to fire. To fire you just release the arm that is holding the gear in place. (watch the gif video).
Physics Principles in a Leonardo da Vinci Catapult
- Energy Storage and Conversion
- The catapult uses a tensioned or twisted rope system to store elastic potential energy. When the stored energy is released, it is rapidly converted into kinetic energy, propelling the projectile forward.
- Leonardo's design often relies on torsion (twisting) or bending (flexion) to store energy, demonstrating the principles of elasticity in materials.
- Newton’s Laws of Motion
- First Law (Inertia): The projectile remains at rest until acted upon by the force of the catapult arm.
- Second Law (Force and Acceleration): The force generated by the release of stored energy accelerates the projectile. The equation F=ma explains how the force applied determines the projectile's acceleration based on its mass.
- Third Law (Action-Reaction): As the arm pushes the projectile forward, the projectile exerts an equal and opposite force on the arm, though the arm is anchored and moves minimally due to the catapult's structure.
- Projectile Motion
- Once launched, the projectile follows a parabolic trajectory due to the influence of gravity and initial velocity. The path is determined by the initial angle of release, the speed of the arm, and air resistance.
- The key equations for projectile motion include:
- x=vxt: Horizontal distance
- y=vyt−12gt2: Vertical position
- vx=vcos(θ), vy=vsin(θ): Velocity components
- Torque and Lever Principles
- The catapult arm acts as a lever, with the fulcrum near the base. Torque (τ=rFsinθ) is applied to rotate the arm, where rr is the distance from the fulcrum to the point of force application, F is the force applied, and θ is the angle of application.
- The mechanical advantage of the lever amplifies the input force from the tensioned mechanism.
- Moment of Inertia
- The arm's ability to rotate depends on its moment of inertia, I=∑mr2, where mm is the mass of individual elements and rr their distance from the rotation axis. A lower moment of inertia allows for faster rotation, increasing projectile velocity.
- Air Drag and Aerodynamics
- As the projectile moves through the air, it encounters drag forces that slow it down. The drag depends on the shape, size, and speed of the projectile, as well as the density of the air.
- Energy Losses
- Not all stored potential energy is converted to kinetic energy due to friction at the arm’s pivot point, internal friction in the torsion system, and air resistance acting on the projectile.
License
You shall not share, sub-license, sell, rent, host, transfer, or distribute in any way the digital or 3D printed versions of this object, nor any other derivative work of this object in its digital or physical format (including - but not limited to - remixes of this object, and hosting on other digital platforms). The objects may not be used without permission in any way whatsoever in which you charge money, or collect fees.
Comment & Rating (4)