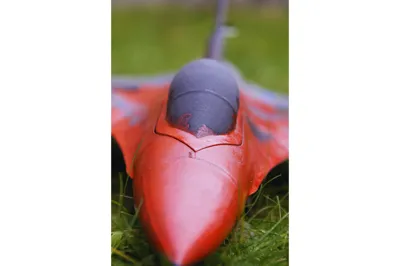
F-16 RC JET (50mm EDF)


Print Profile(2)


Bill of Materials


Description
Boost Me (for free)
FOR MORE COOL DESIGNS
IMPORTANT: IT IS ADVISED TO USE A CATAPULT FOR THE LAUNCH
Introducing my FREE 1:17 scale F16 fighting falcon 50mm EDF RC fighter jet! Optimized for LW-PLA with 0.4mm nozzle, 0.2mm layer height, 0.6 to 0.5 flow and 245 to 265°C temp (fix your flow rate according to the table below).
sadly announcing that the maiden ended with Stalls as my power setup was not strong enough
but the plane's center of gravity was nearly spot on
https://drive.google.com/file/d/1jVEJ7VtU4VWRGlcavaISmwUdgsGGIkw0/view?usp=sharing
Tech description:
- Wingspan: 650 mm
- Length: 850 mm
- Height: 250 mm
- Weight: 600g
- Maximum take-off weight: 700 g (including 2200 mAh 3s Lipo battery)
- Flight speed range: 8 m/s - 28 m/s (30 km/h - 100 km/h)
Controls: ailerons/elevators/rudder (5 servos).
most of the parts are printed with gyroid infill 2%
BOM:
1x EDF 50mm such style of EDF (https://de.aliexpress.com/item/32861018751.html?src=google&pdp_npi=4@dis!EUR!7.39!7.39!!!!!@!65360710316!ppc!!!&gQT=1)
1x 40A ESC
Lipo 4S(or 3S) 1500-2200 30C or more
5x 9g metal gear servo FROM BAMBULAB SHOP
300g PLA aer or ASA aero and 40g PLA
servo vable extentions (nearly 1,5m in total)
6mmx4mmx280mm carbon fiber rod (OPTIONNAL) but will get in the way of the turbine's intake airflow
5x 80mm 1.2mm steel rods
5X push rod attachment
8 magnets 8x2mm FROM BAMBULAB SHOP
20cm Velcro FROM BAMBULAB SHOP
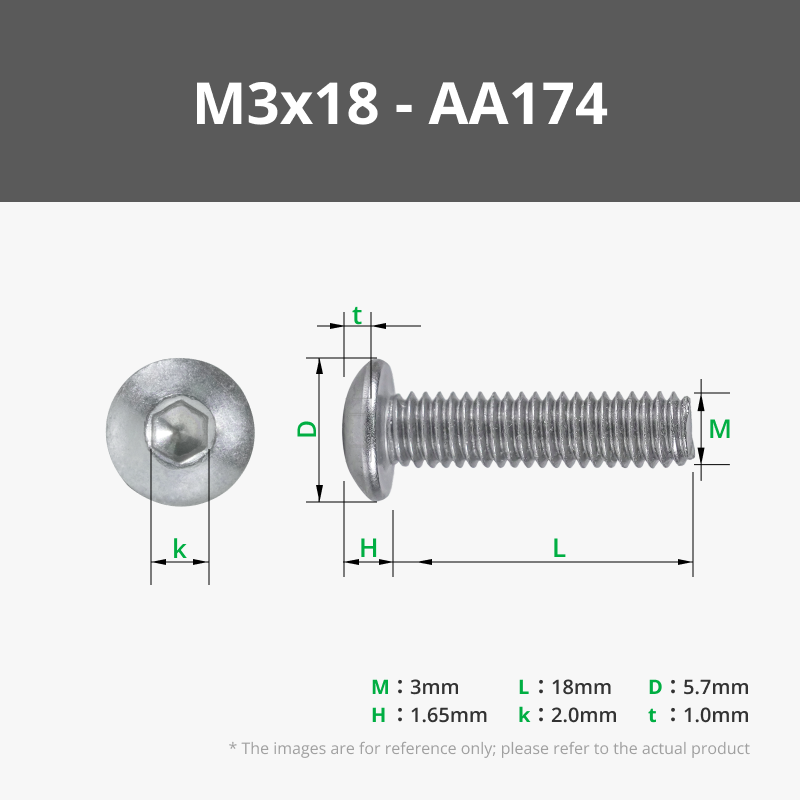
M3x18mm Machine screws + nuts FROM BAMBULAB SHOP
CA-Glue
CENTER OF GRAVITY (or cog) should be around 6cm from the front trailing edge of the wing (not proven yet, i will do the maiden in a couple of days due to bad weather conditions, maiden video coming soon)
assembly:
L stands for left
R stands for right
A stands for aileron
E stands for elevator
R stands for rudder
T stands for top
B stands for bottom
- glue the servo mounts in place with the letters as reference
- you can start by wiring the servos and fixing them in place because the wiring management is kind of bad as there is no much space over the turbine (note that the esc will be placed in the right section of the wiring management tunnel so try to put the rest of the servo wires from the other side and only the right aileron cables alongside the esc) if you dont have a space, break gently and slowly walls to pass the cables through
- glue the fuselage parts together with CA glue or super glue
- glue the control surfaces together (ailerons right 1+2+3, ailerons left 1+2+3 and rudder 1+2) then glue the hinges onto them
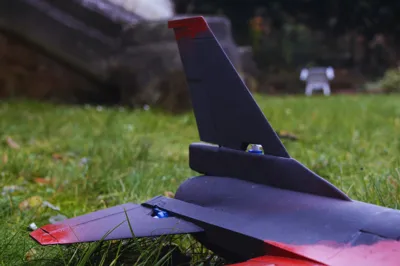
- glue the horisontal and vertical stabilizers in place then glue the two little triangular shaped fuselage rear extention with hinge holes in the back. careful that the angle of the parts having hinge holes in it is -8° and not +8°
- place the control surfaces then close them by glueing the stabilizers tips onto the stabilizers. make sure they rotate smoothly the whole time so they are free form super glue
- OPTIONNAL: place the CF rod in the fuselage then glue it in
- glue the midle aileron hinge in the ailerons with the pla hinge holder put in it
- glue the wing in place then place the ailerons (hinges rotating in the fuselage holes) then glue the tip of the wing with the rockets (closing the hinges in place) make sure no glue reaches the hinges
- glue the middle hinge holder to the wing
- glue the canopey parts together
- glue two magnets on each egde of the canopey and glue 2 magnets on each side of the fuselage's canopey place
- make 2 openings on the fuselage area near the turbine to enable you to connect and disconnect the esc wires to the turbine (cut it with a raozr sharp blade or just with the bed scaper from bambulab)
- glue magnets to the cut part to reinstall it as shown below
- cut ventillation section over the esc (cut narrow U shapes, bend them upwards and glue them im place) to avoid overheating
- put the 2 nuts in the turbine mount base and glue it in place
- install the turbine, with the wires passed through the hole to the fuselage then install the cover
- put a tiny bit of glue on the brackets (with screw holes) attatched to the turbine cover and let dry. avoid putting much glue and gluing the whole cover in place
- pull the cover out and glue the brackets firmly
- glue the front fuselage tip
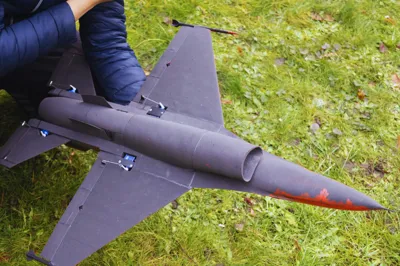
- stick the velcro in place and tune the center of gravity so it alligns with the marks found under the wing
if you made it this far, congratulations, you finished bulding your plane! feel free to paint it in creative ways! and dont hesitate to share your build and feedback here!
If you have any questions, please contact me, I will try to answer them as soon as possible!
these marks show roughly the place of the center of gravity (6 cm behind the trailing edge of the wing)


License
You shall not share, sub-license, sell, rent, host, transfer, or distribute in any way the digital or 3D printed versions of this object, nor any other derivative work of this object in its digital or physical format (including - but not limited to - remixes of this object, and hosting on other digital platforms). The objects may not be used without permission in any way whatsoever in which you charge money, or collect fees.
Comment & Rating (228)