


Print Profile(8)


Description
Update 2/24/2026: Just added 2 new print profiles for a larger version to that fits bigger Bambu printers. The bigger lamp shade and corresponding base are under the Big Wavy Lamp print profiles.
Update 9/21/2025: Just added a new print profile for 0.8mm nozzles! This prints faster and the lamp is also shinier.
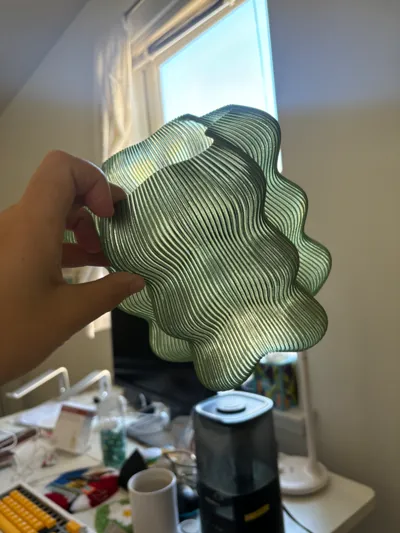
I was inspired by Wooj Design's wavy lamps and wanted to make my own mini version that I could print from my A1 mini.
I modeled both the lamp shade and base in Rhino.
Note: when you download the lampshade file, it will look like one giant solid without any holes - this is so you can slice it with only shell (vase mode) and it will produce the lampshade.
To print the lampshade, print with these settings for a 0.4mm nozzle.
- 0.28 layer height
- 0.8 line width
- 1 layer walls
- Spiral vase mode
- Bottom shell 6 layers
I would suggest to directly use my print profile, otherwise you would need to ensure only the shell is being printed instead of the whole model.
Also, choosing “Bambu Basic PETG” prints faster than “Bambu Translucent PETG” for some reason, but I've tested and both settings print equally well. I just select Basic PETG for a faster print while loading translucent PETG anyways.
There are two different heights of legs to choose from, a short one and a long one, print them upside down with normal supports. The legs have a hole that can directly support the base of a e26/e27 lightbulb base, but if you want to really secure the lightbulb holder in place, you can print a E27 fixture nut to clamp the legs from both sides on the lightbulb base. See picture below for reference.


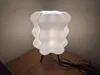
After building the base, attach lamp shade.
Always use LED lights!
Boost Me (for free)
:)
FAQs:
What is the size of the big and mini wavy lampshades?
- The mini wavy lamp shade is roughly 17 cm * 17 cm * 15.3 cm, and the big wavy lamp is 24.3 cm * 24.3 cm * 23.8 cm
What is the size of the pendant cutout in the pendant print profile?
- The pendant cutout is a circle with a diameter of 43.8mm.
Why does the sliced print look solid instead of hollow and why does it say it will take 1 day to print?
- You probably forgot to slice it in “spiral vase mode”, spiral vase mode is automatically selected if you download my print profile for the Bambu slicer, otherwise you need to manually configure it yourself if you use a different slicer.
Why is the print profile for the lampshade in PETG, can I use PLA?
Yes both PETG and PLA would work, I used PETG because I had better PETG filament colors but PLA would also work fine as well. As long as you use LED lightbulbs, there should be no warping with PETG or PLA.
Where do I buy the lightbulb socket?
I prefer to use these from Aliexpress, search for E26 or E27 lightbulb socket cord. I prefer the threaded ones over the non threaded ones so that I can I can secure it in place with a E27 fixture nut.

What kind of lightbulb should I get?
- I like to use 1.5W Equivalent LED light bulbs at 2700K warm light for the E26 base. This is the type of lightbulb I've used in all the pictures, but you could use different lightbulbs for a brighter light etc. Remember to always use LEDs to prevent the lampshade from warping or melting.
License
You shall not share, sub-license, sell, rent, host, transfer, or distribute in any way the digital or 3D printed versions of this object, nor any other derivative work of this object in its digital or physical format (including - but not limited to - remixes of this object, and hosting on other digital platforms). The objects may not be used without permission in any way whatsoever in which you charge money, or collect fees.
Comment & Rating (674)