K2 Plus - Left poop chute with removable bin


Print Profile(1)

Description
Creality K2 Plus - bin Left position
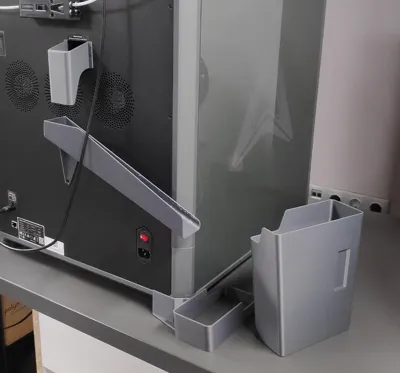
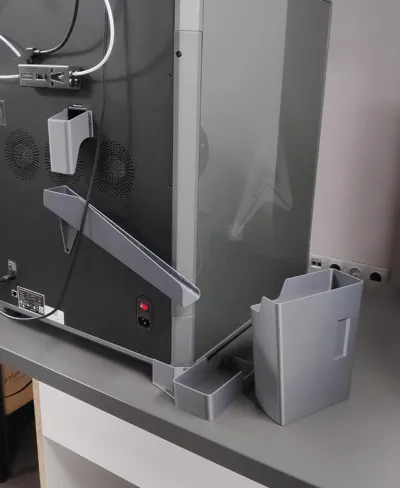
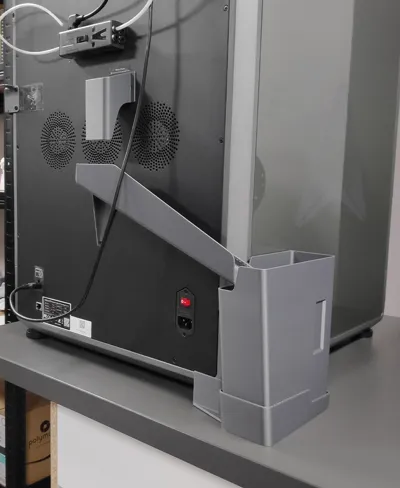
This chute model is for the Creality K2 Plus printers. The chute is designed so that it does not interfere with the normal operation of the fans that are located on the back of the printer. It is designed so that no additional parts need to be purchased for installation. Simply print the parts and mount them on the printer. For added convenience, the waste bin can be removed without having to remove the other components.
Parts and assembly
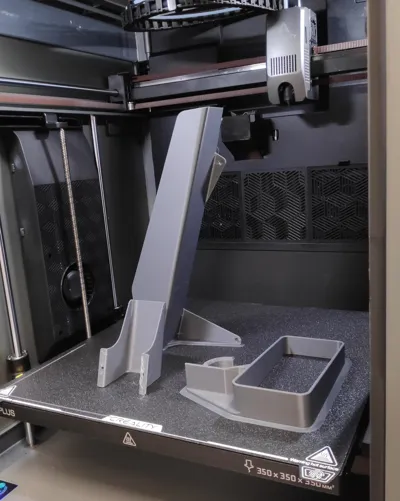
The whole model consists of 4 main parts. Each part is marked on the picture where it is located. The parts have been designed so that when they are printed there is no need to add support.

1. Waste outlet baffle (directs the poop to the chute)
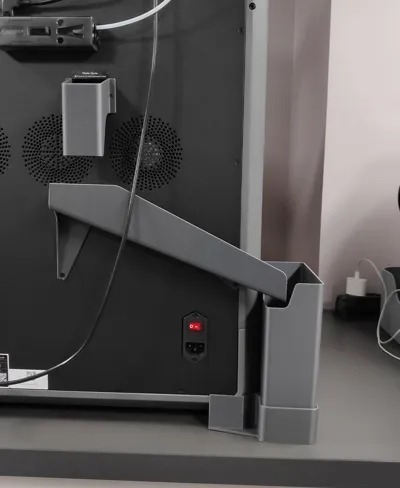
- Remove the two screws that are on the left and right of the outlet. Place the printed part as shown in the picture. Then screw the screws in the same places again.
2. Chute (directs the poop to the bin)
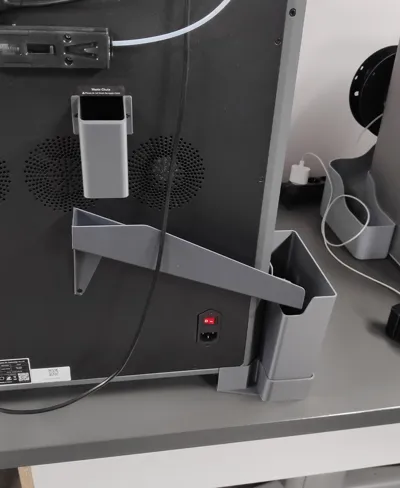
- Unscrew the bottom left and bottom middle screws of the printer cover. Caution: the two screws have different threads so be careful which screw you unscrew from where to put it in the same place. Insert the chute as shown in the picture then re-tighten the screws. The fine thread screw (which screws onto the printer frame) may need to be replaced with a 3mm longer screw. If you want the chute to be snug against the printer cover you can use double stick tape. I have not used it and yet it works very well for me and I have had no problems
3. Bin Holder.
- Raise the printer from behind then position the holder so that the printer leg goes inside the round hole on the holder.
4. Bin
- Insert into the holder. One corner at the top of the bin is cut out. This is in order that when you insert the bin the cut out part falls under the chute. this way the chute goes freely into the bin. It also helps to make the bin easier to remove and put away when the waste filament needs to be disposed of. For easier removal, lift the bin at an angle until it comes out of the lowest part of the holder then pull outwards.
Depending on the printer layout you may need a right bin position which can be found here.
Creality K2 Plus - bin Right position
You can Follow me, so you will always be among the first to experience the next unique project.
Boost Me (for free)
Every model starts with an idea, a piece of white paper and inspiration.💚 If you like this model, Boost me and turn the next idea into reality.
License
You shall not share, sub-license, sell, rent, host, transfer, or distribute in any way the digital or 3D printed versions of this object, nor any other derivative work of this object in its digital or physical format (including - but not limited to - remixes of this object, and hosting on other digital platforms). The objects may not be used without permission in any way whatsoever in which you charge money, or collect fees.
Comment & Rating (31)