ISKREM LAMP REMIX


Print Profile(5)


Bill of Materials
- E26 Light Socket Extension Cord x 1:
- wheel weights stick on 1/4 Oz,0.25 Oz Adhesive Backed Wheel Weights, x 1:
Description
PLEASE READ CAREFULLY
This is a remix combining models of 2 other creators.
If you want to boost, please boost these two creators
Lamp shade I used : https://makerworld.com/en/models/757391#profileId-691776
Base and other accessories I used : https://makerworld.com/en/models/738820#profileId-671097
I've made the lamp shade from skinnyt click with the lamp base of SoDR . You will see two versions of this model. I've modified each part and added some of my own

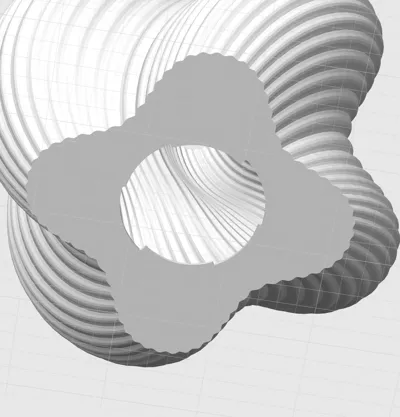
Version 1 : THIN - The original thickness of the lamp shade which clicks with a modified base I made. I don't like this one as much, because I feel like the lamp shade is too flimsy
Version 2 : THICK - In the thick version, I use the original base from SoDR, but have made the bottom part of the lamp thicker. The lamp shade is more solid.
NOTES :
1. I've included the original posters light bulb holders, but I've also included another one which fits light bulb extensions i found on amazon.

2. I also feel like this lamp is too light, so i bought some weights to add at the bottom.

3. You will see two different base bottoms. The modified one is .5% wider, because the original one wasn't tight enough, but that depends on the filament used. You might have to test it out yourself. The bigger one is the one with the little line on the inside.

Here is the link for light bulb socket extension I used : https://amzn.to/3TbFzkx
Here is the link to the weights I put at the bottom : https://amzn.to/3SBjmfH
INSTRUCTIONS
Instructions for both versions are the same
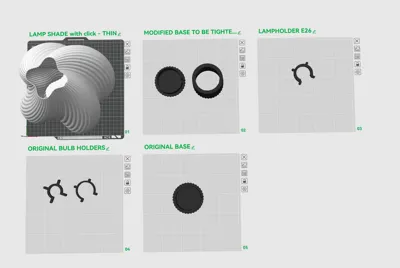
Step 1 : Print lamp shade and appropriate base
Step 2 : You can decide which bulb holder to print, but all three combined are 8 grams of filament, so I would suggest you print all three and see which one fits the best. If you're buying the socket extension from my amazon link, use the bottom one in this picture :

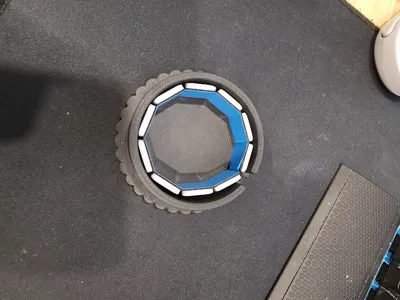
Step 3 : Once you've figure out which light bulb holder works best, glue it on the base. I also glue (I use Krazy Glue) the light bulb socket extension as well. It should look something like this ( The base in the photo is the wrong one, I might update the photo later )

Step 4 (Optional) : Add weights at the bottom of the lamp. I don't necessarily need to glue them, because you won't be moving the lamp much.
Step 5: Everything else is either clickable or just fits without glue.
Please note that it is absolutely prohibited to use this for commercial use.
If you enjoy this model, please give some love to the original creators!
License
You shall not share, sub-license, sell, rent, host, transfer, or distribute in any way the digital or 3D printed versions of this object, nor any other derivative work of this object in its digital or physical format (including - but not limited to - remixes of this object, and hosting on other digital platforms). The objects may not be used without permission in any way whatsoever in which you charge money, or collect fees.
Comment & Rating (131)