Thirty-Minute Rapid Print Adjustable Magnetic Force Neutral Pen


Print Profile(1)

Description
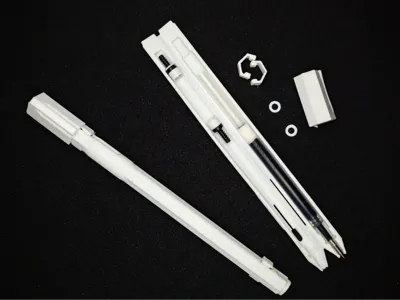
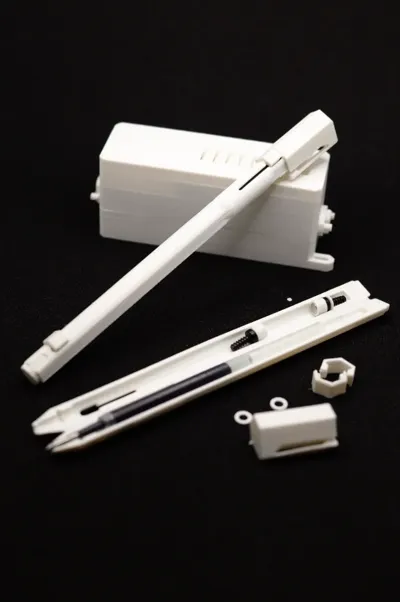
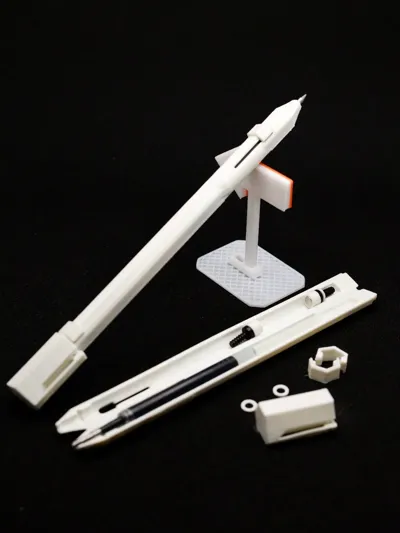
A rapid-printing, magnetically adjustable pen case
Design Overview:
One of the rapid-printing series, this quickly printed pen case for water-based pens leverages the flexibility of low-layer PLA. The design prioritizes minimizing print time while maintaining comfortable usability. It enhances the printing experience and expands the applicability of 3D printing. A magnetic spring mechanism has been added to the original version, improving the writing experience. The magnetic strength is adjustable to individual preference.
Print Time:
The total print time is approximately 30 minutes (A1).
Pen Dimensions:
138mm (without cap, excluding nib protrusion)
Approximately 160mm (with cap, including nib protrusion)
Nib protrusion approximately 5mm
Cap 25mm
Compatible Nib Size:
Primarily designed for 110mm press-action ballpoint pen refills. Compatible with 130mm refills, but the magnetic push rod cannot be installed in this case.

Materials and Cost:
Standard PLA is sufficient (PLA+ is recommended). Material consumption is approximately 8g. At a cost of 70 yuan per kilogram, the cost is approximately 0.56 yuan.
Strength:
Sufficient for everyday use.
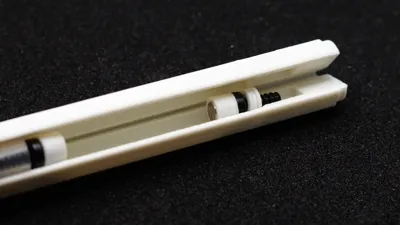
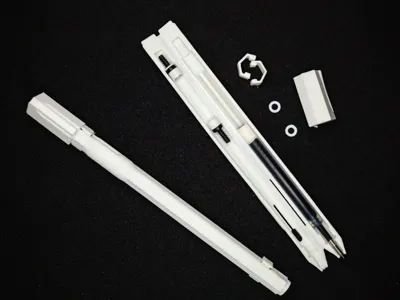
The configuration file includes three identical clasps; two are sufficient for normal use, and only one is needed for extreme use (the cap clips onto the pen end). Even if a clasp breaks in the middle, as long as it is not completely severed (see image below), it remains functional (and usable for a considerable time). If only one clasp remains, consider either borrowing one from another pen or printing a few more (which is quick).

Assembly Instructions:
1. Insert two (or one) D4*2 round magnets (from the starter kit) into the ring, and then attach a BT3*8 round self-tapping screw to the back.
2. Position the appropriate number of spacers, and insert the parts into the pen body slot.
3. Repeat the process on the other end (but without spacers).

4. Slowly close the pen body until the left-hand nib prevents further closure.

5. Push the nib until the pen body closes completely.

6. Attach the clasps.

7. Test writing comfort. If the magnetic force is too weak, increase the number of spacers or magnets. If the magnetic force is too strong, decrease the number of spacers or magnets (steps 1 and 2). Adjust to your preference.
Printing Recommendations (!!):
Some parts are small; glue is recommended. At minimum, clean the printing plate before printing.
Source Files and Modifications (Optional):
SOLIDWORKS source files are available for adjusting size or further development. Please leave a comment or send a private message if you encounter any issues during modification.
Modifying the SW file can be complex; a simpler approach is to directly leave a message.
Other Products in This Serieshttps://makerworld.com.cn/zh/models/640204#profileId-579710:

License
You shall not share, sub-license, sell, rent, host, transfer, or distribute in any way the digital or 3D printed versions of this object, nor any other derivative work of this object in its digital or physical format (including - but not limited to - remixes of this object, and hosting on other digital platforms). The objects may not be used without permission in any way whatsoever in which you charge money, or collect fees.
Comment & Rating (1)