


Print Profile(2)


Bill of Materials


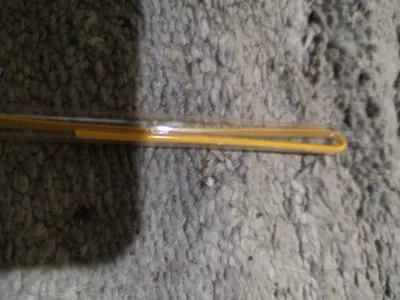
- tube or straw x 1: clear straw or tube to run the light through
Description
Boost Me (for free)
Help me by boosting my models if you like them. Boosts help me be creative by supplying filament to try new things
Description
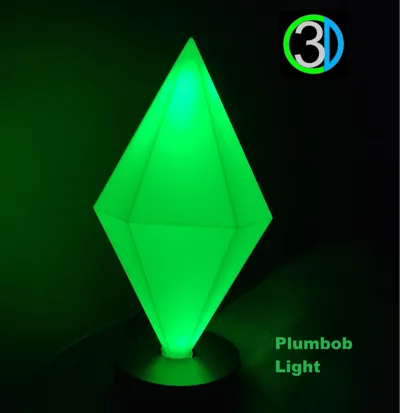
A Sims Plumbob light. Designed using maker supply components for easy plug and play assembly. The light is dimmable using a potentiometer so you can set the brightness that you like. Couldn't find anything like it online so decided to design one. This will require some sort of clear tube to run the COB strip through. I used a clear straw.
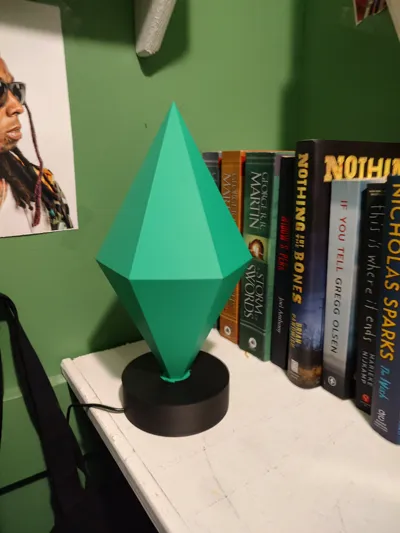
There is a version with no electronics or hardware that is display only for those that don't want to purchase components and hardware.
Customizable for Convenience
The light insert is customizable to the inside diameter of whatever it is you use for the tube. The diameter is limited to a maximum of .46875" and a minimum of .125".
Measure the inside of your tube and enter that for your diameter in inches.
Generate the light Insert and download the STL. Open the print profile of the plumbob and insert the STL onto Plate 2 with the base. You can also download the 3MF and print it separate.
This step is not necessary if printing for display only.
Filament
My filament used was:
PLA Basic Bambu Green (10501)
PLA Basic Black (10101) this can be whatever color you want
Assembly
Base

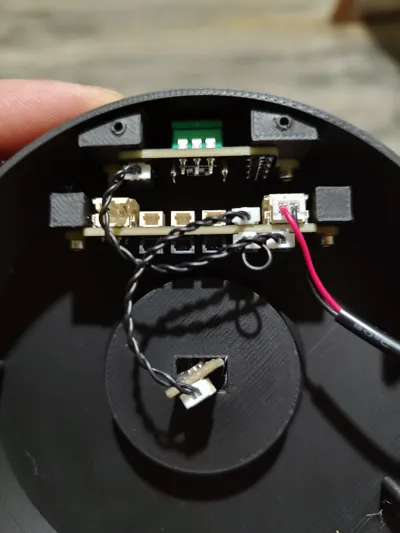
Attach the potentiometer with (2) M2 SHCS. The connection should be to the left as shown which connects to port SW0 on the PCB.
Attach the PCB with (2) SHCS. The SW0 ports (black) should be towards the center as shown. Connect the USB to the In port on the right as shown.
A jumper that comes with the PCB is to go into SW1 port.
Light Insert

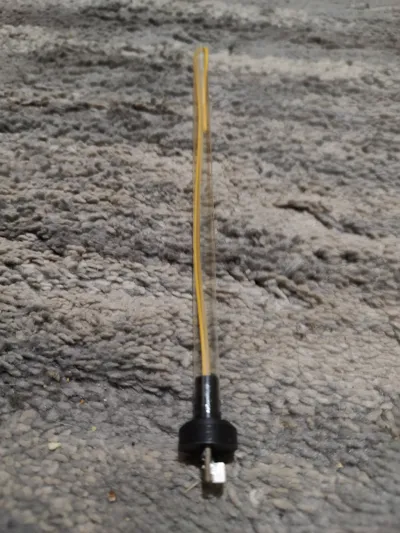
Feed the light through the rectangular opening in the insert piece and the tube. I applied a small amount of glue to fix the tube in place. The light is rubbery and grips to the tube so pulling through is difficult but holds it in place when done. I used a clear straw and cut 3/4 of the way along the length to be able to grab the light strip and pull through the straw.
The light is a little long so I folded it back into the tube. This gives a little extra glow at the top.
Plumbob Light

Push the light Insert into the bottom of the plumbob until it stops and is flush.
Attaching to base

Connect the plumbob to the base.
The will be stringing inside where the plumbob inserts the base. Clean that up a little. That won't be seen and helps with a snug fit.

Be cautious with the lights electronic board feeding into the slot. It was designed as a snug fit to the base to aid in holding the light. Rotate the light Insert as needed to set it in. This is a little difficult but does work.
Fully push the plumbob into the base and rotate.
Connect the light to CH1 with the second wire that came with the potentiometer. This leaves you with a spare potentiometer as it comes with two.

The USB wire pushes into the notch to run it outside of the base.

Place the cover on aligning the notch with the USB wire
Display Only (No Electronics)
A secondary print profile is available if you just want it as a display without the light and electronics or any hardware required. It is a pretty cool display still without the light.
This print profile is the base without mounting for electronics, the light Insert or the cover.
Plate 1 from the other print profile with the plumbob is still required.
License
You shall not share, sub-license, sell, rent, host, transfer, or distribute in any way the digital or 3D printed versions of this object, nor any other derivative work of this object in its digital or physical format (including - but not limited to - remixes of this object, and hosting on other digital platforms). The objects may not be used without permission in any way whatsoever in which you charge money, or collect fees.
Comment & Rating (12)