Modular Desiccant Bin - Curved for Spools


Print Profile(6)


Description
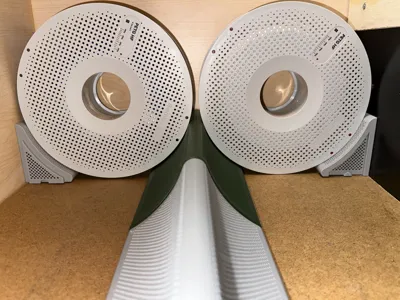
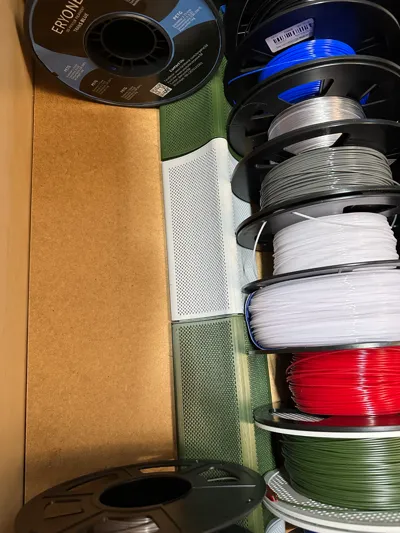
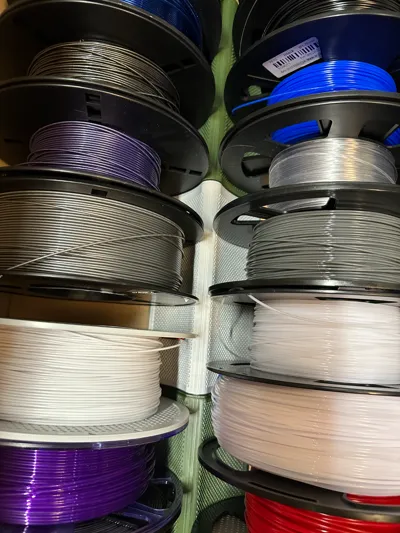
This desiccant bin works well in cabinets and boxes where you want to keep the spools from rolling around. They’re modular and fit together cleanly after assembly so you print as many as you need for your situation. It allows for multiple rows at the same time.
Some of the example images I uploaded just show a smaller section of the “Outer” variation because I'm still working on printing full sizes for my various storage areas. And don't get concerned with the Print Times listed on the Print Profile summary section. All sizes are included in each Print Profile so you're seeing the total time to print ALL sizes. Individual models will print quicker.
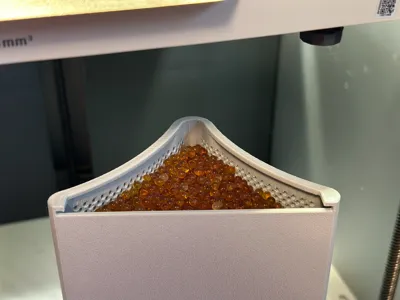
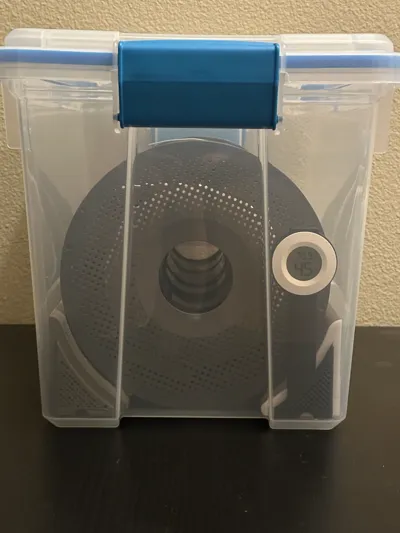
I recently discovered 3A Molecular Sieve desiccant and it is absolutely amazing! These bins are fully compatible and the vent holes are small enough that nothing the smaller pieces will not fall out of the sides. I was able to achieve 10% humidity levels in my 44Qt bins using these bins and Molecular Sieve desiccant. Game changer!
Features
- Modular
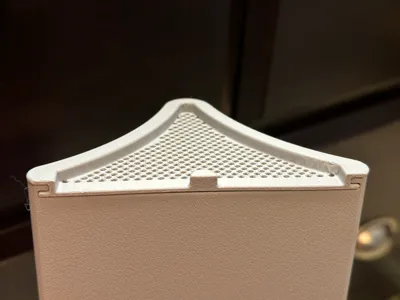
- Lid seals tightly so no risk of spilling
- Multiple Size Options
- Vented or Closed Bottom Options
- Allows for Rows with “Inner” and “Outer” shapes
- Pour spout in the larger / Inner shape for easier pouring (pour slowly)
- Mix and match colors / sizes if desired
- Can be used horizontally or vertically
- Can be printed in any material
- No supports required for printing
- Standard Spools will slot against the bins and won’t roll around
- Sterilite 20 Qt Variation
- Modular Hygrometer Mount Options
- Use 3A Molecular Sieve Desiccant and achieve 10% humidity!
Variations
Shape:
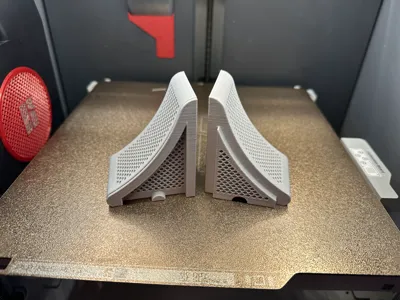
- Inner - Sloped on both sides and meant to be used in between rows of spools
- Outer - Sloped on one side and meant to be used on outside edges of spools
Vents:
- Solid Bottom - If vents aren‘t needed underneath, use this version. Prints much faster.
- Vented Bottom - Vents all the way around (takes about 40-50% longer to print)
The lid for the solid and vented bottoms are the same. The only difference is whether there are vents on the bottom or not. Everything else is identical.
Current Sizes (including lid) |
|
Usage Instructions
My example video shows a full bin but I believe it would be more effective to fill ½ - ¾ full and leave space for air to flow over the gels. So fill the bin up to the desired height and slide the lid in from the bottom. There is a locking clasp that will slide over the lip and then lock the lid in place after it’s in the correct position. To open, use the small tab on the lid to pull up slightly and then slide the lid down in the opposite direction of installation.
The sides of the bin extend on one side and have a depression on the other. To join them, simply push the two parts together and they’ll fit together nicely.
When placing the bins in a slippery cabinet, shelf, or box, it may be helpful to secure them in place with some Command Strips, velcro tabs, or something similar so they don’t slide around once they’re in the right position. I actually used some shelf liner left over from our kitchen in the bottom of my Iris 44 Qt bins and it works great as everything sits in place and doesn't slide around.
The Outer edge pieces have a slightly tighter fit for opening and closing because they can’t be lifted quite as far away from the bin as the larger Inner lids. I reduced the clasp size for the Outer bins but they will take a little more effort than the Inner bins to open.
Hygrometer Mounts
The hygrometer mounts are modular and configurable. You can print so they will sit on either the left, middle, or right hand side of your containers as needed. There is also a version that fits on the back of the Outer pieces so it can be read from the side instead of the end. If anyone needs a mount that can be read from the top instead of the side, let me know and I can try to create one of those.
For the hygrometer mounts, print the shape of your choice (rectangular, circular with 12 and 6 position locks, or slightly-turned circular mount with 1:30 and 7:30 position locks). Then, print the mount base of your choice and attach the mount to the base. The mount sits in a slot that is arced on one side so it only goes in one way. The mount sits slightly offset from the base but with the lip of the hygrometer, it should sit fairly flush with the base / riser. The gap is intentional but slightly less aesthetically pleasing.
The “Outer Side Riser” has protrusion nubs on the inside of the grip that will fit into the vent holes on the vertical portion of the Outer Bin. They will almost “click” into place once seated properly. But you may need to position them slightly to the left or right if they don't seat into place at first. After you do it a few times, it will become easier.

Print Instructions
Each Print Profile comes with all available sizes. Calculate how much space you need to cover and then come up with a combination of bins that work for you. So you could use one 4X Large (218mm) plus one Small (50mm) to cover 270mm or you could use two 1x Large (134mm) bins instead. Keep in mind that there is about 5mm of overlap with each bin because they fit together. So 218mm + 50mm would actually take up about 263mm of space after installation (268mm - 5mm overlap).
Each bin will need a lid so pick your sizes and add enough lids as needed. You can fit 2 Inner bins per build plate in a single row (P and X series printers) and about up to 4 Outer bins per row.
There is a Painted brim on each lid to ensure they will stay in place. I used one brim for the Outer lids and Two for the Inner lids. I did not put the brim on the part of the lid that slides into the channel of the bin because it's sometimes harder to remove brims in between tight spaces. So I just put them on the straighter parts of the lid bottom instead.
No supports are needed during printing. I recommend PETG (or something with flexibility) as the lid needs to flex a bit to install and remove. Just be sure to use a filament that can generate clean walls because layer lines could prevent the lid from sliding into the bin cleanly.
There is a custom Print Profile for Sterilite 20 Quart bins that consists of one of the 2X Large standard bins, one custom bin that is slightly shorter to allow for the width of the Sterilite bin, 2 lids, and one male extension that allows the printed bins to sit up against the cutout in the walls so they don't slide around. If you print an extension variation of the hygrometer mount, you don't need to print a standard extension.
Other
If you have a use case that doesn’t work with the existing size options, let me know and I will consider adding some additional “in between” sizes if there is enough demand. There is a custom variation already for Sterilite 20 Qt bins so look for that Print Profile specifically.
Some of the photos show high humidity % but they were taken after assembling a bin / layout for demo purposes after sitting out in the open so they were not in a sealed environment.
License
You shall not share, sub-license, sell, rent, host, transfer, or distribute in any way the digital or 3D printed versions of this object, nor any other derivative work of this object in its digital or physical format (including - but not limited to - remixes of this object, and hosting on other digital platforms). The objects may not be used without permission in any way whatsoever in which you charge money, or collect fees.
Comment & Rating (45)