Fire Extinguisher Wall Mount (parametric)


Print Profile(4)


Description
This is a remix of @franktrebin_863245 fantastic fire extinguisher wall mount. Massive props to him, it is a work of art. It's not only very functional and well designed for 3d printing, it's quite a sexy design too. It wasn't the right size for me, so I shamelessly rebuilt his design in a parametric way, and added some enhancements.
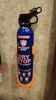
The included STL/STEP is tuned for a Kidde 3lbs 5-12oz extinguisher. Models listed on the label include: H110G, FA110G, M110G, FC110, FS110, M110GM. The extinguisher diameter is 3 ¼" (82.5mm) and approx. 14 ½" tall (370mm). The mount for it is 8" tall (203 mm).
If you like this design but it won't fit your extinguisher .. fear not. Two options:
- Click the Customize button above. The main parameters can be adjusted inside of MakerWorld's Parametric Model Maker. Note that all measurements must be entered in mm (metric). Just convert from inches if that's what you use.
- Download the Fusion file. As long as you can navigate Fusion360 enough to load and export a model, you can customize this with the included parametric file. More parameters are provided in this file, and Fusion handles mixing of units:

The Fusion360 file goes beyond the basic parameters like diameter and height and the model adjusts without error with reasonable changes. For example, change the width and height together.
Some printing tips:
- print with enough walls to completely fill tube + arms. 4 walls for my model.
- print with “Order of walls” being “inner wall/outer wall/inner wall”. That produces flawless overhangs for me (Bambu X1).
- print the “Seam Position” on the back (may need to rotate the model so back of model is on the back of the build plate).
Some adjustment tips:
- VERY IMPORTANT - make sure the extinguisher drops completely into the mount without much friction. Ensure the base of the extinguisher makes contact with the base of the mount. I recommend cutting the model above the base wiggle line (see below) for a test fit.
- Obviously a thicker wall makes for stiffer arms. You need to have a somewhat loose fit in the tube anyway, you should be fine here. But again, you could cut and just print the arms to test. I had to go thicker and thicker myself - printing with PETG-CF.
- Don't make the height of the base enclosed area too tall. You don't need it, and makes binding more likely and tolerances stricter.
- Don't make the mount too tall. You want to be able to grab the top of the extinguisher and yank it down and out with leverage. Note you can grab the center too, but that requires more grip and hand strength.
Enhancements I made to the original model:
- An overall thicker wall design.
- Wiggle in the diameter of the base to prevent binding:

- Flared Arms:


Comment & Rating (36)