Search models, users, collections, and posts

Bambu Filament Watches Fantasy Motion

GIF

Print Profile(2)

All
P1S
P1P
X1
X1 Carbon
X1E
A1
H2D
H2D Pro
H2S
P2S
H2C
X2D
A2L
A1 mini

PLA 0.2mm layer, 2 walls, 15% infill
Designer
14.7 h
6 plates
4.9(11)

FOR A1 MINI, PLA 0.2mm layer, 2 walls, 15% infill
Designer
16.8 h
7 plates
4.8(4)

Open in Bambu Studio
Boost
534
1019
62
59
369
93
Released 

Bill of Materials

Maker's Supply Kits and Parts
Select all
TT Motor (DC5V 59RPM CCW Single Axis) -1PCS - LA001
D6x2 mm Round Magnet (20PCS) - CA004
Bambu Filaments
Select all
Black (10101) / Refill / 1kg
Silver (10102) / Refill / 1kg
Filament Swatches

Description

4/1/2025 - UPDATE TO VERSION 2


I revised the external wall to give it a minimum of texture, as it was before it did not convince me being too smooth, everything else remains as before, so the changes made are only aesthetic, they do not compromise the operation using the components in the old version. The base, the grid and the cap have been modified. the assembly tutorial video always remains the same since the assembly is always the same.


DESCRIPTION


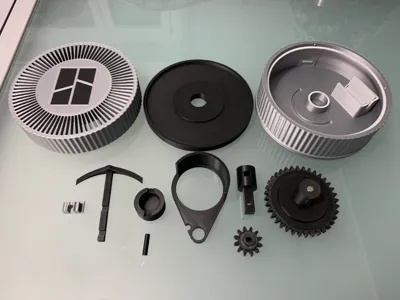
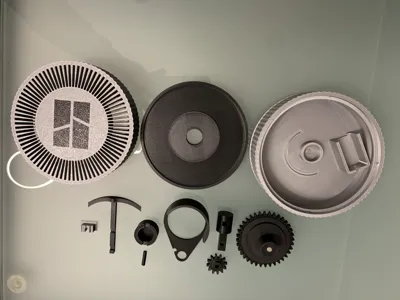
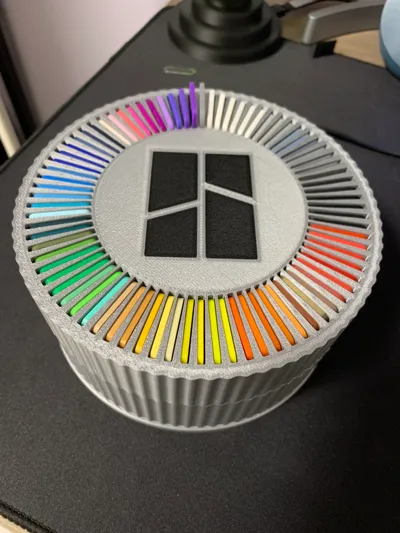
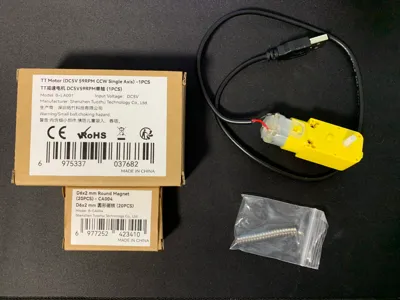
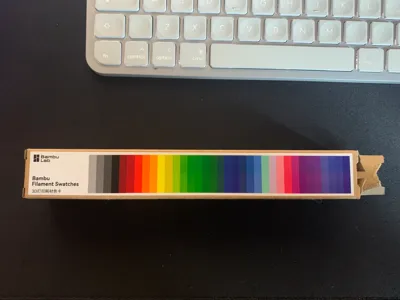
This project was designed entirely by me for purely visual purposes, it has no other use than the visual one and if we want to tell the truth the noise made by the cursor while lifting the tags of the bambulab filament emits a really pleasant and relaxing sound. I'll post a video for the assembly (I inserted the tags to speed up the video before the video). I'll start by saying that to make this project you need the sample tags of the bambulab filament that fit into the bambulab printers, the tt motor and 2 6x2 magnets, all these accessories except the colored bambulab tags are on the site, I'll leave you the link in the list if you want to get them, if you already have them proceed with the viewing of the assembly. I also inserted the printable grid later for those who don't have ams, so the logo will be slightly carved into the grid, so instead of there being the colored logo like the version for those who have ams, those who print the version without ams will only have the carved logo. I inserted two sliders, the difference between the 2 is 1 mm in height, so choose the one you want based on whether you want the tag to rise 1 mm more or not, if the tags are friction in the grid simply take the tag and manually slide it up and down until the tag slides smoothly. here is the assembly video:


https://youtu.be/utiJjSCuNL4?si=f3EA4DhJJdOil-8V


IMPORTANT: the sliders must be printed with adaptive layers for greater fluidity of the tags when they pass over the slider.

I hope you like it, if so print it and I would be very happy with the star rating. Before inserting the tags, make sure there are no excess wires that block the sliding.


Happy printing!

Comment & Rating (62)

(0/1000)

Fantastic print. About half of the swatches needed sanding to slide up and down easily. After getting annoyed I discovered they were subtly different sizes right out of the box. Regardless - loved putting this together. My 10 y/o son and I had a blast wiring it up and getting it running. Takes a bit of elbow grease but well worth it.
The designer has replied
0
Reply
To be honest, I didn't adjust the samples, as they flowed perfectly as shown in the cover GIF Perhaps yours had slightly different dimensions
Show original
0
Reply
Boosted
Print Profile
PLA 0.2mm layer, 2 walls, 15% infill
Excellent quality
Show original
0
Reply
Print Profile
PLA 0.2mm layer, 2 walls, 15% infill
The profile uploader has replied
0
Reply
Grazie 🤩
0
Reply
Print Profile
PLA 0.2mm layer, 2 walls, 15% infill
works perfectly and the parts fit very nicely. I do need to point out that using a 200 rpm robotics motor with it instead of the slow one in the BOM will make it move atrociously fast and make it very loud so.... don't do that ;) A little silicone grease helps the gears move smoothly at high speeds if you want to do the stupid thing I did though lol.
The profile uploader has replied
1
Reply
Thank you for the comment, did you want them to take flight, that's why you used a faster motor? =)
Show original
0
Reply
Dang, your model is picking up traction quickly. I just saw it come out yesterday and it already has nearly 80 likes! Congrats dude!
The designer has replied
1
Reply
Thank you for your comment, I'm glad you like it, I honestly love it a lot, both for the continuous movement that creates the wave and for the sound it emits, I find it very relaxing :)
Show original
1
Reply
Would love this for the Creality filament swatches :( nice project!!
The designer has replied
0
Reply
Grazie 🙏
0
Reply
Print Profile
PLA 0.2mm layer, 2 walls, 15% infill
Print files are excellent. I had a few issues with getting enough torque from the motor to keep the spinning assembly functioning. After smoothing gears and touching a few areas it had no other issues
The profile uploader has replied
0
Reply
I cannot understand why, I have conducted countless tests with various tolerances to ensure that once printed, everything would rotate smoothly without friction, requiring no sanding whatsoever
Show original
0
Reply
Boosted
Very cool model!
The designer has replied
0
Reply
Grazie :)
0
Reply
Boosted
Truly beautiful
The designer has replied
Show original
0
Reply
Grazie
0
Reply
Boosted
Beautiful. Thank you
The designer has replied
Show original
0
Reply
Grazie a te
0
Reply

License

This user content is licensed under a Standard Digital File License.

You shall not share, sub-license, sell, rent, host, transfer, or distribute in any way the digital or 3D printed versions of this object, nor any other derivative work of this object in its digital or physical format (including - but not limited to - remixes of this object, and hosting on other digital platforms). The objects may not be used without permission in any way whatsoever in which you charge money, or collect fees.