Dewalt 779/780 Zero Clearance Replaceable Inserts


Print Profile(1)

Description
---------------Update 1/14/2025---------------
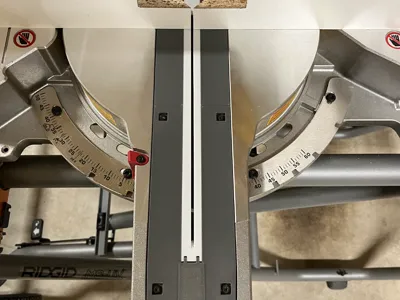
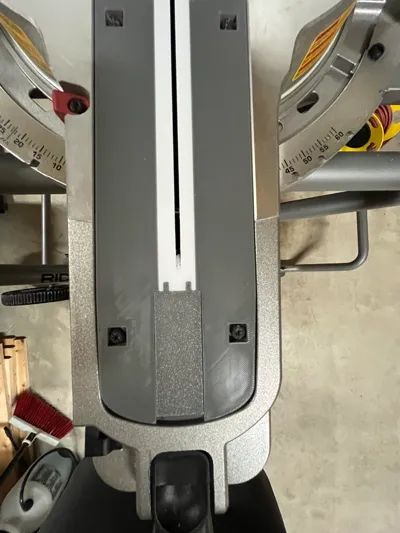
- Added notches at either end of the replaceable insert and base plate. This modification allows the replaceable insert to retain its shape even if you accidentally cut all the way through it with the sliding action of the miter saw. I cut all the way through the replaceable insert on my previous design and noticed the sides would collapse toward the center.
- Because of the notches, I don't know how well this will perform for bevel cuts. This works well for square cuts and miter cuts.
- For the small piece to hold the replaceable insert in place, I moved the location of the plugs farther from the blade. This reduces the likelihood the miter saw cuts through the plug on accident.
--------------------------------------------------------
Remix of markyzek Zero Clearance insert for DeWalt DWS80 Miter saw but for the DWS779. No changes were made to the overall shape so this should work for the DWS779 and DWS780. The goal of this remix was to minimize the amount of filament needed to replace the insert. This remix is ideal for using the sliding action of the DWS779/780 for square or miter cuts. I set the depth stop of my saw so the blade goes just past the fence. This design should be able to handle a sliding miter cut up to 9 inches long.
In keeping with the original model, using 0.4 nozzle with 0.2 layer height should be fine. 60% infill for the top portion with the male connectors, 30% for the bottom portion with the female connectors, and 30% for the replaceable insert. Like markyzek, I was printing on a smaller printer (A1) and needed to print in two pieces but the replaceable insert can be done on a single plate, oriented diagonally.
To assemble:
- Put the halves together, connecting the top half with the male connectors to the bottom half with the female connectors
- Slide the replaceable insert into the slot
- Press the connector into the base to hold the replaceable insert in place. You may need to flip it around so the plugs line up with the holes.
After assembly, use the stock screws to attach to your saw. Square your blade before the cut. Set your depth stop so the blade doesn't go too far past the fence. USE SAFETY GLASSES and dust collection. Make the cut.
Thank you to markyzek for the inspiration.

Comment & Rating (45)