


Print Profile(7)


Bill of Materials


Description
Step back into a time where everything was new, space was the obvious path for humanity and Dungeons and Dragons was mankind’s biggest Enemy.
Go back to the future with the RFC-01 mini.
- Update 25/12/2024: Merry Christmas! I just uploaded a video with a build guide for the RFC-01 mini. Should help anyone better understand how to assemble the clock and also has a tip for getting your prints to look better :)
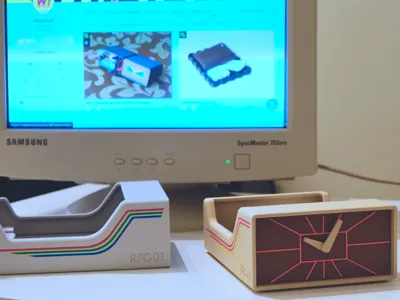
Born from my love for the retro sci-fi/space age look, the RFC-01 mini is the first model in my Retro future collection. The RF collection is where I will pay homage to that style I like so much, reminiscent of early personal computer styling as well as the aesthetic of terminals from other retro futuristic media such as the original Alien movie or Fallout.
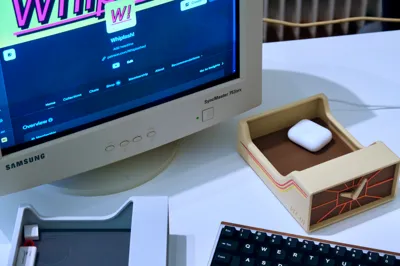
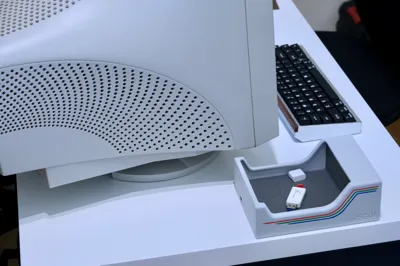
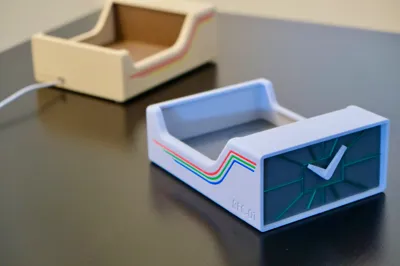
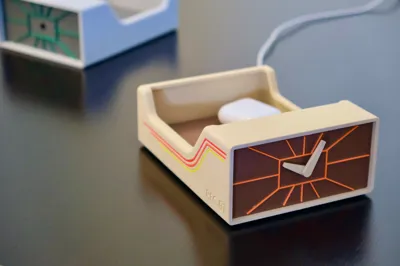
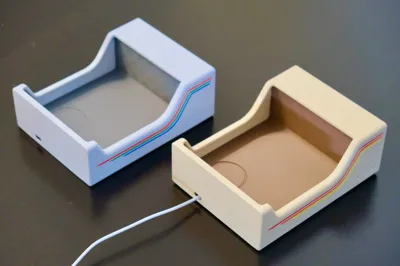
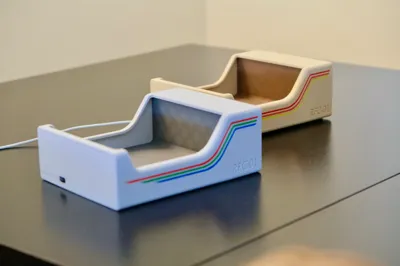
More than just a clock, I designed the RFC-01 to earn a spot in places you spend a lot of time in such as your desk or nightstand and so, it integrates a catch all tray in the back to help you reduce clutter and features a slot for a charging pad for small items such as AirPods in it’s mini version. I tried to give it a strong and bold design language but in order to not make the design of this overpowering and make it feel completely out of place in a home that isn’t floating in outer space, I didn’t go too overboard and instead decided to keep a clean look and let color do most of the talking.
As you can see from the pictures, you can completely change the vibe of the RFC-01 by simply changing it’s colors and speaking of which, you don’t need an AMS or other Multi filament systems to color this, I have made printable accent pieces that you can print separately in whatever color you want or even print them all in one color to later paint them yourself like I did. The accent strips on the side may require glue to keep in place but thankfully the face markers don’t seem to need glue to stay put :)
In regards to printing, this really isn’t a demanding print at all, all the pieces print fine, however, I will suggest you up your bed temp 10 degrees from normal for the accent pieces and the face markers to help with adhesion as they’re so thin. I would also highly suggest you really let the plate and part cool before removing the parts. The accent strips and marker will straight up deform if you don’t let them cool enough. The shell and insert on the other hand have supports, with cool parts the supports come right off, on the insert for example I always managed to pull the part off the plate and the supports detach from the part and remained on the plate every time, if however you remove it too early you might have some trouble removing the supports so although I’m no stranger to burning my fingertips on hot plates, let it cool a bit pal.
Boost Me (for free)
Please consider boosting. Designing, printing and prototyping takes a lot of time and filament, boosting helps me continue to make new things for you to enjoy, thank you.
The clock makes use of my standard TPU feet that I have previously used in other designs so if you have extras laying around you’re all set, no need to print new ones. One pretty big oversight on my end though was adjusting the clock hands, the clock module itself fit’s onto the insert rather than to the clock face so there is no way of adjusting the hands after installing the clock, at least not via use of the setting gear on the back, you can however simply install the clock in place and stick the hands onto the clock and then set it by turning the minutes dial clockwise, doing this will not damage the clock mechanism but remember, CLOCKWISE, you should never adjust a clock counter clockwise.
As I continuously implied all through the description by calling this the mini, there is also a bigger version in the works and on that one you’ll be able to charge your phone, unfortunately I only own an A1 mini so I’m not able to test that one yet but if you like this design and would like to help me test out the bigger version, send me a dm!
I hope you enjoy using this model as much as I enjoyed designing it and I really can’t wait to see what color ways you guys come up with! As always my friends, see you soon and happy printing. And happy Holidays!
License
You shall not share, sub-license, sell, rent, host, transfer, or distribute in any way the digital or 3D printed versions of this object, nor any other derivative work of this object in its digital or physical format (including - but not limited to - remixes of this object, and hosting on other digital platforms). The objects may not be used without permission in any way whatsoever in which you charge money, or collect fees.
Comment & Rating (11)