Christmas Snowman Knit Disassembly Version


Print Profile(11)


Description
Boost Me (for free)
Each creation is a heartfelt sharing, and I poured countless nights into this model. If you appreciate it, a boost or like would be a heartwarming encouragement. Thank you in advance. Orz
Assembly instructions are at the bottom
Feel free to comment if you have any questions. I will respond promptly
I updated all print settings around 00:00 on the 23rd
Fixed some facial imperfections

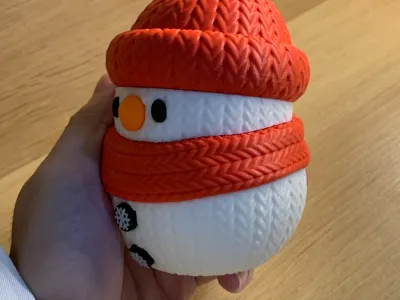
The buttons' arrangement and snowflake color have been revised (the AMS can print the white snowflakes on the buttons). Only two buttons are needed, the third serves as a material wiper tower

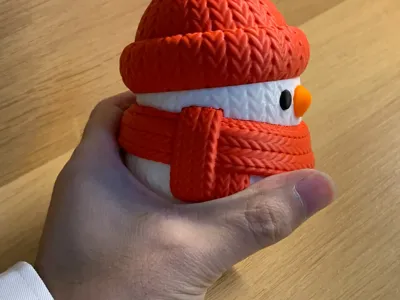
The new version can be assembled without glue (the 73mm version's eyes are slightly problematic and prone to falling off). The body and hat assembly methods have been improved

For the AMS version, please do not alter the print order. The sequence is as follows: Nose → Buttons and Eyes (the buttons will change color, printing the white snowflakes before resuming with white filament for the body) → Body and Face → Hat and Scarf

The AMS version has three buttons; the first printed snowflake may have imperfections
Some users reported that small parts did not adhere to the build plate. Please clean the build plate or add a brim to these small parts before printing to ensure successful printing

Users with AMS can directly use the provided print settings. Rest assured, it's a part-by-part print
Multi-color print version linkhttps://makerworld.com.cn/zh/models/741443#profileId-702873
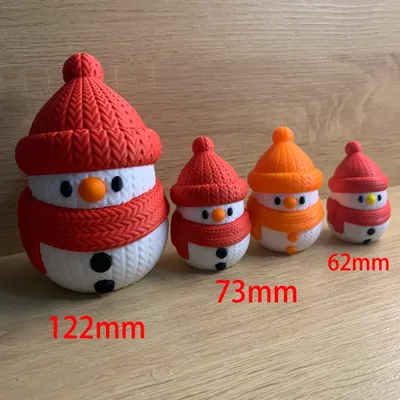
This model is a disassembled version of the hat-wearing knitted snowman from the multi-color version. To facilitate disassembly, modifications have been made to the model's size, volume, and shape. The model is 122mm tall. Manufacturing tolerances exist.
Assembly Demonstration (using 73mm as an example)

Inspect the printed parts (the AMS version will have an extra snowflake button with imperfections)

Insert the white peg into the body

Align and assemble the body and scarf

Insert the red peg into the scarf (inserting the red peg into the hat first is also possible)

Align the facial recess with the scarf protrusion and assemble

Align and assemble the holes

Insert the nose with the beveled side facing down into the nasal cavity

Insert the eyes with the beveled side facing down into their respective sockets (the eyes are left and right; it is recommended to insert both and compare before proceeding)

After adjusting the snowflake pattern on the buttons, simply insert them
License
You shall not share, sub-license, sell, rent, host, transfer, or distribute in any way the digital or 3D printed versions of this object, nor any other derivative work of this object in its digital or physical format (including - but not limited to - remixes of this object, and hosting on other digital platforms). The objects may not be used without permission in any way whatsoever in which you charge money, or collect fees.
Comment & Rating (600)