


Print Profile(1)

Bill of Materials


- 25x6mm screwdriver bits x 4: Found in socket sets, bit sets, individually at hardware stores, etc.
- CA glue (super glue) x 1: A fine tip or brush is best.
Description
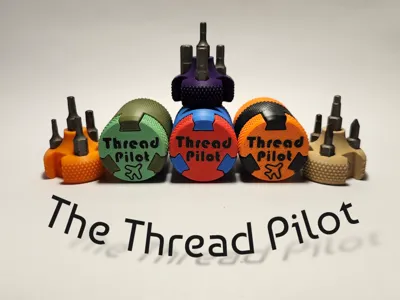
The Thread Pilot is my take on the compact multi-screwdriver.

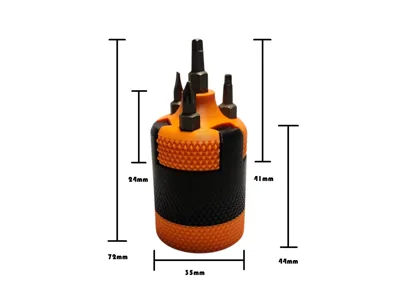
There is space for four 25x6mm bits. Bits can be purchased, however they are often included in accessory kits included in other tools. I had a generous supply of bits included in my socket set, enough to fill 10 unique Thread Pilots.
Ten 6x2mm round magnets are also needed. Four are to be installed during the print of the screwdriver (2 pauses). Six can be installed after printing.
PRINT TIMES:

ASSEMBLY INSTRUCTIONS:
Assembling is very simple. The key is to keep track of your magnet poles.
Paint as you'd like.
Material and scaling:
Obligatory “Make sure your filament is dry and calibrated.”
- I have printed the Thread Pilot in both PLA and PETG, using the same profile, from the following brands:
- Bambu PLA (Basic and Matte)
- Polymaker Polyterra PLA
- Elegoo Matte PLA
- Overture PLA and Matte PLA
- Bambu PETG HF
Elegoo Rapid PETG
PLA printed very easily. I never required scaling or altering. HOWEVER, in some instances, the bit holes were a bit tight for my liking. I have found success enlarging the holes by heating a bit slightly and sticking it in the affected hole. REMEMBER: PLA gets soft at a very low temperature. The hotter and longer you leave the bit in, the more it will expand. Leaving it too long and/or too hot will make the hole too big. Hold the bit with some pliers and gently heat it. I used a lighter for a few seconds but you could use anything. Less is more, stretch in increments because once you've gone too far, you can't go back.
If using regular PETG, you may need to slow the speed a touch.
- PETG seems to be a bit finicky with tolerances (see the first point). It may be necessary to try a test print. Minor scaling, x-y contour and hole compensation as well as shrinkage factors were all tested by me. In the end, adjusting the individual filament shrinkage factor showed the best results. Example:

Magnets:
Ten 6x2 magnets can be purchased almost anywhere. Maker's Supply is a great source, as is Amazon or Ali.
During the print can be any orientation as long as they are all the same. 3 will be installed at the first pause, 1 at the second.
- Cap and driver magnets must oppose. All 3 magnets on the driver need to be installed with the same pole facing out, same for the cap. Failure to ensure consistency will mean your cap will not fit in all configurations. (see below)

I used quick dry CA Glue (super glue). A dab under each magnet is a good idea. It will prevent them from falling out or slipping and sticking to your nozzle, ruining your print. I used a tiny drop under all 10 magnets.
If you are having trouble with the first layer on the driver I suggest a build plate clean with dish soap and water. 9/10 times this solves my problem. The other 1/10 is a filament calibration issue or partial clog. The logo is tricky if you are struggling with any of these issues.
- This model CAN be printed without magnets, however, as the pieces wear, they will become loose. I would suggest using the 4 magnets in the driver at the very least.
HAPPY PRINTING!
I really hope you enjoy my favorite creation to date! I humbly request your feedback and photos of your creations!
Boost Me (for free)
I really hope you enjoy the THREAD PILOT! If you deem it worthy, a boost would make my day :)
License
You shall not share, sub-license, sell, rent, host, transfer, or distribute in any way the digital or 3D printed versions of this object, nor any other derivative work of this object in its digital or physical format (including - but not limited to - remixes of this object, and hosting on other digital platforms). The objects may not be used without permission in any way whatsoever in which you charge money, or collect fees.
Comment & Rating (6)