Search models, users, collections, and posts
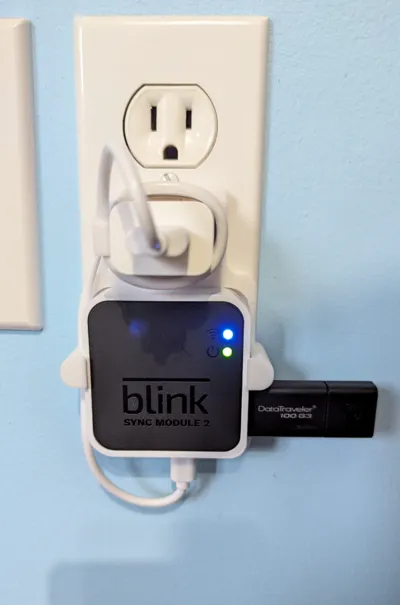
Blink Sync Module 2 Outlet Mount Bracket V2
Remixed by
IP Report


Print Profile(3)

0.2mm layer, 2 walls, 15% infill V2
Designer
45 min
1 plate

0.2mm layer, 4 walls, 15% infill V1
Designer
43 min
1 plate

0.2mm layer, 4 walls, 15% infill V1
Designer
44 min
1 plate
Open in Bambu Studio
Boost
80
205
54
21
500
413
Released
Description
Blink Sync Module 2 Outlet Mount Bracket V2
This is a remix from the original with some improvements:
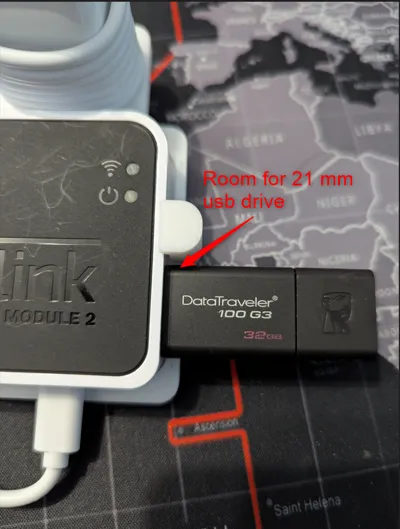
- Room for 21mm usb drive
- Cable management
- Smug fit for the psu and Sync Module
- NEW The psu now slides inside the bracket instead of goind trough the AC connector
NOTE:
This is made for North America model, other country might have some differences that wont fit with this design. So please make sure you have the proper version before saying that the design doesn’t work.
PRINTING:
*The wire clip must be printed at layer height of 16mm. The profile is already prepared for this*
- Nozzle: 0.4mm
- Layer Height: 0.2mm
- Walls: 4
- Infill: Rectilinear
- Infill : 15%
- Brims: No
- Textured PEI plate
- Support : No *check second profile with support if prefered
Keep the profile's orientation and settings for better strength.
No support required but depending on your printer settings it might work best for the cable channel.
ASSEMBLING:
- Insert the wire inside the bracket's cable management
- Insert the Sync module and clip it firmly in place
- Insert the power supply all the way *Tight fit
- Curl the wire around the power supply and use the clip to hold the cable.
- Plug into the wall and enjoy!
This remix is based on

License
This user content is licensed under a
Creative Commons Attribution-Noncommercial-Share Alike
Comment & Rating (54)