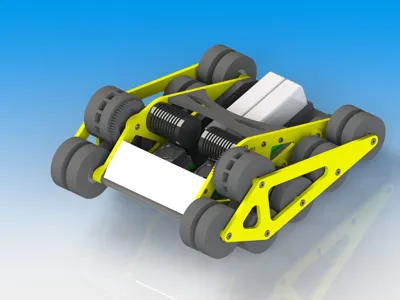
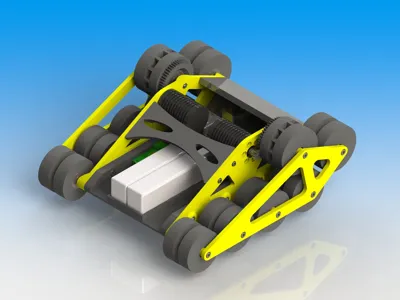
RC Speed Tank


Print Profile(1)

Bill of Materials
- M4x15mm x 8:
- M4x60mm x 12:
- M3x20mm x 4:
- M3x10mm x 4:
- M3x45mm x 84:
- M4 x 20:
- M3 x 88:
- 4x13x5mm 624 Lager x 12:
- 8x22x7mm 608 x 12:
- 1:10er Combo (60A ESC & 540 35T Motor x 2:
- Motorritzel (Modul 1 11 Zähne) x 2:
- 2/3sLipo 2200mAh x 2:
Description
This "Speed Tank" achieves approximately 25km/h with the components I use, and it's durable too
I deliberately designed it to be simple so that soon many good ones will be driving around :-D
If you have any questions, just contact me, and I will, of course, update the description
- What else is needed
2x 1:10 combo (60A ESC & 540 35T Motor)
2x motor pinions (Module 1 11 teeth)
2x adapter pinions M1 for 3.175mm shaft
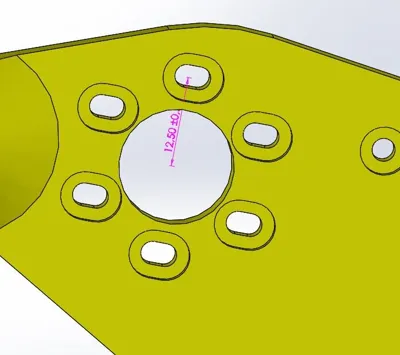
- Ball bearings:
8x22x7mm 608 12x
4x13x5mm 624 12x
- LiPos:
2x 3x 2200mAh
- Screws:
M4x15mm 8x
M4x60mm 12x
M3x20mm 4x
M3x10mm 4x
M3x45mm 84x
- Nuts:
M4 20x
M3 88x
For control, the two channels of the remote control are simply mixed, which works with any stick remote control or even some pistol grip remote controls
- Which parts are needed how often
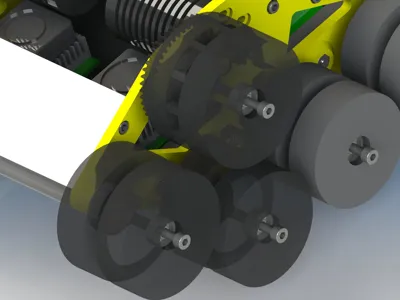
Drive wheel: 2x
Base plate 1x
Front bumper 1x
Rear cover 1x
Chain link 84x
Idler wheel chain tension: 2x
Idler wheel 8x
Side panel mirrored 1x
Side panel 1x
Stiffener mirrored 1x
Stiffener 1x
- Assembly:
Everything is screwed and nothing is glued. In addition, the vehicle has a completely modular design for easy assembly/repair
I made all the nut recesses so that they can be pressed in while hot so they hold by themselves. This considerably simplifies assembly
I intentionally made the bearing seats slightly larger so that the bearings can be pressed in easily. This is, of course, also dependent on the printer settings
The 42 chain links are connected with M3x45mm and then secured with nuts, which can also be secured with threadlocker or superglue
The part "Idler wheel chain tension" serves, as the name suggests, to tension the chain. This is mounted as the foremost idler wheel because it has a different size
- Support:
Support is only needed for the parts "Idler wheel" "Idler wheel chain tension" "Drive wheel" and "Base plate"
- Print settings:
Infill: 20-50% (use more for "Stiffener" & "Side panel")
Outlines: I myself used five for most parts, especially for the drive wheel due to the gearing
all parts are oriented as I printed them
Material: PLA/PETG/TPU
Printer: Print bed of 200mmx200mm is required
https://www.youtube.com/watch?v=z7oRk-XY7QM
Comment & Rating (52)