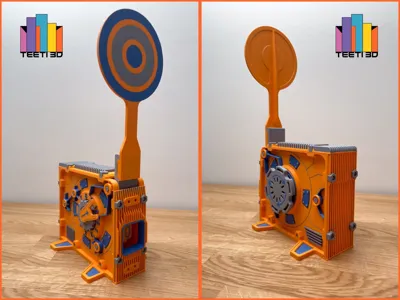
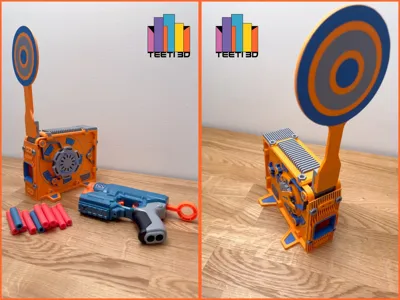
SpinScore Target - Best Nerf Target!


Print Profile(2)


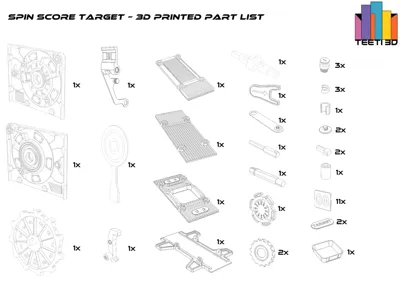
Bill of Materials


- Rubber Band Size #32 x 1: (3" x 1/8" — 7.6cm x 0.3 cm)
Description
DESCRIPTION
Inspired by playful competitions with my kids, I designed the Spin Score Target to make shooting games fun and fair.
We used to use random objects placed on couch headrests or chair backrests, but the kids would always question if the placement was the same for everyone, as the orientation and position would change each time the target was knocked down. To solve this problem, I created the Spin Score Target.
THIS IS FOR PERSONAL USE ONLY!
Spin Score Target has a simple but effective mechanical counting system, and it is very easy to assemble, requiring no glue and a few readily available components.
I have created the assembly instructions that are included in this Model upload. But there is also a video assembly instructions that can be found here:
SpinScore Target counting demo:
I'm including the .STEP files of these parts:
- Target template (for making your unique/additional custom targets).
- Name templates (for making custom nameplates).
REQUIRED HARDWARE
- 3 x Rubber Bands Size #32 (3" x 1/8" —— 7.6cm x 0.3 cm)
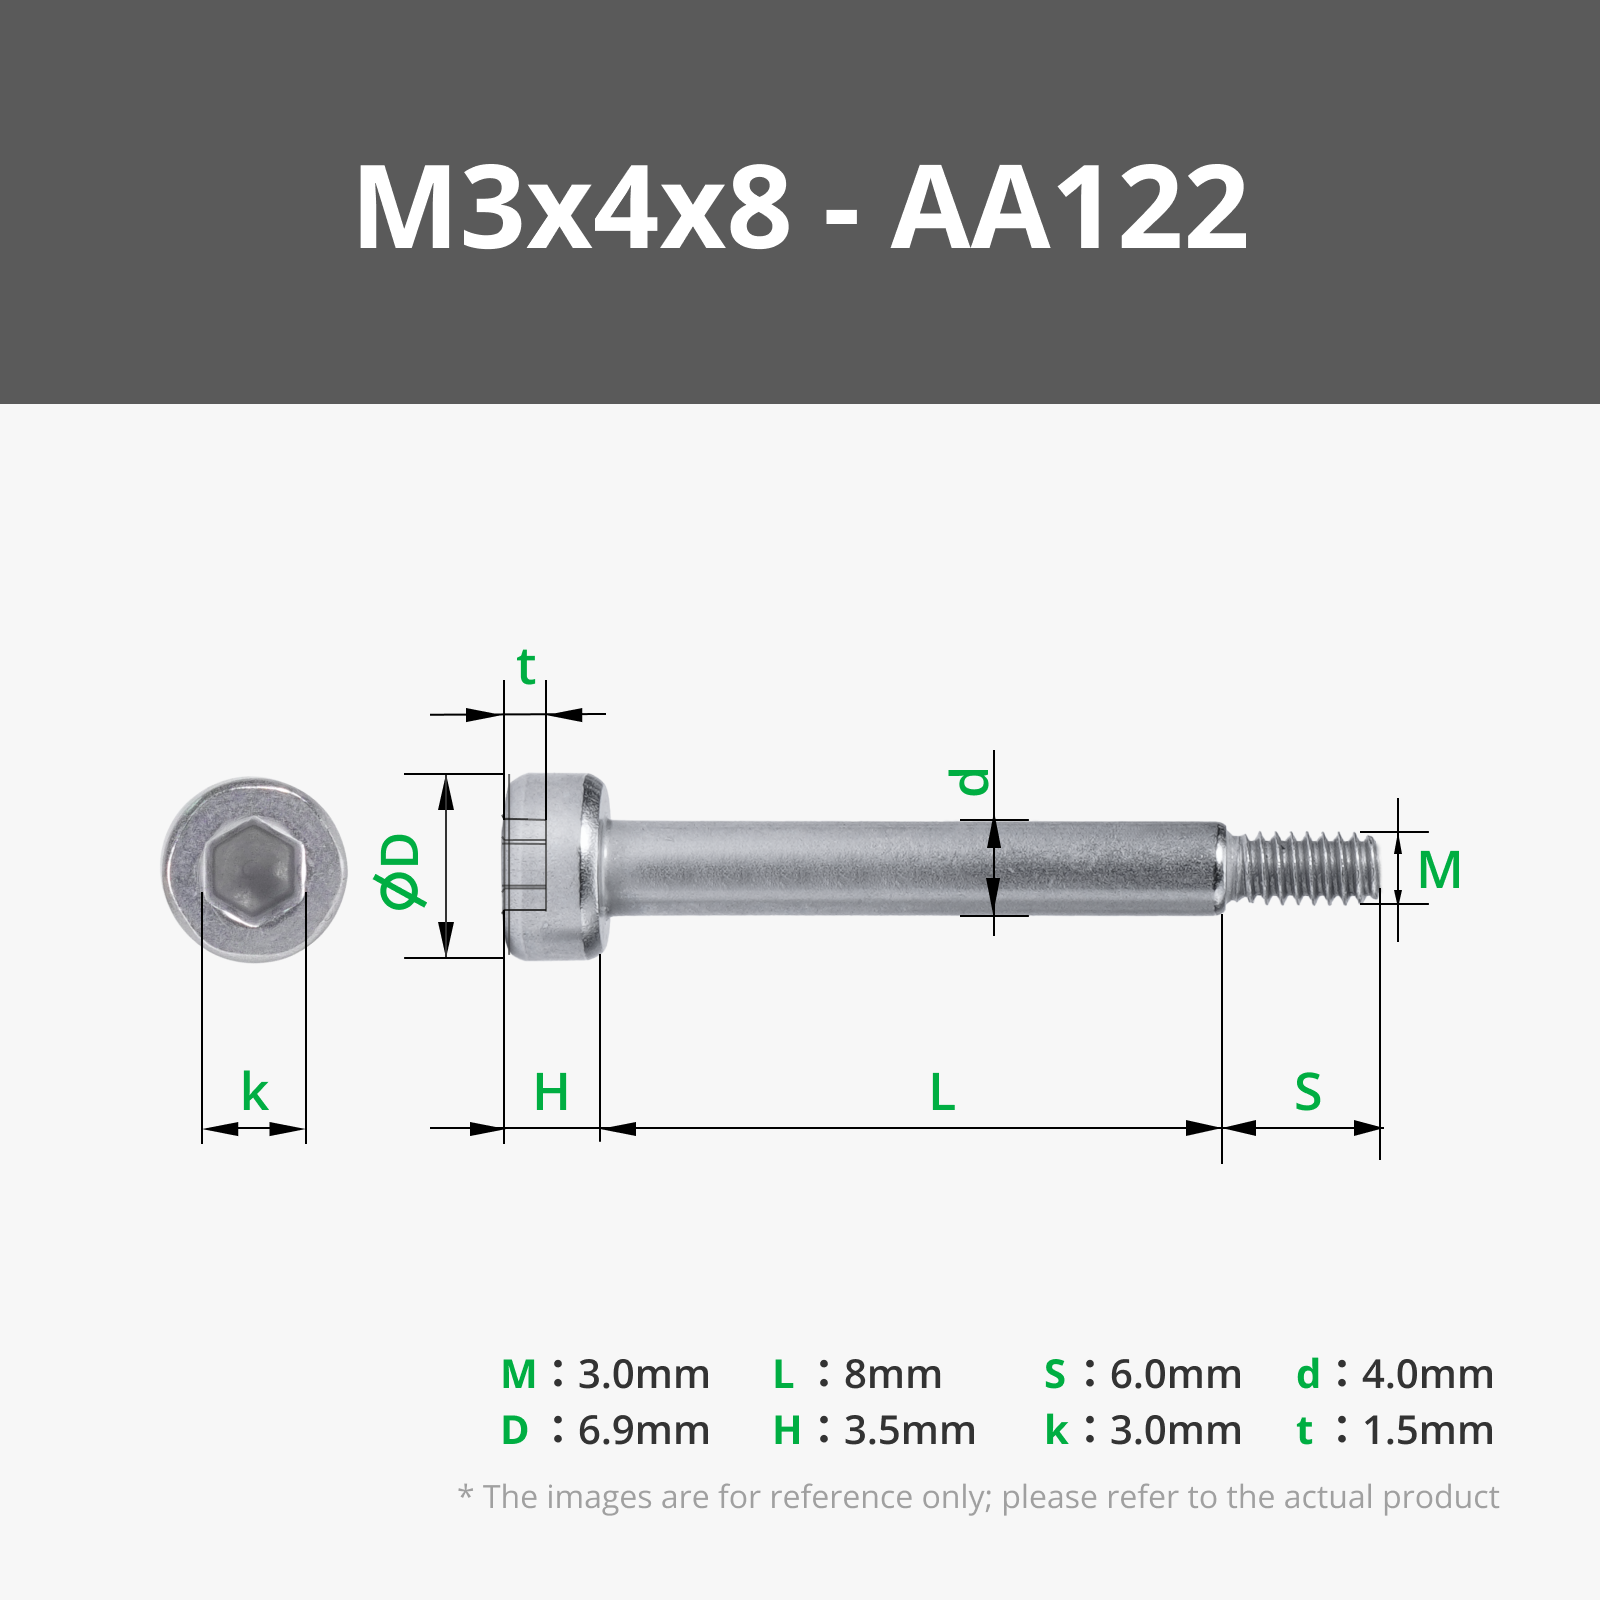
- 16 x M3x8 Socket Head Screws or Button Head Hex Drive Screws (DIN912 or ISO7380)
- 2 x 608 ball bearings (8mm x 22mm x 7mm)
PRINTING SETTINGS
Wall Loops: 3
Top shell layers: 5
Bottom shell layers: 4
Sparse infill: 15% (rectilinear)
No supports
NOTES
- This project includes a couple of print-in-place rotating parts. Make sure that the printer is not stringing and is well calibrated.
- Before diving into the full project, I strongly advise printing a prepared test print. This step will ensure a smooth assembly process.
- If you plan to use more powerful toy guns than a standard Nerf pistol, you should tension the target linkage rubber band more to give the target more resistance (or a couple of rubber bands can be used)
- Do not over-tension the target winder, as it might snap the rubber bands. Using recommended rubber bands, two complete rotations should be enough (depending on the installed score wheel orientation).
Boost Me (for free)
Please consider boosting this model. It takes a very long time to create high-quality and functional models. Thank you!
Documentation (1)
License
You shall not share, sub-license, sell, rent, host, transfer, or distribute in any way the digital or 3D printed versions of this object, nor any other derivative work of this object in its digital or physical format (including - but not limited to - remixes of this object, and hosting on other digital platforms). The objects may not be used without permission in any way whatsoever in which you charge money, or collect fees.
Comment & Rating (69)