Rotating Wireless Charging Phone Stand (Specifically for Xiaomi 15)


Print Profile(2)


Description
Numerous websites, including MakerWorld, offer countless phone stand models, including wireless charging versions compatible with MagSafe.
However, I haven't found a design that perfectly suits my Xiaomi 15.
Unfortunately, I also have a limited wireless charger as shown in the image above.
This makes it almost impossible to find a stand that perfectly meets my needs.
Driven by necessity, I started this project.
However, I have rarely, or almost never, designed models with weak practical value, or models where artistic value outweighs usability. Therefore, this design isn't entirely satisfactory, but it fundamentally fulfills my requirements.
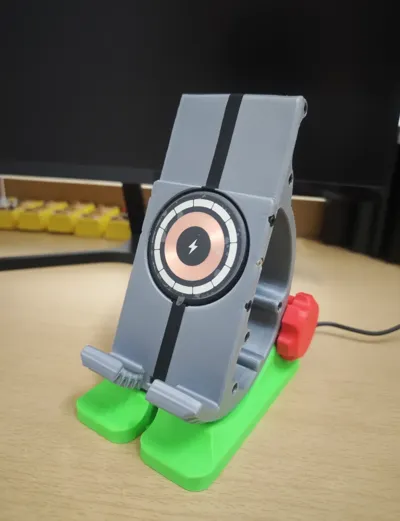
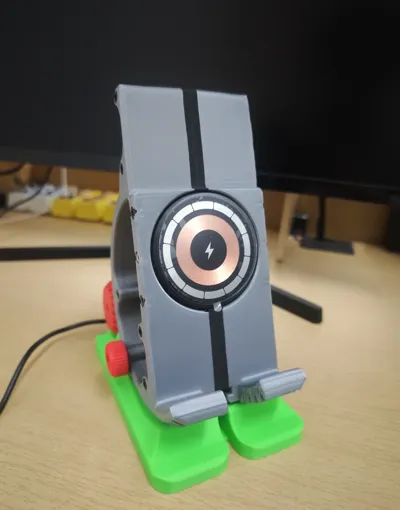
The design inspiration comes from the recently popular gear-driven rotating phone stands (although, from an economic and technological perspective, the gears are quite redundant here, they do possess a certain artistic appeal). It's specifically designed for the Xiaomi 15's dimensions (the Xiaomi 14 series should also be adaptable), and seamlessly integrates the wireless charger shown in the last image (this charger is rated at 15W, but actually only has a little over 10W input, with an output power comparable to 5V1A. However, its advantage lies in its air cooling. Please carefully consider before purchasing, as this charger is not cheap).
Except for the base, all models require no supports.
The turntable is printed in two parts and assembled using five M3*40mm bolts (Please place the charger in the center of the turntable before tightening the bolts!).
The charger's data cable can be concealed in the center of the base and secured with a cable management cover. This uses four M3*4 countersunk bolts.
The turntable should slide easily into the base's guide rails (if the supports are properly cleaned). A small amount of grease can be applied for lubrication. Don't worry about any initial stiffness; it will become smooth with use.
The knob and driven gear (I know it's not technically a driven gear) are connected using an M3*50mm bolt. I recommend screwing the bolt into the driven gear first before installing it to the base to prevent the central shaft from breaking.
The clamping bolt uses an M5*35mm bolt. Use a hammer or an M5 nut to press it into the bolt head (interference fit), and press fit an M5*6*7 T-nut into the turntable.
The charger is secured with six M3*4 set screws, and I've also used additional M3*4 bolts to cover and aesthetically enhance the set screw holes.
Comment & Rating (2)