Bubble Gun Toy


Print Profile(1)

Bill of Materials


Description
Model Revision #1 (14.12.2024): Air holes have been added (01_Body + 02_Body). Better airflow for bubble maker.
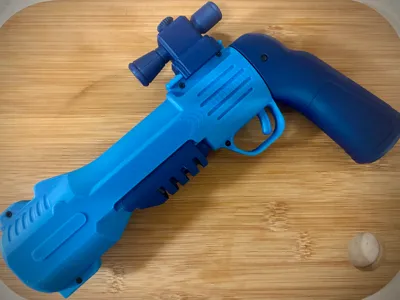
🫧A great bubble gun that fits any party! Not only kids will have fun with this gun! Simple printed parts combined with the Electric Bubble maker kit 01 create a bubble gun with a unique design!
🫧This Electric Bubble Maker Kit is easy to assemble and operate. It features an electric bubble blower that produces large, delicate bubbles.
🫧All you will need to assemble is the 01 kit mentioned above, 6 PCS Self Tapping Screws BT2x8 and Bubble making fluid (recommended). You can also use dish detergent and water.

👉Assembly instruction
Insert the shortened hose into the lid (included in the kit). The length of the hose should be 50-70mm. Then insert the rest of the hose on the bottom of the lid. The length of the hose should be 50mm. Push the hose onto the lid mandrel as far as possible❗

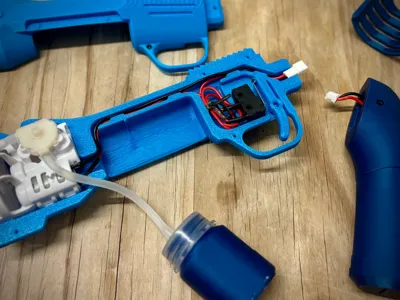
Correct fitting of the hose to the hood mandrel - Place the bubble maker into 01_Body. Insert the cables into the groove so that they do not come out of the groove. Place the switch on the pins and finally put the trigger on one pin. 📌
Cover the electronic parts with 02_Body and fix it with 5 PCS Screws BT2x8.🔩

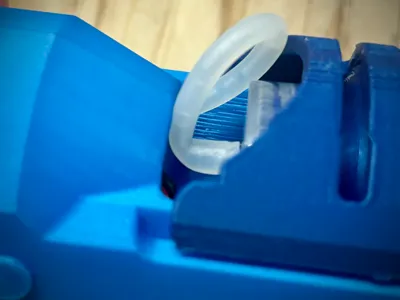
Correct insertion of the cables into the groove. - Don't forget to apply the silicone sleeve (included in the kit) to the lid! The lid must be one-way!.. and place the gravity ball on the end of the hose. Gravity ball is important so that the hose is always at the bottom of the bottle with the bubble liquid.
- Close the bottle of liquid with the cap. Insert the bottle into the body. Make sure the hose is not plugged❗ The hose must not be bent too much. If it is, either shorten the hose or do not bend it too much… and place cover.
- 🔋Insert the lithium battery into the grip and gently pull the cables through. Secure the battery with the plug 🔋
- Connect the bubble maker to the battery and insert the grip into the body and secure with the BT2x8 screw.
- Finally, assemble the aimer and mount the bubble gun! Have fun 🥳
Problem with the hose falling off
Occasionally, the hose inside the bottle would fall off the lid spike. This problem has two solutions:
You will need transparent silicone tube 3x5 mm (RC021). The required tube length is 36 mm. Connect the gravity ball included in the bubble maker kit to the tube.

Make grooves on the lid spike. Use a knife to make small notches (grooves) in the lid spike. Then attach the original hose that is part of the kit. Attach the printed 08_gravity ball to the hose. (according to the original instructions).


License
You shall not share, sub-license, sell, rent, host, transfer, or distribute in any way the digital or 3D printed versions of this object, nor any other derivative work of this object in its digital or physical format (including - but not limited to - remixes of this object, and hosting on other digital platforms). The objects may not be used without permission in any way whatsoever in which you charge money, or collect fees.
Comment & Rating (66)