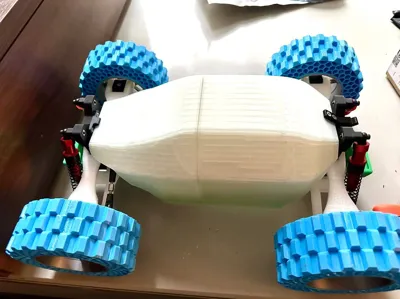
1:10 RC Car Monster Truck Fun Pack robak-v2.2.0-remix


Print Profile(2)


Description
Original Author: milrobak
2025.01.02 Update——————————————————————————————————————
Due to the higher center of gravity of version 2.2, the vehicle tends to overturn during high-speed turns, a driving posture absent in commercial RC cars;
Based on the original author's data, a chassis upgrade kit has been designed. The new components result in the following changes:
- Elevates the roll center (anti-roll bars could be added, but this would necessitate new hardware and complicate the design. Directly altering the physical structure is simpler and more direct)
- Wheels exhibit a 2-degree negative camber, preventing rollovers
- Optimizes suspension thickness and weight (the original author's swing arm data was too weak, proving highly susceptible to breakage in actual testing. Therefore, I redesigned reinforced swing arms, though these still remain more prone to fracture than the original 2.2 version. I prefer replacing inexpensive printed suspensions after violent impacts, rather than the chassis or HSP standard parts)
- New steering blocks and rear wheel bearing housings; steering blocks remain compatible with HSP102011

——————————————————————————————————————
Remix Patch Notes:
- After numerous instances of five minutes of driving followed by two hours of repairs, and experimentation with various materials, I present the final configuration enabling stable and enjoyable operation
- The steering cup mount has been modified for compatibility with HSP standard metal steering cups; the original printed steering cups are no longer suitable (I experimented with many engineering materials—PAHT-CF, PA12, PA6, PC—all of which fractured quickly. TPU, while usable, is too soft, leading to erratic wheel movement. I ultimately opted for HSP aluminum alloy standard parts)
- Addition of a front bumper
- Modification of the rear light mount to accommodate a rear handle for convenient carrying
- Addition of a rear wing
- Modification of the original body shell to incorporate drilling guides (please drill the holes yourself; direct excavation was avoided as slicing the holes alters the routing and leaves unsightly layer lines on the shell)
- For the convenience of users in China, a bill of materials (BOM) with Taobao links is included
- Inclusion of a 5mm COB light strip enclosure; access link: here
Note:
- Always print test models first! If bearing insertion is difficult, adjust x-y hole compensation!
- If you intend to print part 4 using PAHT-CF or PA-CF and anneal it, anneal the test model first to determine your x-y hole compensation values!
- Users in China, please carefully read the bill of materials: here
- It is strongly recommended to prepare 3.1 and 2.7 mm diameter drill bits: 2.7 mm for screw holes, 3.1 mm for smooth insertion of cylindrical pins
- Four additional M5*7*0.5 washers can be used to adjust play during front wheel installation
- Unless you're as stubborn as I am, avoid printing tires. If determined to print them, go to: here
- International users should source metal steering cups themselves: HSP102011; other non-printed accessories can be found at: here
Video:
Printing Instructions:
Plate 1: Suspension swing arms, servo drive parts, steering cup bracket. Use PA12 (fiberless) or 60D hardness TPU or higher; nylon 12 offers superior strength and driving stability, but is difficult to print. 60D TPU or higher is also suitable (Bambu TPU for AMS hardness is 68D);

Plate 2: New rear wing and front bumper, and body shell clips. Use 95A or 98A TPU;

Plate 3: Chassis. Use PAHT-CF or PA-GF. Slicing incorporates additional strength in areas prone to breakage;

Plate 4: Servo mount, motor mount, rear wheel housing, suspension mount. High hardness is required; use PAHT-CF or PA-CF. Motor and servo mounts should be 100% infill. Annealing is strongly recommended (if a dedicated annealing device isn't available, an air fryer at 95°C for 6-8 hours can be used);

Plate 5: Front and rear differentials and chassis connectors. No modifications made; use PETG (PETG-HF is not recommended due to insufficient layer adhesion and toughness);

Plates 6 & 7: Shell. Any preferred material may be used. Pre-drilled guides are included; use a 3.1 mm drill bit to drill from the inside out;


Comment & Rating (12)