Sushi Maker 202x43mm


Print Profile(2)


Description
DESCRIPTION
As a family, we like sushi nori rolls. Making it at home means we can come up with our own stuffings. Not always traditional Japanese, but it’s what you like.
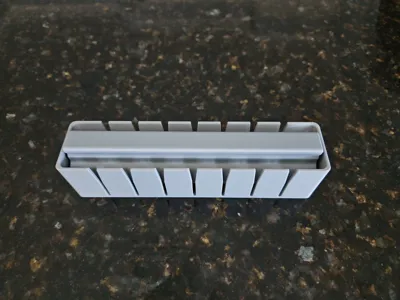
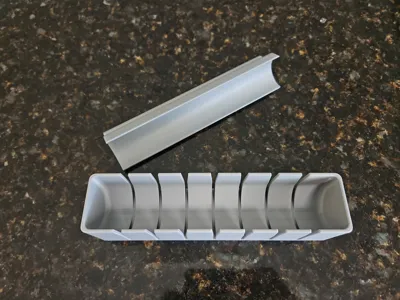
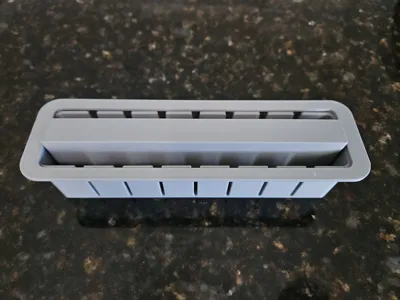
My sushi maker design helps us assemble the nori rolls and gives a good result. The tool has inside dimensions of 43 x 202mm, fitting a standard nori sheet. The design includes cutting slots, so a full-length roll can be cut into 8 equal pieces.

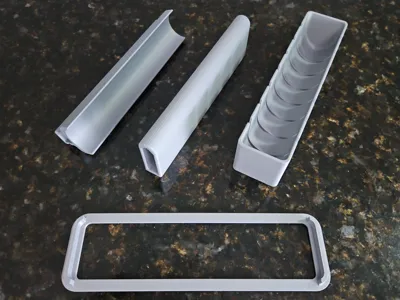
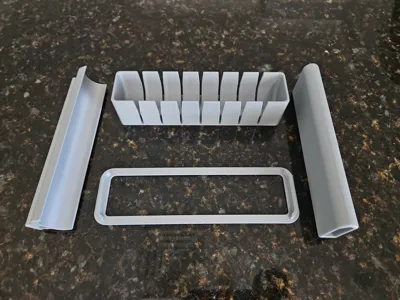
The sushi maker is in several printed parts:
- Base frame
- Top press
- Tamper
- Nori frame
There’s no assembly, so the parts can be put to use after a cleaning. Here is my 3D design. My design may match your needs, too.
So, be creative and enjoy …
USAGE
In the usage instructions, I have made the assumption that you’ve attempted making nori rolls the tradition way (with a bamboo mat) and looking for a quicker and simplified tool to assist you.

A (over-simplified) nori roll preparation guide:
- Place a sheet of nori evenly in the base.
- Spread open the nori sheet sides with the nori frame on top. The frame avoids nori sheet ends obstructing the filling.
- Loosely place a layer of 10mm cooked sushi rice.
- Use tamper to press a valley in the centre of the rice layer.
- Place filling (be creative) in the pressed "valley".
- Place a 10mm layer of sushi rice on top.
- Use top press to firm up the nori rice and filling.
- Wrap the nori ends together into a roll.
- Cut.
- Eat
CLEANING
Most 3D printed parts don't do well in a dishwasher, so, use soap and cold or warm water to keep parts clean after each use. Take care for food hygiene with 3D printed parts.
THANK YOU
I hope that you can find this print useful, too. If so, you can support my work by buying me a coffee …
Remember to leave a comment, perhaps a like to keep me enthused to make more. I have a 100+ published designs. Do check them out.
PRINTING INFORMATION
My print is made with eSUN PLA+ 1.75mm Silver filament, with 0.2mm layer height and 15% infill on a Bambu H2D printer. No supports required. Wall Loops = 4. A brim is recommended for the tamper.
Both the print profile and the individual STL files are included for download.
HISTORY
- 26/10/2025 Updated part designs to use less filament and print more easily. Functionality and overall dimensions of the parts have not changed, hence interchangeable with earlier parts.
Comment & Rating (258)