Bionic Mech_Assembled Dynamic Model


Print Profile(14)


Description
Boost Me (for free)
This is my first time posting a model on MakerWorld, please help boost it, thank you very much~~
------------------------------------------------------------------------------------------------------------------------------------------
2025.1.24 Update
1. C version: Fixed missing 3mf files for parts
------------------------------------------------------------------------------------------------------------------------------------------
2025.1.21 Update
1. B version switch mount: Minor flaw fixed
2. C version switch mount: Minor flaw fixed
3. C version bottom power compartment: Added a Type-C charging port, corresponding to the Type-C female connector I have on hand, as shown below

------------------------------------------------------------------------------------------------------------------------------------------
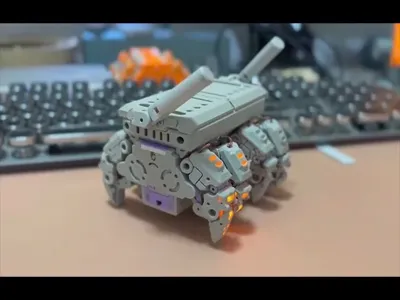
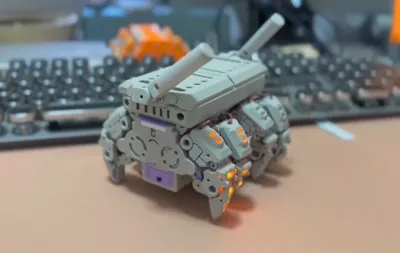
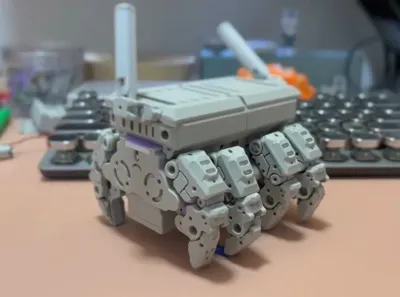
Version C (Upgraded mech appearance based on B version)
1. Upgraded mech appearance to better fit the theme
2. Enlarged body with multiple areas for improvement, making it easy to add LEDs or internal circuits
3. The mech's external structure was too complex, so it was reduced to 8 legs to lower assembly difficulty
4. Added a battery compartment for 3 AAA batteries and retained the bottom battery compartment (extended). More space, more choices
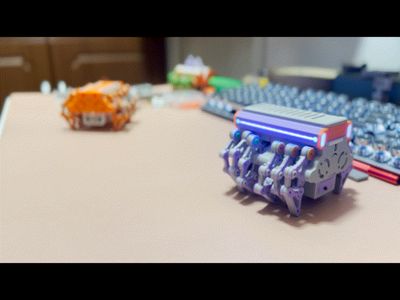
5. Legs have numerous reserved LED installation points
C Version Dual Motor Remote Control Installation Video
bilibili Leg detailed installation tutorial bilibili
------------------------------------------------------------------------------------------------------------------------------------------
Version B (Dual Motor Remote Control Version)
1. Version A's legs are compatible with Version B, and the crankshafts can be shared (Version B's crankshaft has an increased step distance and can also be used on Version A). Other parts are not interchangeable
2. Optimized some designs. The main frame and motor mount are separated, making it convenient to use other motors without reprinting the frame; only the printed motor mount needs to be modified. (Two versions of N20/N10 motor mounts are provided, matching different lengths of D-shafts)
3. Modified gear ratio, increased walking step distance, and increased walking speed. If you want faster speed, you'll need to use high-speed N20 or N10 (buy them on Taobao, they're everywhere)
4. There are two versions of the motor starting gear, matching different lengths of D-shafts
5. LEDs can be installed at the power switch, and also on the top cover. It is recommended to print the LED parts with transparent material
6. The remote control circuit uses a DIY Loli remote receiver. You can search for tutorials to make it yourself (DIY to the end), or purchase a finished product on Taobao
7. After numerous test prints, the strength of ordinary PLA material is barely sufficient for the pin installation strength. It is recommended not to print parts that require connection with matte material (the strength is insufficient, and they will break directly when removed after being inserted)
------------------------------------------------------------------------------------------------------------------------------------------
B Version Dual Motor Remote Control Installation Video
------------------------------------------------------------------------------------------------------------------------------------------
At the request of my friends, I have compiled the original tutorial materials for the DIY Loli remote control. The raw materials include detailed instructions, requiring some hands-on ability. But once you learn, you'll have wireless control module freedom.
Data Download Baidu Netdisk Link
-------------------------------------------------------------------------------------------------------------------------------------------
If you really don't want to make it yourself, just buy the finished product. The remote control sellers below have all the Loli DIY original parts, and you can easily buy everything in one go by checking the information I uploaded
3.7v single-channel ESC 2 needed
4-9V integrated dual-channel ESC one is enough, but the power supply needs to be 2S (7.4V). My tutorial mentions that a 2S power supply requires two small lithium batteries connected in series
Loli remote control, choose automatic throttle centering, ordinary receiver The receiver is a bit large, but it's not sold separately, so you have to buy it together. This is the cheapest seller I could find, and the quality is good
8-channel receiver relatively small in size, recommended to use this. Otherwise, it might not fit into the B version machine
There are also many finished products made by players on Xianyu, but I still recommend DIY if you want to have fun
By the way, I suggest that Bambu Lab officially release a proportional remote control circuit kit, which would be much more convenient. You could design various remote-controlled gadgets
--------------------------------------------------------------------------------------------------------------------------------------------
--------------------------------------------------------------------------------------------------------------------------------------------
Version A (Single Motor)
1. This model is an assembled electric model, requiring some hands-on ability
2. When printing, try to use a high-temperature smooth build plate, as the model's operation requires a certain precision. PEI textured plates may cause elephant's foot on contact surfaces, leading to insufficient tolerances during assembly
3. The entire model does not use any hardware parts
4. Power can be provided by Bambu Lab's standard N20 geared motor
5. For power, I used the self-locking switch and connecting wires from Bambu Lab's small train, which are compatible with the N20 motor
6. For power and motor, you can also purchase N20 geared motors and push-button switches on Taobao, which will require self-soldering
---------------------------------------------------------------------------------------------------------------------------------------------
A Version Single Motor Installation Video
---------------------------------------------------------------------------------------------------------------------------------------------
Accessories List and Purchase Links
1. Hassle-free version, purchase from Maker's Supply, no soldering required
AAA battery electrode contacts Quantity 1
N20 geared motor Quantity 1
Switch Quantity 1
Distribution board Quantity 1
2. Pure DIY version, requires self-soldering
Any of the four switches will work, and corresponding models are provided.
| Purchase Link | Name | Model | Quantity | Illustration |
| http://e.tb.cn/h.TdMEsFv6kfuEPDK?tk=bMkQ3FS91mX | Switch | SS12F15V G6 | Optional |  |
| SS12D07V G4 | Optional |

| ||
| SK09 G2 | Optional |
 | ||
| http://e.tb.cn/h.TdPpr9mbGVy83c9?tk=H0RY3FS9G5M | Gray 5.8*5.8 self-locking straight plug | Optional |
 |
Below are the motor and electrode contacts
| Purchase Link | Name | Quantity | Illustration |
| http://e.tb.cn/h.TdyZphGtlj1yjPE?tk=ZLY93FSP7dk | AAA battery electrode contacts | At least one set |  |
| http://e.tb.cn/h.TW7lG5LEOGgLTQj?tk=a6dm3FSuhCC | N20 motor | Can buy a few extra as spares |  |
---------------------------------------------------------------------------------------------------------
Some switch models I have on hand

Simple wiring, if you don't want to use terminals, you can directly solder the wires.

Friends who like it are welcome to download
Boost Me (for free)
If you like it, please give it a boost
License
You shall not share, sub-license, sell, rent, host, transfer, or distribute in any way the digital or 3D printed versions of this object, nor any other derivative work of this object in its digital or physical format (including - but not limited to - remixes of this object, and hosting on other digital platforms). The objects may not be used without permission in any way whatsoever in which you charge money, or collect fees.
Comment & Rating (32)