Star Christmas Tree Topper w/Supportive Base


Print Profile(2)


Description
Boost Me (for free)
If you download, print, or collect this free model, I would really appreciate it if you take the time to click the like <3 button (or boost if you see fit) as I put a ton of time, experimentation, and filament into developing, testing, and posting these- and your support helps me continue to do so!
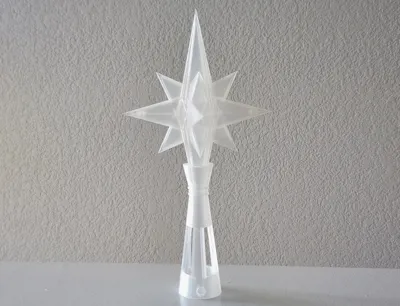
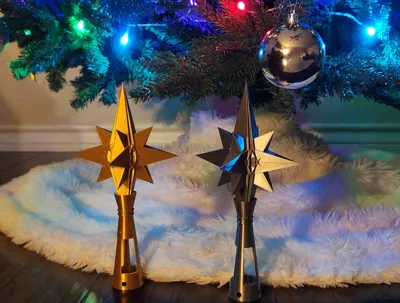
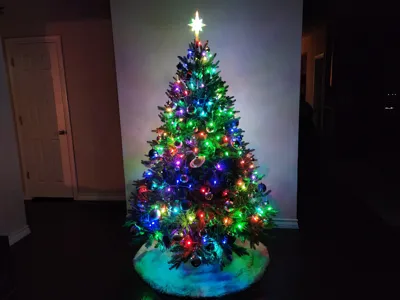
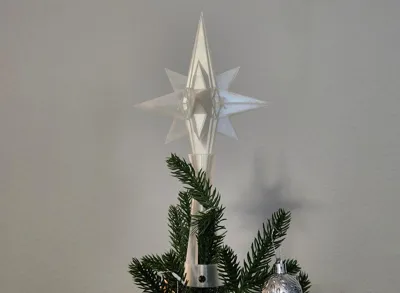
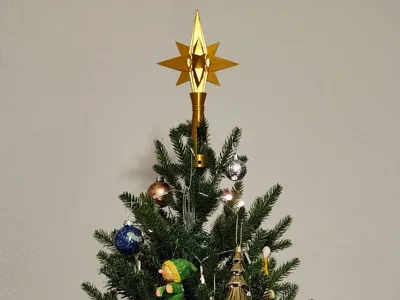
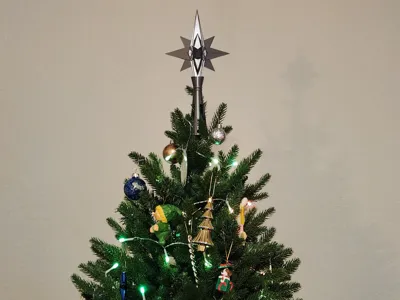
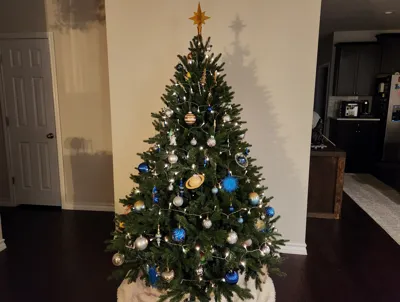
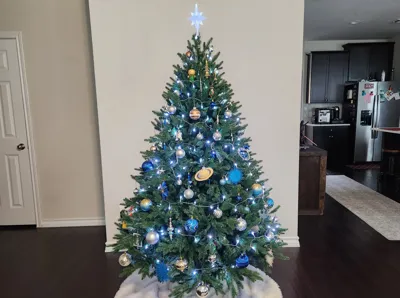
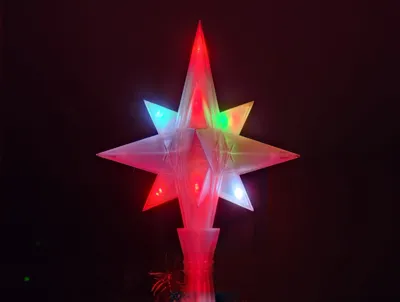
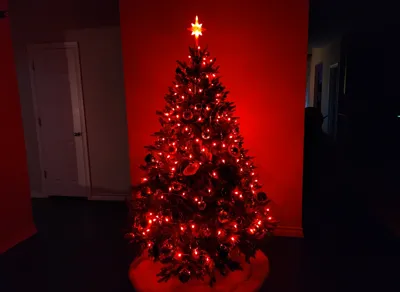
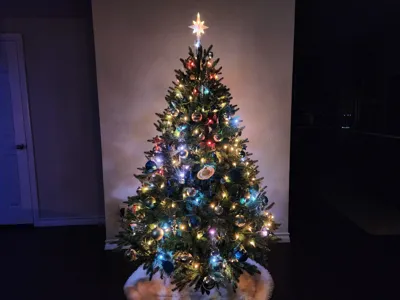
I was browsing and browsing and browsing looking on Amazon for a tree topper I really liked- and just couldn't find what I wanted. So it hit me- I had PLA, a creative mind, and a 3D printer- so I sat down and designed my own star-shaped Christmas tree topper! It took several prototypes, but I am very happy with the results- and due to the stabilizing design of the star's base (gaps for limbs and holes for optional zip ties, etc.), it actually stays upright on my tree after a little adjusting. The pictured star toppers were printed with PLA Basic Transparent, PLA Silk Silver and PLA Silk Gold- the print profiles have been provided for silk and transparent.
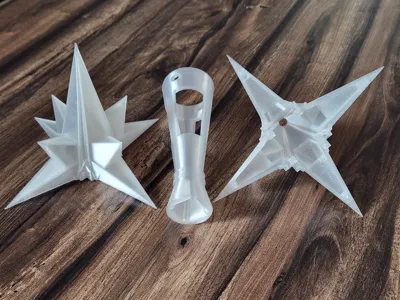
WARNING! All of the points on this star are EXTRA SHARP- so be careful assembling!
This star is printed in three main parts- top, bottom, and base- and has 8 tiny dowels to connect the halves, though you can get away with just four on the outside dowel holes- the inner four are just for added stability but can be tricky to get all 8 lined up. Four and some super glue will work great from my experience. The entire design is as lightweight as I could make it and is hollow with a hole in the base and in the center of the bottom half to accommodate a cord for adding LED strand or other fairy lights (if you use transparent or light colored filament).
PRINT RECOMMENDATIONS- PLEASE CHECK THESE OUT FOR BEST RESULTS!!
This model will use a bit of support to make sure the surfaces print well, and I highly recommend these settings for best results:
- Infill- 0% for top, bottom, and base, and I used between 15%-25% for the dowels
- .2 for layer height
- Use traditional/normal supports (and yes, they will take a bit of effort to remove but they really help make sure the overhangs are a nice result)
- Make the bottom and top shell layers 6- I started with the defaults and got some pillowing on the surfaces of my prototypes- so I bumped it up to 6 and it fixed it for me.
- Use the support painter to block the round connecting dowel holes in both halves of the star (if you don't it can be a serious pain to get some of the support material out of those tiny holes)
- I recommend using brims on everything- obviously it is optional but with the very narrow pointy ends and tiny dowels it just makes it easier and less likely to lift from the bed.
License
You shall not share, sub-license, sell, rent, host, transfer, or distribute in any way the digital or 3D printed versions of this object, nor any other derivative work of this object in its digital or physical format (including - but not limited to - remixes of this object, and hosting on other digital platforms). The objects may not be used without permission in any way whatsoever in which you charge money, or collect fees.
Comment & Rating (22)