Tarmo 5 - Electronics Housing Mod


Print Profile(2)


Description
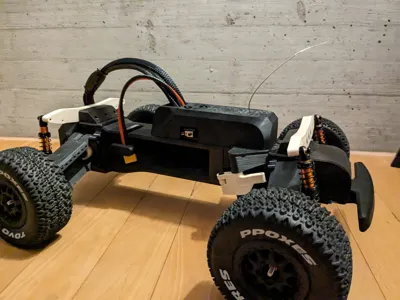
This is a housing for the electronics of the Tarmo 5 RC car.
It protects the sensitive parts against dirt and water.
The housing consists of two parts for easy screwless mounting without further necessary modification of the original body. It can be easily assembled / disassembled.
Installation:
- Insert the Mounting Plate (B) into the existing holes of your Tarmo.
- Arrange your electronics so that everything fits into housing. Feed the antenna cable out of the hole on top and press the housing into the holes of Part B.

Please note:
- You need to mount the on / off switch on the side of the ESC and in the right position for the cutout in the housing (VHB tape).
- You must mount the receiver between the ESC and the servo (untested) or on top of the servo (tested / fits), and arrange the cables so that everything fits into the housing.
- Tolerances of my Printer may not be the same as yours. Use some glue if the press fit parts are too loose / sand a bit it if its too tight.
Print:
- I printed mine in ABS, 0.2 Layer height, 10% Gyroid and 4 Walls.
-PLA / PETG should be fine as well.
-No supports needed. The STLs are already oriented for print.
Comment & Rating (3)