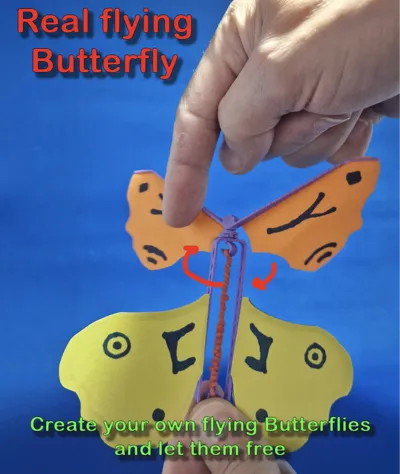
Real Flying Butterfly


Print Profile(1)

Description
Real flying butterfly.
Create your own. Show them and let them free.
This print allows you te create a butterfly that is great for kids.
It is designed to be as light as possible yet strong enough to hold a wind rubber band.
Please read the instructions and see the pictures to assemble.
1. Print the butterfly
2. Put 2 of the washers just below the “head”of the butterfly around the axis.
Make sure the outdents are located int eh slot of the counter washer.
You need 2 washers only (4 in the print profile, 2 for spare)
This is a bit of fiddling.
3. Use the templates to cut 2 lower and 2 upper wings.
Use the lightest paper you have to keep the weight low.
You can color the wings to your preffering
4. Use a little all purpuse glue to glue the wings to the skeleton. See pictures for which wing goes where.
5. Put a small and light rubberband between the hooks
6. Fold the upperwings so that the form a propeller.
I suggest to fold the right wing to the front and the left wing to the back. You will have to play with the angle to get the butterfly to fly.
7. Turn the wings by holding the body with one hand and use the finger of your other hand to rotate the wings (clock wise when folded as described).
Warning do not wind the rubber band to far because the body can break.
Play with the angle of the wings and the amount of turns to get the butterfly to fly away.
Best is to keep the wound up butterfly between your two closed hands and toss it up.
Happy flying.
Comment & Rating (3)