
Voron Trident Horizontal Umbilical Chain for CW2

Print Profile(1)

Description
Background
After switching my Trident over to using a CAN toolhead and removing the X/Y cable chains, the one thing that I wasn't satisfied with was umbilical wire management. Unlike on the Voron 2.4, piano wire isn't very practical since the toolhead in the Trident is so close to the top panel of the enclosure. There are a few Trident top-hat solutions that I thought about installing, but ultimately settled on a more minimal approach.
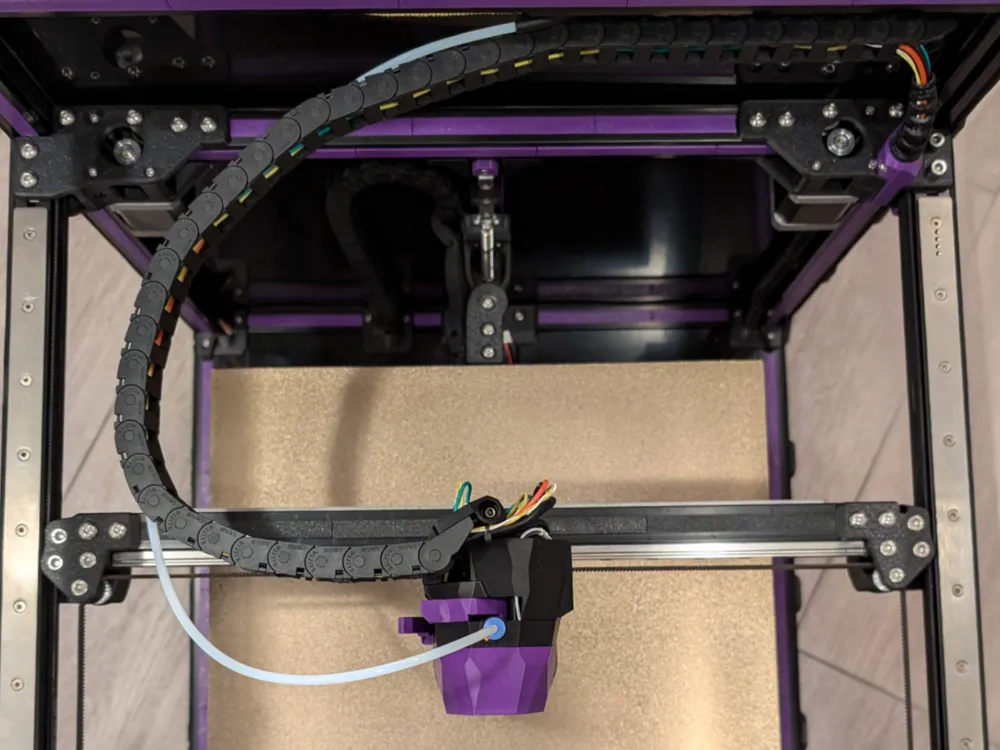
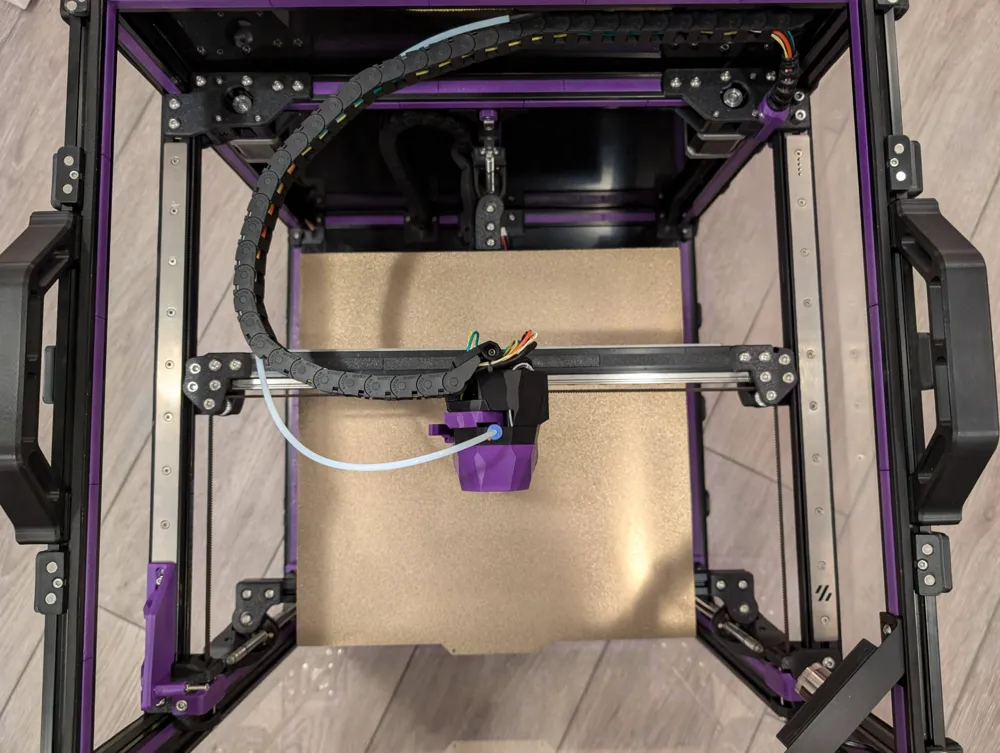
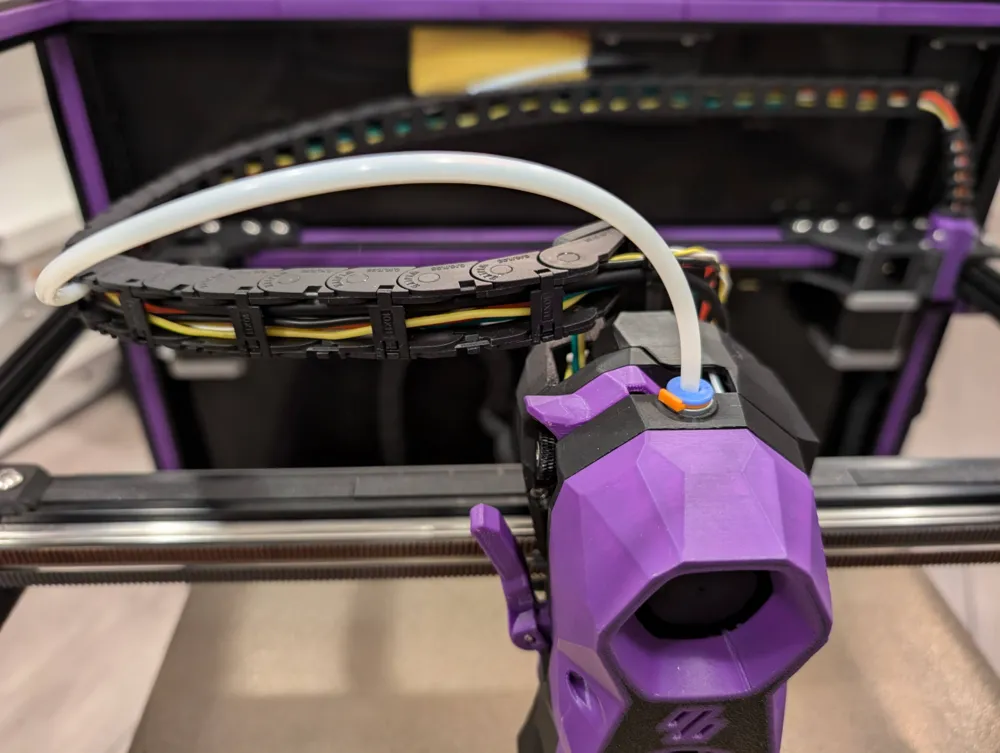
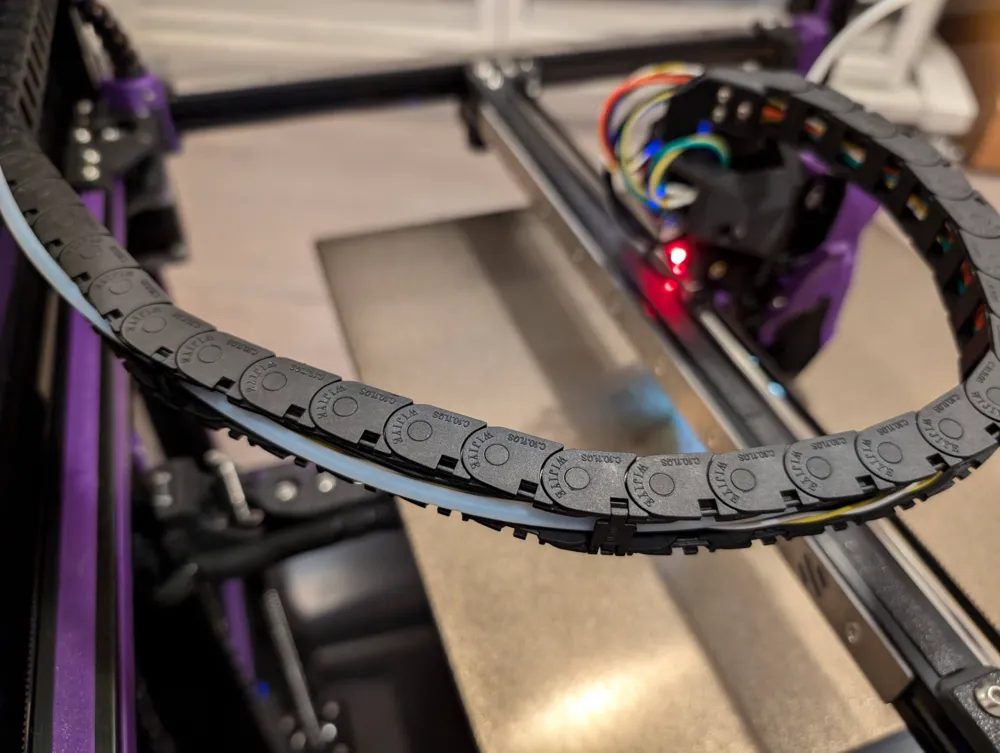
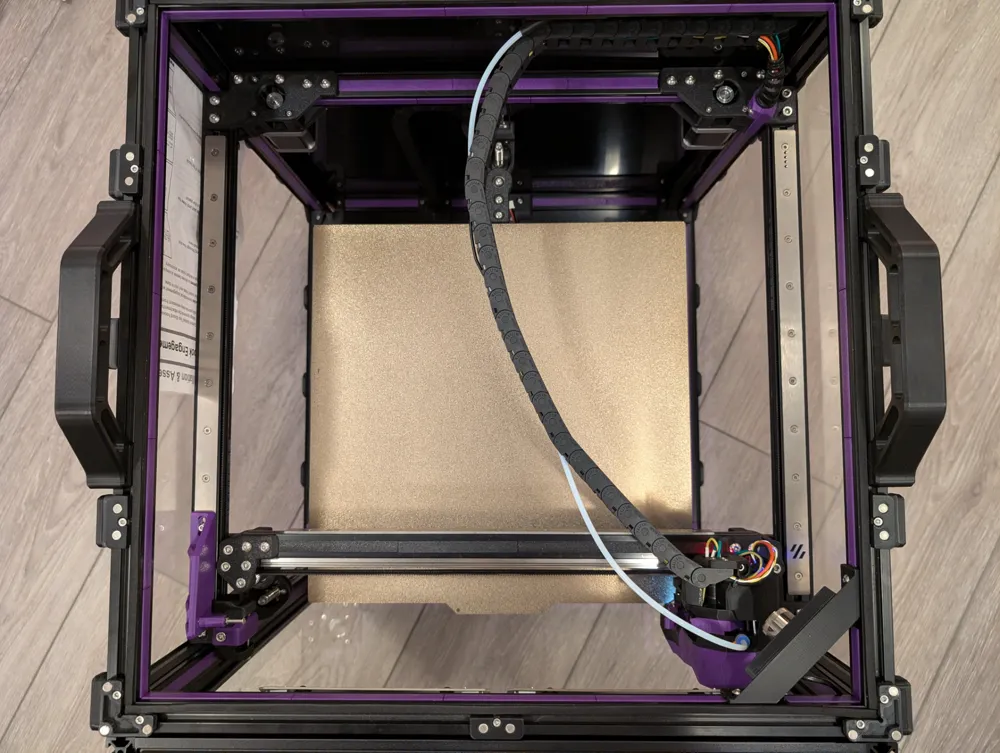
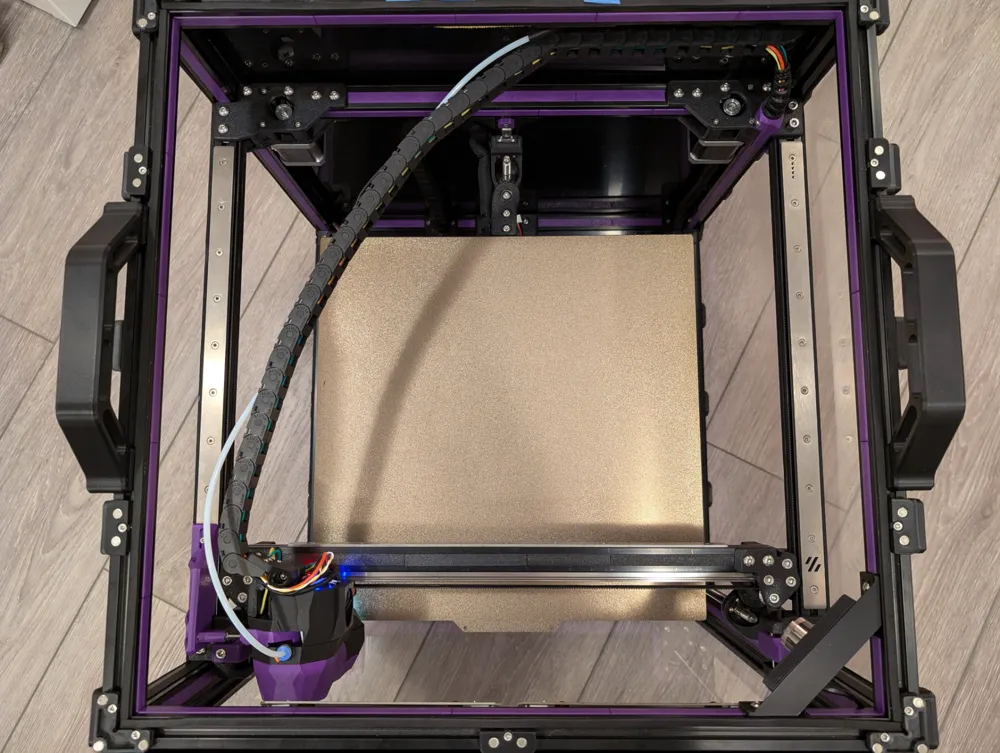
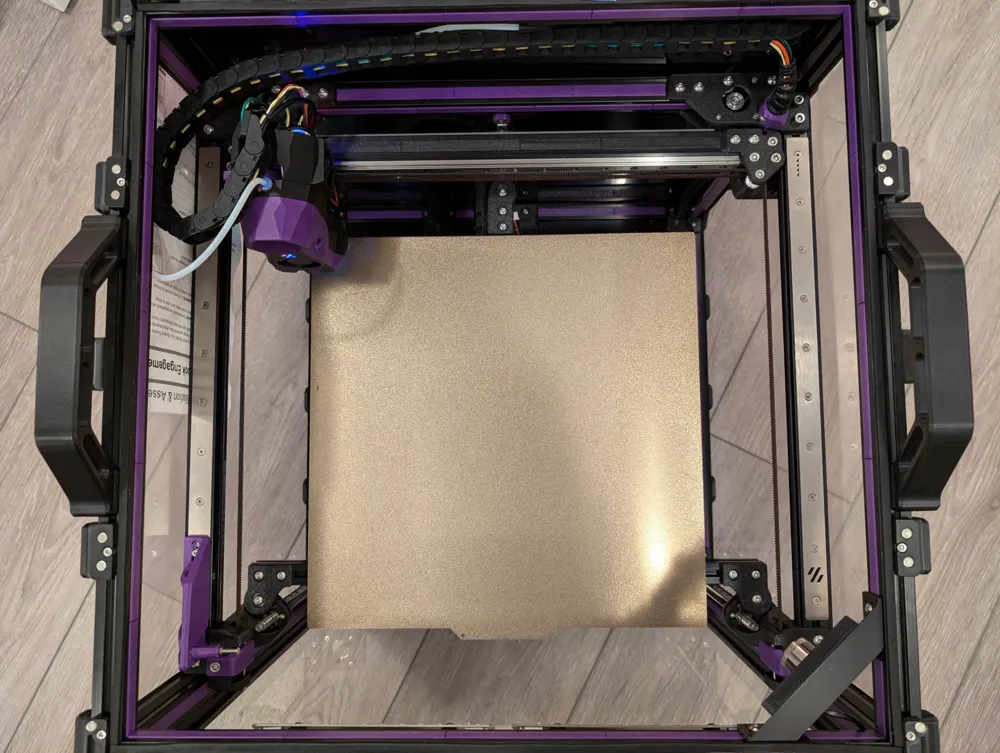
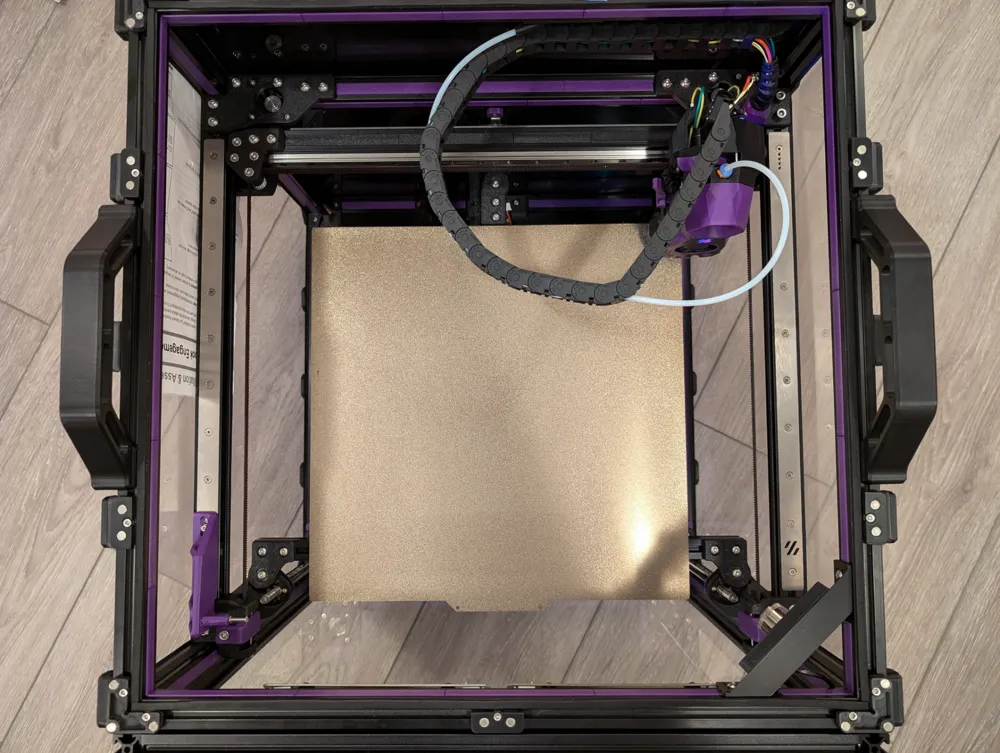
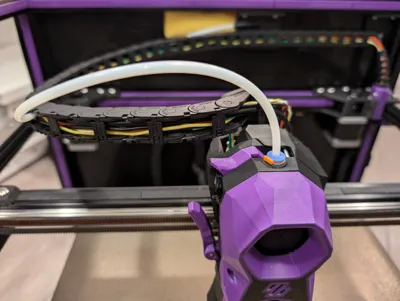
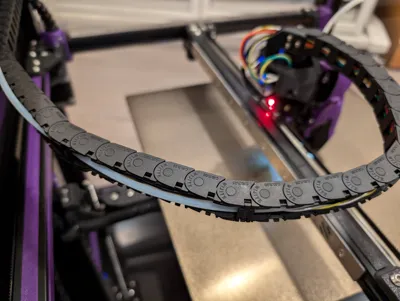
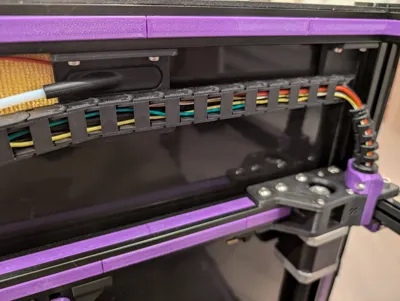
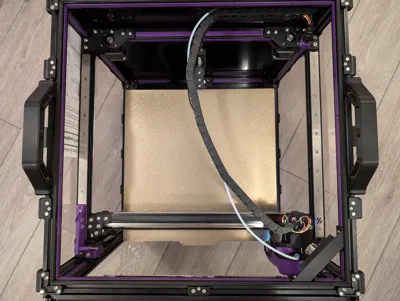
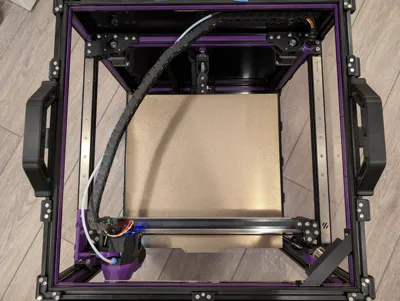
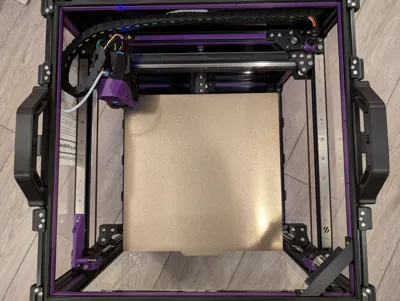
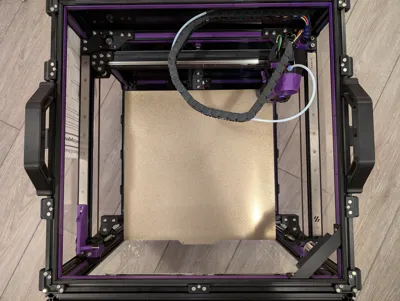
This is a horizontal mounting system for the original Voron Trident cable chain, intended to protect and support the umbilical wiring and PTFE tube, similar to how it's done on the Bambu Lab X/P series printers.
This design is inspired by https://www.printables.com/model/702546-voron-trident-bambulab-cable-chain (I tried this one first and found that the Bambu Lab chain clip didn't attach as securely as I'd like on the toolhead side) and https://www.printables.com/model/536648-horizontal-chain-mount-for-voron-stealthburner-cw2 (nice design, but the positioning of the pivot point at the back left of the CW2 prevents the chain from rotating when the toolhead is driven from front to back along the far left of the printer, due to collision with the side panel).
Features
- Uses parts you probably already have if you converted a Trident that had X and Y cable chains.
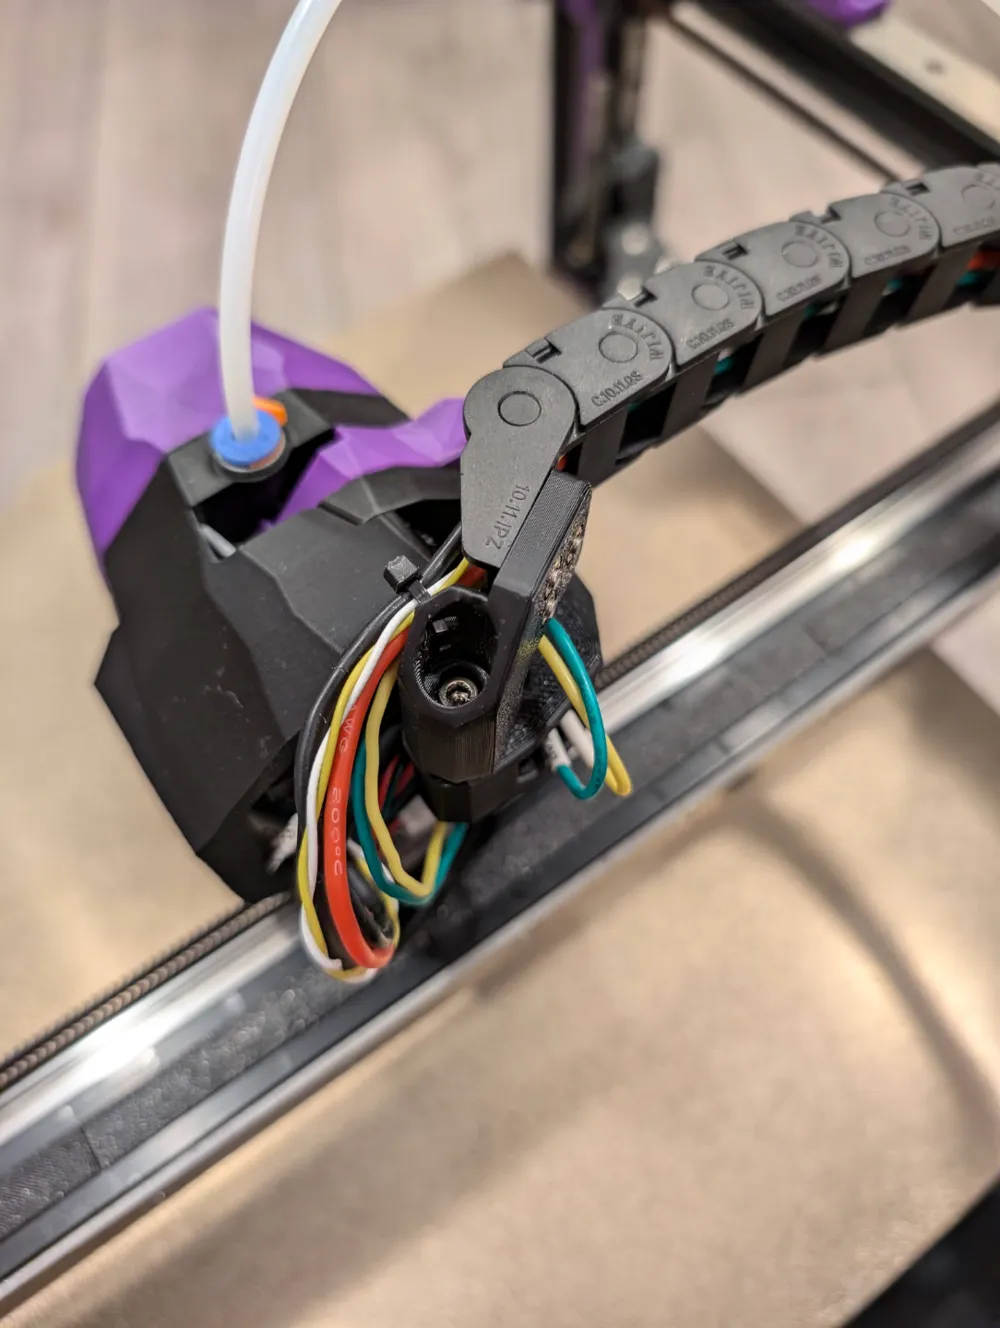
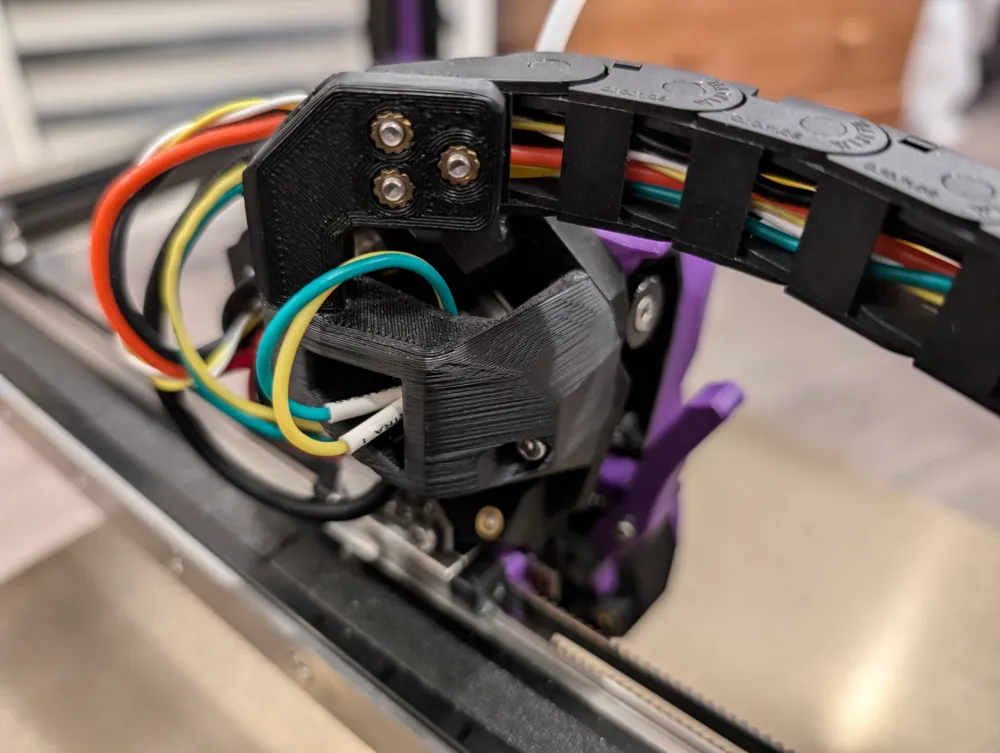
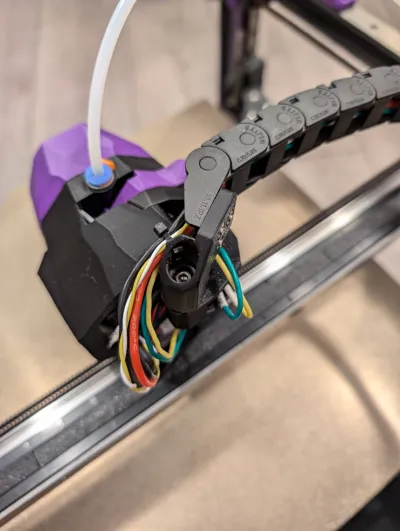
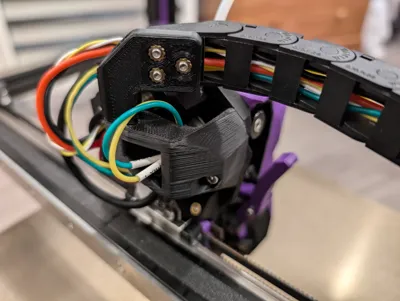
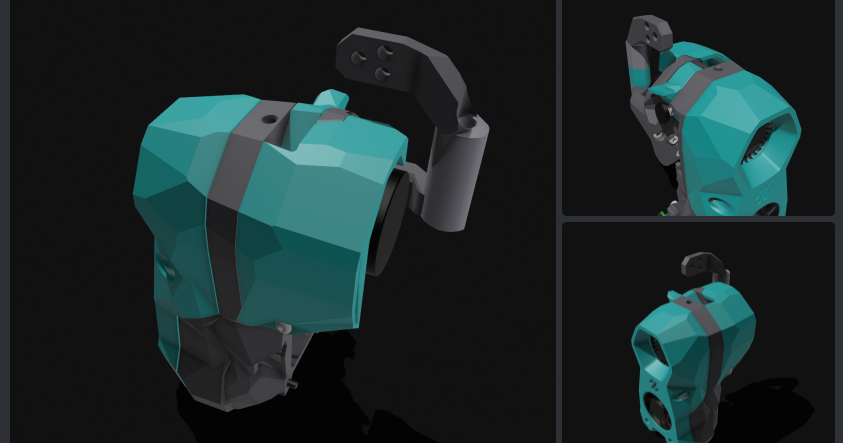
- Toolhead chain mount with a centered pivot point that allows the chain to rotate just above the top of the Stealthburner.
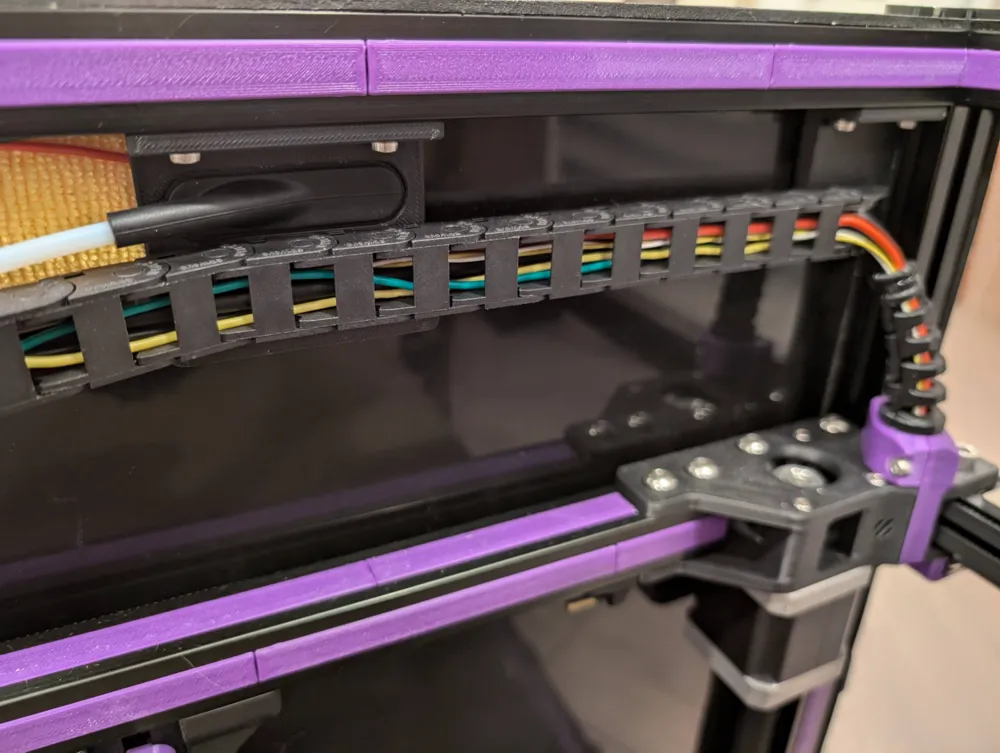
- Frame mount that attaches the chain at the back center of the printer (and allows PTFE to exit here) while also guiding the umbilical wiring to the back right for standard routing (pairs nicely with https://www.printables.com/model/558536-a-drive-mount-for-pug-voron-trident and https://www.printables.com/model/378567-pug-parametric-umbilical-gland).
BOM
- Voron Trident cable chain (38 links, plus 2 end/mounting pieces)
- To save a tiny bit of weight, you can remove some of the clips (see photos)
- 1x M3x25 SHCS (half-threaded is best, but fully threaded also works fine) for attaching toolhead-side pivot to CW2 arm.
- 6x M3x6 FHCS for attaching chain to toolhead and frame components
- 1x M3x20 and 1x M3x8 SHCS (from original CW2 BOM) for mounting the chain anchor arm to the toolhead
- 4x M3x10 SHCS for attaching the two mounting plates to the 2020 extrusion
- 4x M3 hammerhead or roll-in T-nuts also for mounting to the 2020 extrusion
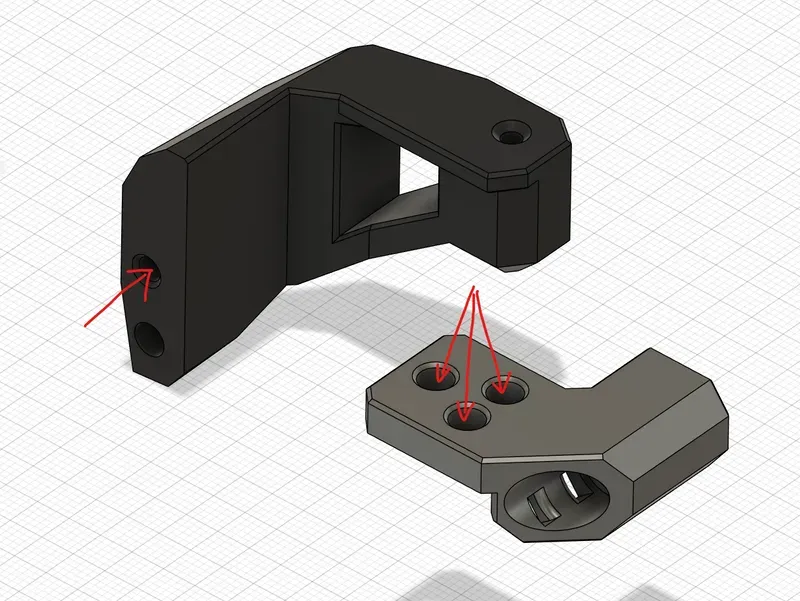
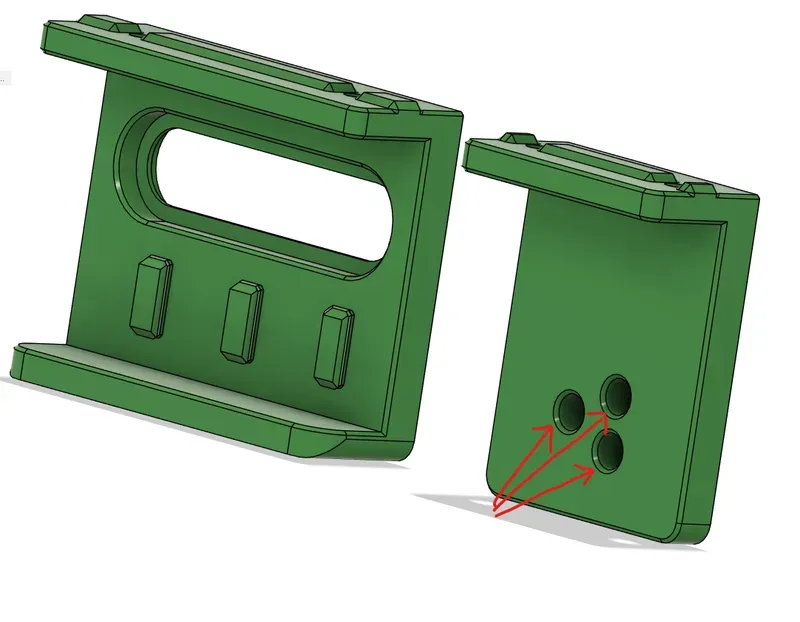
- 7x M3x5x4 heat set inserts
- 1x zip tie
- Modified exhaust housing (see note at the end)
Assembly
Heat Set Inserts
Install heat set inserts in the orientation shown.
Frame-Side Components
Attach the PTFE passthrough and chain anchor to the frame using 2x M3x10 SHCS and 2x M3 T-nuts each. Attach one end of the chain to the chain anchor with 3x M3x6 FHCH into the heat set inserts.
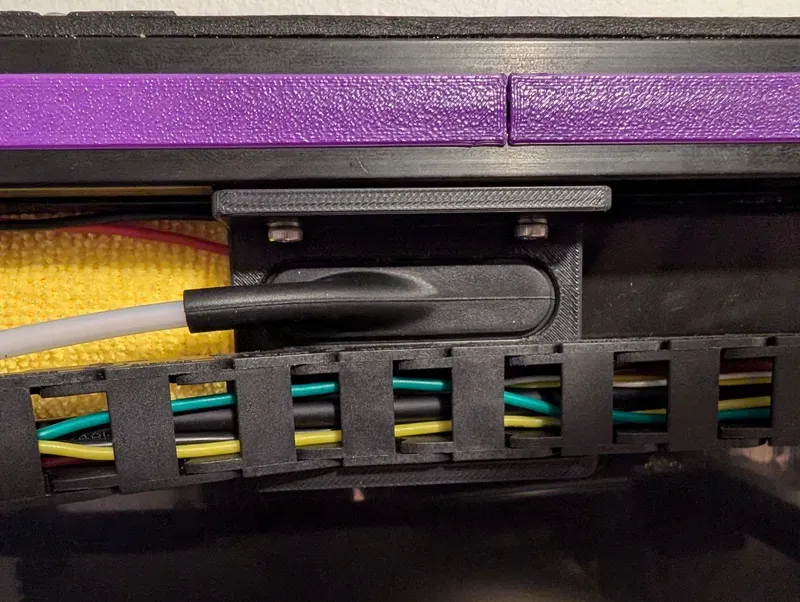
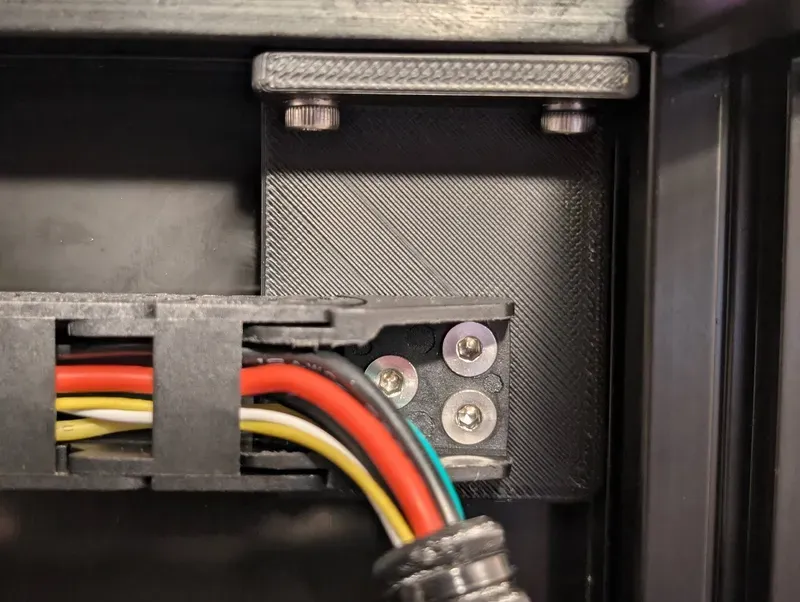
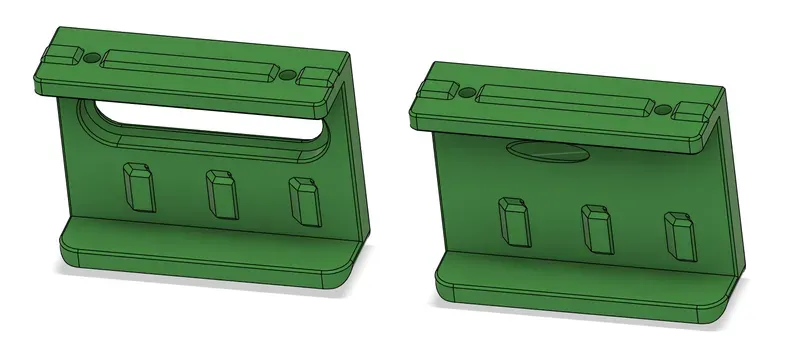
I am routing the PTFE tube at the back through the Bambu Lab rubber PTFE passthrough piece from the X/P-series cable chain kit (because I had originally intended to use the Bambu Lab chain before switching back to the Voron spec chain). I provided the model for this if you happen to have an extra of those rubber pieces and would like to use it, but I am not including it in the BOM because the simple “friction fit” passthrough version of the model works just as well.
Both versions of the passthrough have a shelf that the cable chain rests on and 3 little “fingers” that hook in between the links of the chain, securing it to the back center of the printer frame.
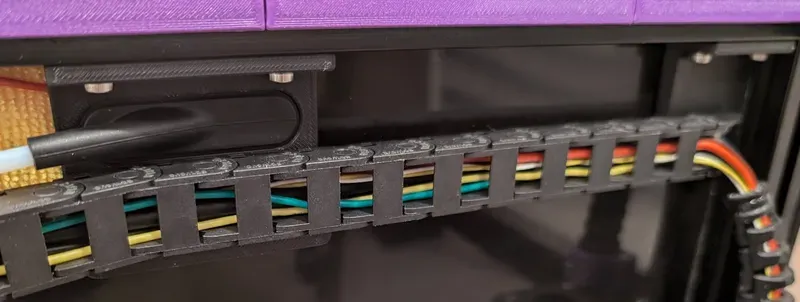
On my Trident 350, there are 10 links of the chain between the back right mounting anchor and the center support/passthrough piece. The remaining 28 links of the chain provide just enough range of motion for full travel to each corner of the bed without stressing the wiring or PTFE tube.
If you prefer to use fewer chain links, the anchor can be mounted directly to the right of the passthrough (near the back center of the frame) instead of in the back right corner.
Toolhead-Side Components
Attach the chain mount arm to the back of the Clockwork 2 (direct replacement for the original arm for attaching the X-axis cable chain) using 1x M3x20 SHCS and 1x M3x8 SHCS.
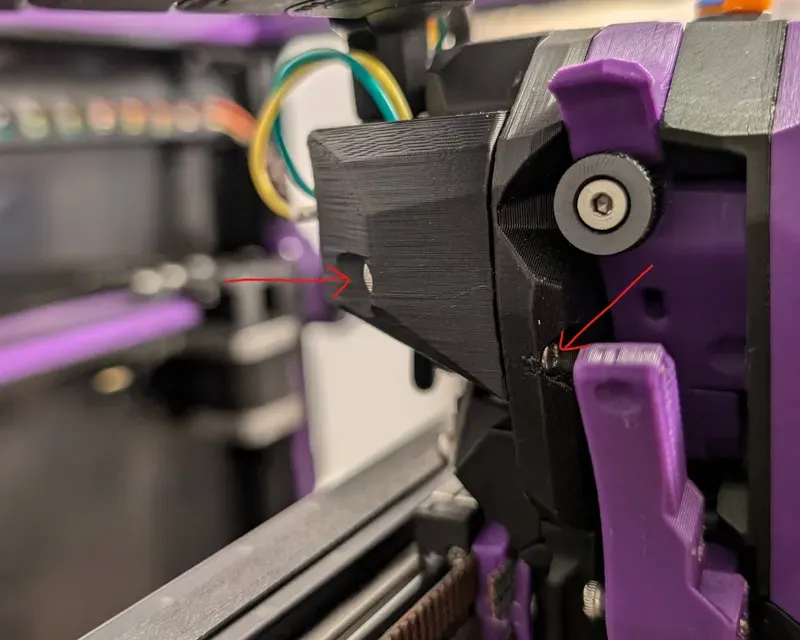
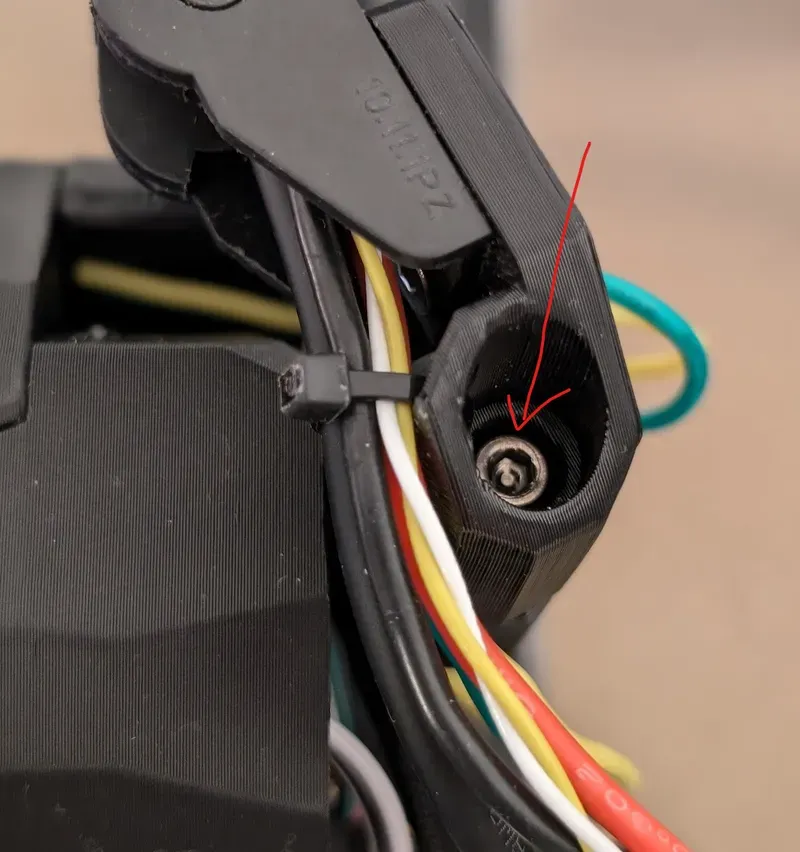
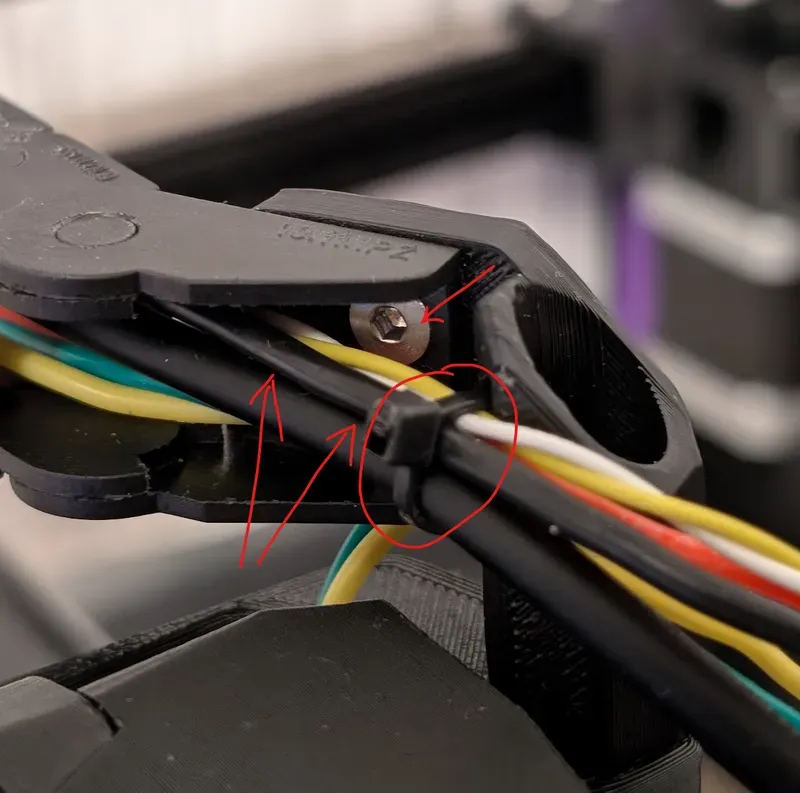
Attach the pivot piece to the mount arm using 1x M3x25 SHCS (threading directly into the plastic of the mount arm). Then secure the chain and wiring with the remaining 3x M3x6 FHCS and zip tie.
Miscellaneous Assembly Notes
The chain will hit the left side-panel as the toolhead moves to the back left corner. This may scratch the panel. I have an idea to design a simple barrier/shield to protect the panel, but in the meantime I just slid a piece of paper in between the panel and the frame.
The PTFE tube can be run part of the way through the cable chain (just 3 clips, spaced 6 links apart, are enough to secure this).
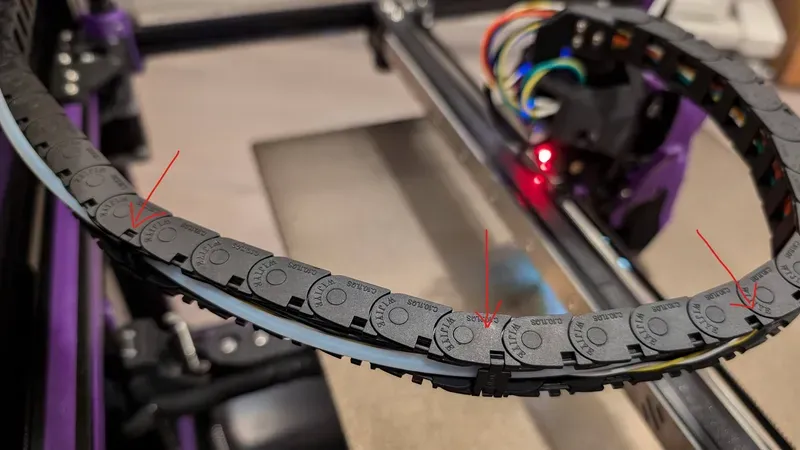
Towards the toolhead, the PTFE needs to run outside of the chain to avoid tight bends.
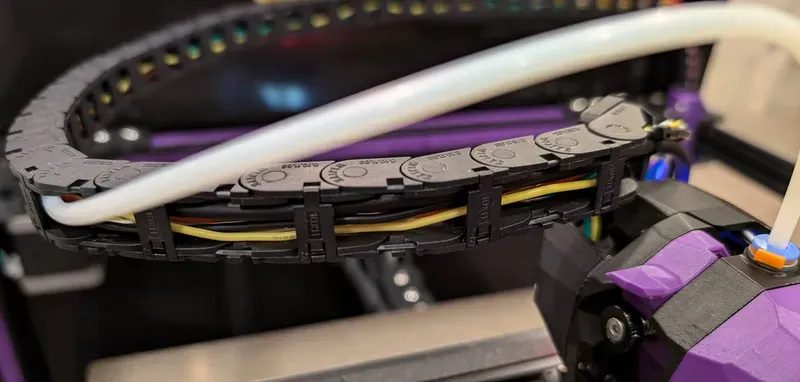
The PTFE tube exits the printer at an angle at the back, intended to route towards the stock on-frame spool holder orientation at the back right. I have also designed a modified panel clip that holds a BTT SFS2 filament sensor at just the right angle to interface with the PTFE exit orientation.
Because of the orientation of exit, a modified exhaust housing is needed. I recommend https://www.printables.com/model/1073729-5015-blower-hepa-exhaust-for-voron-trident-can-cab which was designed by my friend for guaranteed compatibility with this specific horizontal chain mod.
This remix is based on

License



Comment & Rating (3)