Search models, users, collections, and posts

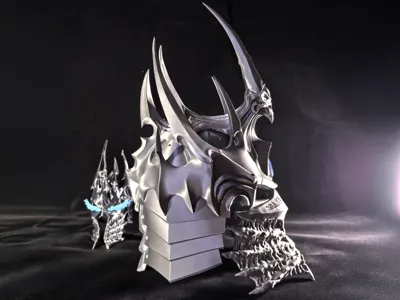
Lich King's Helmet (Life Size) - WOW

Print Profile(2)

All
P1P
H2D
X1E
A1
X1
P1S
H2D Pro
X1 Carbon
H2S
P2S
H2C
X2D
A2L

Be the Lich King_0607
Designer
30.9 h
6 plates
5.0(276)

[Gyroid] 0.2mm layer, 2 walls, 15% infill
[Gyroid] 0.2mm layer, 2 walls, 15% infill
36.7 h
6 plates
4.5(2)

Open in Bambu Studio
Boost
3835
7830
516
736
6.4 k
1.7 k
Released 

Description


----2025.6.7 Optimise the profile, remove all error messages, adjust layout and some supports.

----2025.2.11 QuickFix of the print profile. Increased support at the eye socket to reduce the risk of being knocked over while printing.

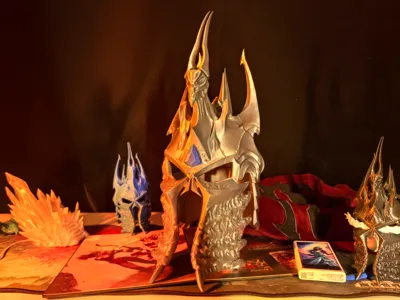
----2024.12.11 Update two version of helmet stand: Arthas version, Sylvanas version

----2024.11.29 QuickFix of the print profile. Increase the infill density of nose and cheekbones area  up to 40% to make sure they don't break.


----2024.11.27 Update

Fine-tuned the slot looseness of the 2 parts on the lower front (disc 2 and disc 3) to be slightly looser than before, making it easier to remove, but you still need to be careful and slow to remove them, the cheekbone area is more fragile. Don't worry if you are printing with an old profile, the old one will still work fine, just slightly tighter. The old and new parts can be used interchangeably.


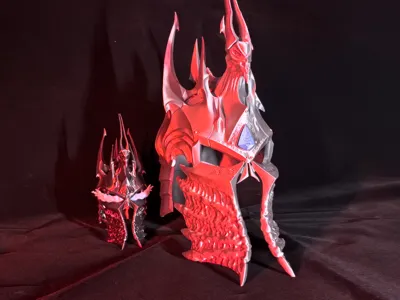
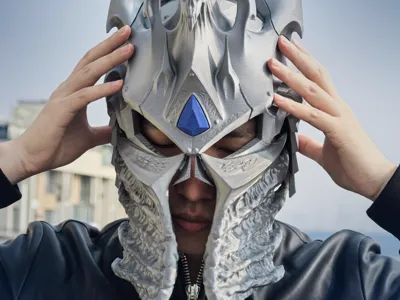
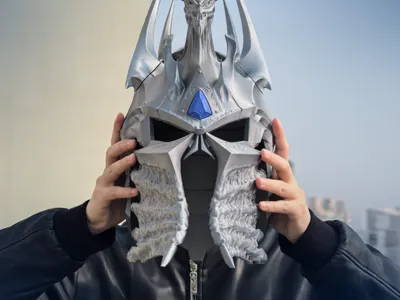
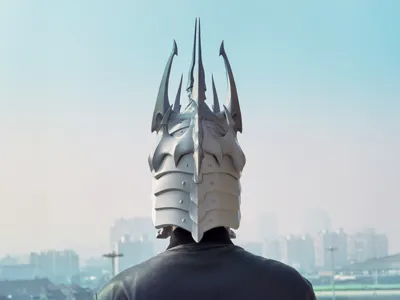
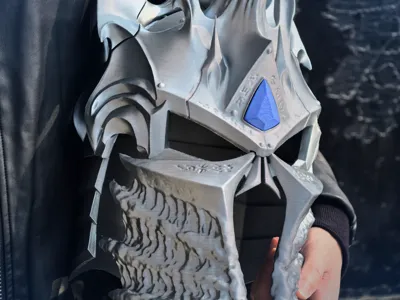
Lich King's Helmet, large size for headwear.

If you need a smaller size ornament, you can print it at this link: Lich King's Helmet (ornament)


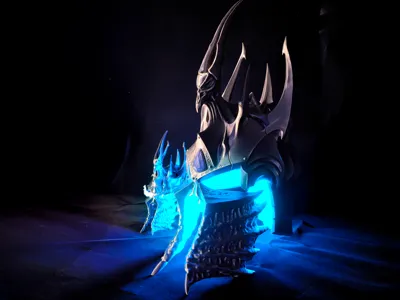
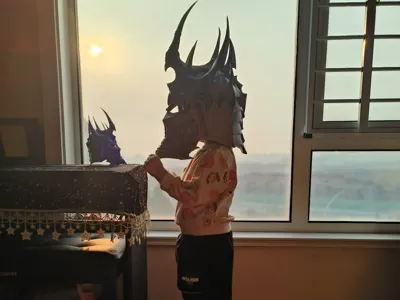
I've reworked almost the entire helmet to optimise it for wear, and the more I look at it, the more I like it, so I've made a little video for it that pays homage to a World of Warcraft Classic.


About Size:

The helmet size is referenced according to the total width on both sides of the ears, with a default width of 182mm, which you can measure on your own according to the measurement positions on the picture. With this wearable width helmet, the print volume has almost reached the limit of Bambu's existing printers, and unfortunately, the A1mini will not be able to print directly due to the small print volume.

There is a long stick in the print profile that can be scaled to your facial dimensions, tick uniform scale and adjust the X axis width of the long stick first, then copy the scale to all parts. Generally, this size is enough for the vast majority of people to wear, and it cannot be scaled up any further due to print volume limitations, so unless your head is much smaller than the preset or you're making it for kids or pet, it's not recommended to change the size.

About Print Profile:

  • All parts are pre-supported and ready to print, almost no support is superfluous. Some of the slots have overhangs, so if you are concerned, you can manually add supports in those areas. In my test, there is a small chance that some slots where the top surface of the inner measurements will be unflat due to the overhang collapsing when using petg, I recommend just cleaning it up with a knife, it only have very little effect on the assembly.
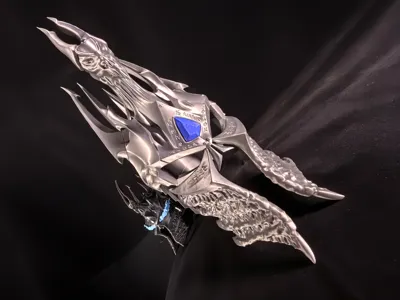
  • There are two ways to place the gems on plate 6, horizontal and vertical, the difference is only the layer pattern, you can choose the one you like.
  • The eye effect parts of the plate 6 are optional and can be left out, cutting about 2 hours off the printing time.

About Assembly:

  • Please see the attached instructions for detailed assembly.
  • Due to the different shrinkage rate of different filaments, you need to decide whether you need glue or not according to the actual situation. in my test, no glue is needed when using pla or petg, the prints are assembled directly and they are very solid, like a real helmet.
  • The gap in assembly has been designed to be hidden as much as possible. After assembly, it should be no more than 1mm.
  • Usually, the whole assembly process does not need to use a lot of force, all the slot ports are optimised for size, no cutting, sanding, please avoid using too much force to cause damage to the parts, it may just be that the angle of the slots are not aligned. There is only one place where you need to use little more force, please see the instruction manual.

This model took a lot of effort to make and test, so if you managed to become the Lich King, please follow me and give me a like, thank you! And I have many more interesting designs to release in the future!


My other works:


Documentation (1)

Assembly Guide (1)
Installation of LichKingHelmet.pdf

Comment & Rating (516)

(0/1000)

Printed on old printer took around 5 days of printing , had hard time assembling the parts the front edited ones were the easiest but with a bit of grinding came out perfect . Decided to go all in so I have primed, sanded and painted it , hope you like it. Amazing model , waiting for the frostmourne !
47
Reply
Di you add some pant wash to this or its directly the filament?
0
Reply
Replying to @irvin_builds :
Ahoy , the filament is standard black and white pla which was filled (gaps) and primed , then painted fully black on it is something like rub n buff applied with sponge or brush for tiny spaces
2
Reply
Looks gnarly! Well done!
2
Reply
Print Profile
Be the Lich King_0607
just amazing, some inpuritys on the overhangs but i could probably have adjusted the supports better. This one is made from Bambu PLA Metal iridium gold and silk blue for the diamond. Thank you very much for sharing!
The profile uploader has replied
17
Reply
Looks so beautiful
(Edited)
3
Reply
Mate how is your printer so perfectly calibrated 😱 not a layer line to be seen!
(Edited)
2
Reply
Replying to @MRMOON1IGHT_ :
Definetly not my credit, but i think that the Bambu metal filament gives very nice results overall. Haven't calibrated or changed anything on the printer except the initial calibration. Added a little bit of support for the print otherwise its all standard
(Edited)
2
Reply
Boosted
Alright normally I don't really engage in the community simply because I am lazy. But!!!! I had to because this was absolutely awesome. I love who ever made this thing from the start <3. Here is my rendition of it. All parts were printed on Bambu labs X1 Carbon. I had 2 of them running at the same time so it really only took me about 24 to print off everything. Contrary to some people wanting me to I did not wood filler/sand it to remove the layer lines. Frankly I don't care all the much it wasn't necessary for me. This was a birthday gift to my stepdad who played the best WoW expansion in its prime. he should be receiving it on the 27th. All parts were printed in PLA white. I used a flat matte black primer spray paint first and coating everything. I actually ended up buying an air brush to attempt the coloring because no way could I paint that by hand. I gotta say I did fairly well for my first time using an air brush. I did use extra supports in some areas simply because I am cautious, and I have plenty of filament to spare. The one mistake/ Critique I found and made was apparently in my mind I thought the runes glowed blue, so I painted them blue. SMH looking back at the original it does not, but I did want to point out that the runes are not really easy to see or read the shape of it. Even with painting it was quite difficult. I wish it was more pronounce in the carving versus it being rounded off. I will likely print another one of these and was thinking since it does already show the outline of it, I will take the tip of a soldering iron and just make it sharper. Truthfully it is not that big of a deal, but I did want to at least bring it up and mention it. Lastly the video you made was stellar! I shipped this to my stepdad with specific instructions before opening to scan the QR code that is linked to that video. 10/10 amazing all around love the work! @sarwtin
(Edited)
The designer has replied
6
Reply
Thank you for such a long message! Your stepfather must be very impressed, even I can feel the deep love :)
0
Reply
Thank you here too, your work is great! xD
0
Reply
Boosted
Replying to @sarwtin :
came back to this post by sheer luck and I'm glad you saw it!
0
Reply
Impressive!!! As a fan of the Lich King, I loved it and it's incredibly well-done!!! A tad difficult assembling the pieces, but putty fixes that. I painted it with silver spray and need to add weathering details. I uploaded a video to my Instagram mentioning you @creativation3d Greetings!!!
Show original
6
Reply
which filament u are using for the diamond ?
0
Reply
Replying to @Shintogod :
translucent blue resin
0
Reply
Print Profile
Be the Lich King_0607
absolutely flawless print using the app exclusively! bravo!!
profile
8
Reply
Magnificent model, supports very easy to remove The finish is perfect I added LEDs inside and it gives a lovely effect Many thanks
Show original
5
Reply
Boosted
what filament did you use? or you painted it too?
1
Reply
Boosted
Replying to @BGeek. :
Probably better to paint it, you can add wear to it. You can also do some post processing and fix any layer line issues.
0
Reply
Boosted
May I ask what kind of stand you used, it appears to sit on one? Also, can you share what kind of LED's you used?
2
Reply
🫡✅️
The designer has replied
6
Reply
🫡Beautiful
0
Reply
Fantastic file!
1
Reply
What paint did you use? this is the color I am going for @SBCreations
0
Reply
Replying to @Mooseferatu :
folkart Metallic Charcoal Black and dry brush of metallic silver.
0
Reply
Super , can you share the wall stand ?
0
Reply
Fantastic print and super easy!
5
Reply
Printed on the P1S and turned out superbly :-) I still need to print the crystal and will then varnish the jewel
The designer has replied
Show original
2
Reply
This is a good Lich King, he's smiling.
2
Reply
Replying to @sarwtin :
Yes exactly :-D
Show original
0
Reply
man that helm suits u so well !!! hahahah amazing print
0
Reply

License

This user content is licensed under a Standard Digital File License.

You shall not share, sub-license, sell, rent, host, transfer, or distribute in any way the digital or 3D printed versions of this object, nor any other derivative work of this object in its digital or physical format (including - but not limited to - remixes of this object, and hosting on other digital platforms). The objects may not be used without permission in any way whatsoever in which you charge money, or collect fees.