Search models, users, collections, and posts
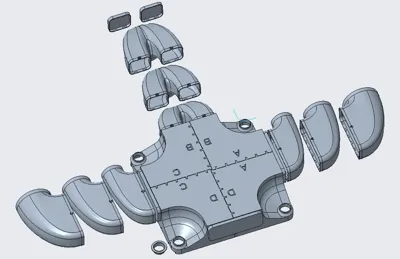
352 Air Purifier Retrofit Fresh Air Kit
IP Report


Print Profile(2)

Universal frame, strongly recommended to print a tolerance test sample first, 0.2mm layer, 2 walls, 15% infill
Designer
16.7 h
5 plates
Air vent connectors and covers, multiple options, 0.2mm layer, 2 walls, 15% infill
Designer
33.9 h
11 plates
Open in Bambu Studio
Boost
2
1
0
0
0
0
Released
Description
Content has been automatically translated.
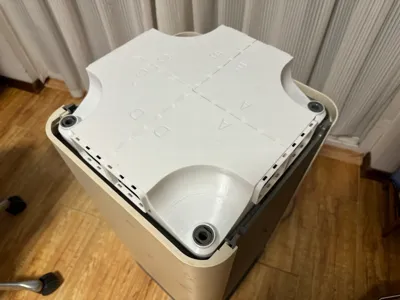
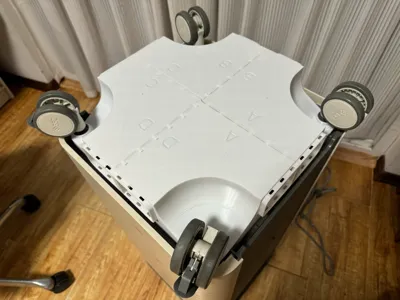
352 X80 Air Purifier Fresh Air Conversion Kit
- Transform your unused 352 X80 air purifier into a fresh air system
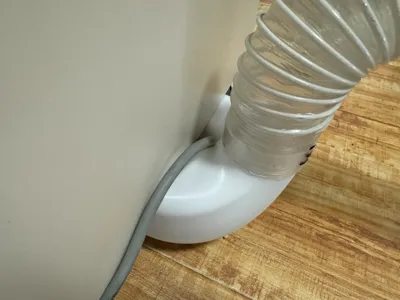
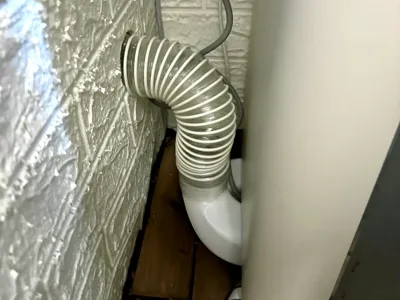
- The frame is versatile, offering three inlet positions—left, right, and rear—with various diameters (Φ60, Φ80, Φ100) available. Non-inlet positions are sealed with cover plates

Important Considerations:
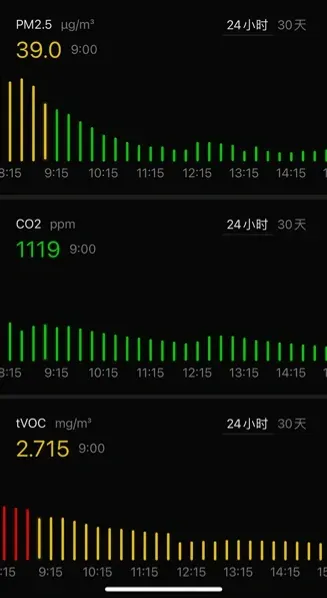
- The original air purifier utilizes four-sided air intake. Due to spatial constraints, the intake area is reduced, increasing air resistance. Airflow will decrease to varying degrees at the same fan speed. Ventilation efficiency cannot match a dedicated fresh air system; avoid unrealistic expectations regarding ventilation speed. Low-speed operation is primarily for maintaining air quality
- This modification is suitable for ventilation in small rooms of approximately 15m2, delivering acceptable results
- Your ductwork inner diameter should exceed 59mm, 79mm, or 99mm for successful installation
Printing Instructions:
- PETG filament is recommended. Depending on your chosen inlet, approximately 500-700g of filament will be required
To prevent filament waste, we strongly recommend printing a tolerance test sample before proceeding. Ensure the test sample fits smoothly into the wheel socket with sufficient damping to prevent slippage
Installation Steps:


License
This user content is licensed under a Standard Digital File License.
You shall not share, sub-license, sell, rent, host, transfer, or distribute in any way the digital or 3D printed versions of this object, nor any other derivative work of this object in its digital or physical format (including - but not limited to - remixes of this object, and hosting on other digital platforms). The objects may not be used without permission in any way whatsoever in which you charge money, or collect fees.
Comment & Rating (0)