Search models, users, collections, and posts

BINO3D ROBOTIC KIT - ARDUINO COMPATIBLE

Print Profile(2)

All
A1
X1
P1S
H2D
H2S
X1E
H2C
P1P
P2S
X2D
H2D Pro
X1 Carbon
A2L
A1 mini

BINO3D PROFILE 0.2mm layer, 2 walls, 15% infill
Designer
15.6 h
9 plates
4.8(12)

A1 MINI BINO3D 0.2mm layer, 2 walls, 15% infill
Designer
13.9 h
10 plates

Open in Bambu Studio
Boost
346
732
95
48
689
193
Released 

Bill of Materials

Maker's Supply Kits and Parts
Select all
9g Continuous Rotation Digital Servo-360° (1PCS) - PG002
9g Positional Digital Servo-180° (1PCS) - PG001
M2 Carbon Steel Hex Nut (20PCS) - AB003
M2x16 SHCS Machine Screw (20PCS) - AA025
M4x30 BHCS Machine Screw (5PCS) - AA070
BT2x10 SHCS Self Tapping Screw (20PCS) - AA192
M4 Carbon Steel Hex Nut (10PCS) - AB028
Bambu Filaments
Select all
Light Gray (10104) / Refill / 1kg
Orange (10300) / Refill / 1kg
Black (10101) / Refill / 1kg
Yellow (10400) / Refill / 1kg
List other parts
  • LED 5mm x 2:
  • 300 ohms resistor x 2:
  • Jumpers x 1:
  • TT DC Motors (Yellow Motors 1:48) x 2:
  • Two Motors mini H-Bridge (L298N) x 1:
  • HC-SR04 sensor x 1:
  • 2 x 18650 Battery and holder x 1:
  • Arduino Nano x 1:
  • Standard Nano Shield x 1:
  • KC011-101 mini switch x 1:
  • Bluetooth HC-05 x 1:
  • 470uF 16v capacitor x 1:

Description

Boost Me (for free)

Did you like it? Give me a boost!

Membership

Thanks for exploring my models! If you’d like to produce and sell my prints, consider joining to support my work. Click to learn more about licensing options!

Join

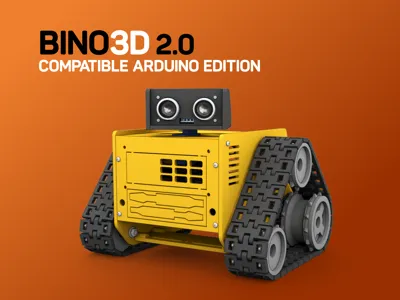
BINO3D 2.0 - ARDUINO EDITION


● Exclusive design
● Compatible with Arduino
● Ideal for children to develop mechanical and robotics skills
● Easy to build and assemble
● Screw fixing system
● Uses two 360 degree servos or TT DC motors
● 1x Standard 9g servo for head


DESCRIPTION

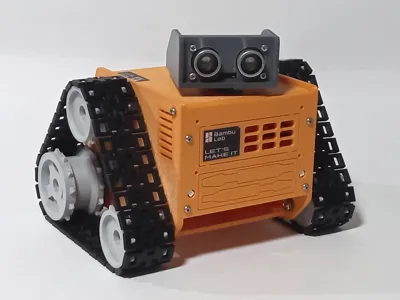
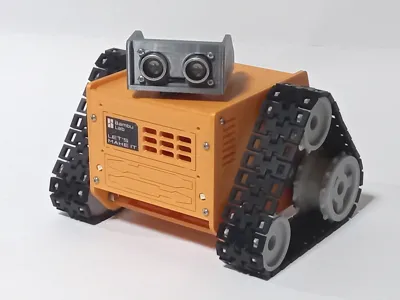
This new version of Bino3D can be programmed and controlled using Arduino. It comes with manuals and wiring diagrams. As a bonus, you will also receive the robotics eBook and video lessons for the recommended block-based programming app, Nairda.


Update 2.0 includes:

 ● Compatibility with 360° servos  and yellow TT DC motors for track drive

 ● New body assembly to improve 3D print finish

 ● Wheel redesign to make assembly easier

 ● New head fixation


BONUS: EBOOK FROM ZERO TO ROBOT


COMPONENTS NEEDED FOR ASSEMBLY 
● 2 x TT DC Motors (Yellow Motors 1:48) or 2 x 9g 360 degree SERVO
● 1 x Two Motors mini H-Bridge
● 1 x HC-SR04 sensor
● 1 Servos 9g
● 2 x 18650 Battery holder
● Arduino Nano + Standard Shield
● Jumpers
● KC011-101 mini switch
● Bluetooth HC-05

● 470uF 16v capacitor


Membership

Thanks for exploring my models! If you’d like to produce and sell prints, consider joining to support my work. Click to learn more about licensing options!

Join

Documentation (3)

Assembly Guide (1)
BINO3D ARDUINO GUIDE.pdf
Other Files (2)
EBOOK FROM ZERO TO ROBOT MAKERWORLD.pdf
MG90 SERVO MODIFICATION TUTORIAL.pdf

Comment & Rating (95)

(0/1000)

When I got to connecting the Arduino to my laptop I selected Nano but the port button is grayed out. What am I doing wrong? Thanks
The designer has replied
0
Reply
Hi, Arduino nano needs to install CH340 driver for Windows, did you do this?
0
Reply
Replying to @mauricioduarte :
I should have mentioned my laptop can't see the nano at all. I plugged it into the USB and turned on the robot. Maybe try the barrel jack plug? Please forgive me, 1st time with Arduino. Thanks
(Edited)
0
Reply
Replying to @mauricioduarte :
I still can't get my laptop to recognize the Nano. I bought this one. https://www.amazon.com/dp/B0097AU5OU?ref_=ppx_hzsearch_conn_dt_b_fed_asin_title_2 I don't see CH340 anywhere on the nano, as per the pic. My research shows CH 340 should be stamped on there. Any ideas? Windows 11, I understand there are issues. Thanks, I appreciate your help.
0
Reply
Print Profile
BINO3D PROFILE 0.2mm layer, 2 walls, 15% infill
everything is cool except the track tensioner. slips if not super tight, but then the wheel cannot turn
The profile uploader has replied
0
Reply
Hello, Something must be wrong there, it works perfectly as you can see in the video. Send me more photos of it with and without the tracks. Thanks.
0
Reply
The tracks cannot be too tense or too loose.
0
Reply
Print Profile
BINO3D PROFILE 0.2mm layer, 2 walls, 15% infill
super robot. I made it an educational project with secondary school students. I took the liberty of raising the shell to accommodate all the electronics, Arduino UNO, breadboard, buck step down, HM-10 BLE and H-Bridge L9110 for the motors which run on 8V, the rest on 5V. Thank you for the project!
(Edited)
The profile uploader has replied
Show original
2
Reply
Thanks
0
Reply
Greatt!
The designer has replied
1
Reply
Thanks
0
Reply
Interested in trying this, but confused on "standard shield" for arduino nano. Google shows me many, many options, but they don't look like the picture. Maybe a link, or some help in specifying?
The designer has replied
0
Reply
Hi, this shield
0
Reply
Replying to @mauricioduarte :
Thank you! Next thing -- don't see where code is posted. Thanks.
0
Reply
Replying to @user_1935668128 :
See the bonus e-book, there is a control app
0
Reply
I have problem for uploading firmware of nairda. when I use Arduino Nano in Arduino IDE, I get an fatal error : fatal error: esp32-hal-ledc.h: No such file or directory #include "esp32-hal-ledc.h" may be help me
The designer has replied
0
Reply
Hi, I'll check with the programmer.
0
Reply
He said he's going to look into that error. He asked you to update your Arduino IDE if it's not already up to date.
0
Reply
Replying to @mauricioduarte :
Hi! I am using the latest version of the Arduino IDE (v2.3.2) and I believe I’ve found the solution.The issue was caused by the 'esp32.servo' folder/library. It was trying to force the code to use ESP32-specific files (like esp32-hal-ledc.h) which are not compatible with the Arduino Nano. After I removed/cut that folder from the project, the fatal error disappeared and everything compiled perfectly
0
Reply
can i have the code file
The designer has replied
0
Reply
See the attach E-BOOK.
0
Reply
Replying to @mauricioduarte :
I recommend an App block programming. If you want a Arduino IDE code, look here:
0
Reply
In the assembly pics there is a piece called "optional part for line sensors." I did not see that in the list of components. Can you please clarify? Thanks
The designer has replied
0
Reply
Hi, It's a support underneath for attaching reflection sensors like the ones in the photo. This allows the robot to be programmed to follow a line on the ground.
0
Reply
This sensor
0
Reply
Replying to @mauricioduarte :
Thanks!
0
Reply
Another question for you, and thanks for answring the last one. Bear with me, I'm a beginner with Arduino. In the manual it shows connecting the battery pack to the shield with the 2 wires. Do these need to be soldered on, or is there a connector? Great project, thanks again!
The designer has replied
0
Reply
Pins need to be soldered
(Edited)
0
Reply
Replying to @mauricioduarte :
See the E-book
1
Reply
hi! I was wondering what the dimensions of the on/off switch are or maybe a link to the right one! thank you
The designer has replied
0
Reply
This swtch. Thanks
0
Reply
thank you!
0
Reply

License

If you want to use this model commercially, please join my membership.
Join Now
This user content is licensed under a Standard Digital File License.

You shall not share, sub-license, sell, rent, host, transfer, or distribute in any way the digital or 3D printed versions of this object, nor any other derivative work of this object in its digital or physical format (including - but not limited to - remixes of this object, and hosting on other digital platforms). The objects may not be used without permission in any way whatsoever in which you charge money, or collect fees.