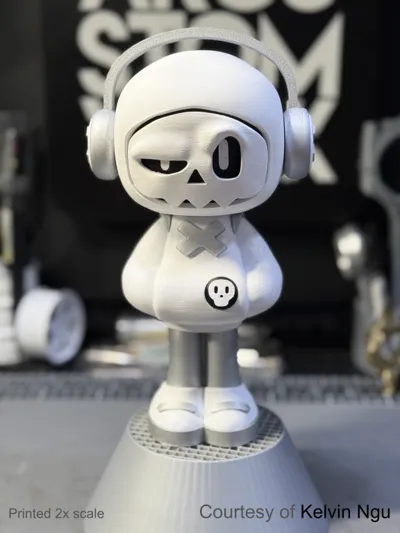
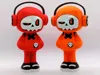
Mr Bone (Series 1) collectible art toy


Print Profile(4)


Description
⚠️If you want to see all my models (i.e. middle fingers), turn on nsfw in your account settings under preferences⚠️
Hey everyone. This a total remake of my Mr Bone (series 1) art toy so no painting and no AMS is required.
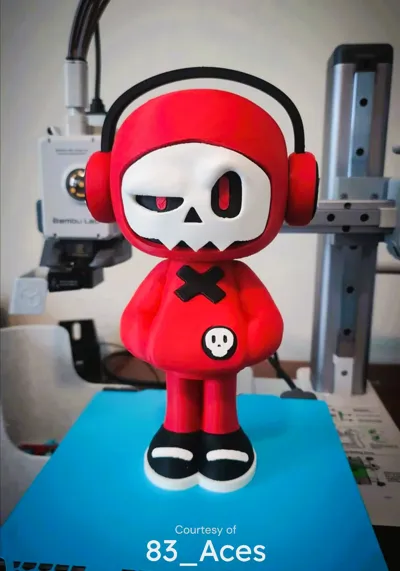
Happy Printing and I can't wait to see what colour combos you come up with.
NB: Detailed building instructions are below.
Printing and building tips
- Matt PLA is highly recommended as it is softer than basic PLA so it is easier to remove supports and trim/clean up the small parts. Even for the larger part, the parts under the supports turn out much better with matt PLA and do not suffer from the white scarring that often occurs at the support interface for basic PLA. For larger parts basic PLA is fine, but I highly recommend matt PLA for at least the white parts.
- You will need the following tools:
- Glue (super glue works and doesn't seem to set too quickly allowing part to be placed and aligned properly). I highly recommend have a fine nozzle to be able to apply and spread small amounts of glue. If you don't have this, then a paper clip works well. i.e. squeeze some glue onto the end of the clip. This allows you to wipe off the excess and apply thin amounts to the model with the tip of the paper clip to simulate a small nozzle.
- A model knife (since parts are small they will need to be trimmed to look the best and fit perfectly). Also useful for gently prying small parts away from the supports.
- Needle nosed pliers to remove larger supports (the finer the better). Note that with matt PLA I was able to remove the supports by hand, whereas for basic PLA it required pliers to remove supports from the body.
Building Instructions
Print all the plates first (the backpack is in a separate file and can be printed at a later stage). For some of the small parts, the orientation is important so pay attention to how you store the parts once removed from the plate so the orientation is respected. This will make it easier to follow the build instructions. For builds like this, I like to have all the parts arranged nicely in a little box.

Building the body and legs
Glue the shoe sole to the main part of the shoe.

Glue the leg part to the shoe.

Grab the body and remove the supports and then glue the body to the legs. Turn it upside down to get the best view to ensure the legs are centred nicely.

Carefully remove the shoe laces from the supports and trim to clean up shape. Glue to the shoe.

Carefully remove shoe crosses from supports (pay attention to the orientation on the plate. This is how the will be applied to the shoe. Use the model knife to carefully pry them from the supports. Doing this from the top works best. Avoid doing this from the side as you can crack the part along the layer lines. Glue to the back of the shoe.

- Carefully remove chest cross from supports. Twisting a model knife gently between the model and support from the top works best. Trim edges a bit to neaten it up (you may need to trim the back edges a bit to get it to fit better) and then glue to the chest. It only fits in one direction so alignment is easy.
- Glue the badge base to the body. It fits in any orientation.

- Carefully remove badge skull from the supports (pry from top as usual) and trim and neaten to your own satisfaction. Glue to the badge.
Building the head
- Remove supports from the head and trim to your satisfaction (it will be cleaner if printed on a smooth plate)
- Remove the face plate from supports and clean up the bottom edge to your satisfaction.
Remove the eyes from supports and trim of raft supports to ensure it is flat. (Pay attention to orientation. Note that there is a small raised surface on the eye and this should be at the top). Glue eyes to the face plate.

Place the head plate in the head but don't glue straight away. The face plate can be moved around so a test alignment is required to ensure the eyes line up nicely with the skull mask. So place the skull mask on top to get a feel for where the face plate should be positioned for best eye alignment. Take the face plate out and put a dollop of glue on the head and then stick the face plate back again. While the glue hasn't set place the skull mask on top again and adjust the face place position until you are once again happy with the alignment. Once dry, glue the mask on top.

Building the headphones
For the headphone, all parts work on either side so you don't need to worry about which part goes on which side.
- Remove the supports from the round headphone base and clean up the hole where to headphone band will be inserted.
Glue the caps on the base noting that the crosses are horizontal. Press fit the white crosses in the caps (not that if you print on a textured base the press fit works when the textured surface is on the outside. If you want to show the smooth side instead, then you will need to do some slight trimming for it to fit)

- When fitting the headphone band, I recommend inserting the band without gluing at first and then slide it on the head to get a feeling of the correct alignment. Even when you have placed the glue I recommend placing it on the head while the glue dries so you can make minor adjustments for a perfect fit. NB: If you use basic PLA you may need to trim the end of the band slightly for it to fit. Matt PLA is soft enough for it to be pushed in).
Once headphones are done glue into position on the head.


Final Steps
The final step (before building the backpack) is to glue the head on to the body. It sits flat on the neck, but pay attention to the side profile to make sure it isn't too far forward or back. This position changes the mood of the character so you can make him more chilled by moving the head more forward and more bold and confident by moving it further back.

Congratulations! If you made it this far then you now have a cool looking Mr Bone character. I think he looks pretty cool even without the backpack, but keep going if you want to the add the backpack.

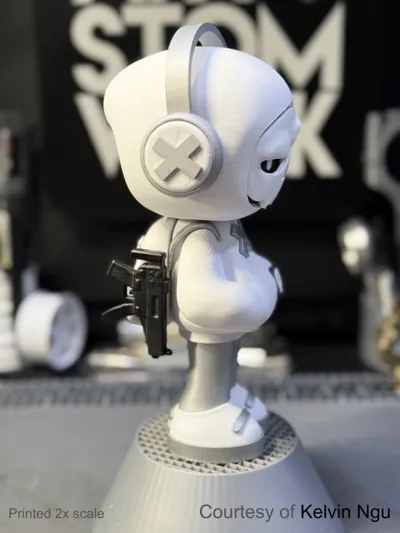
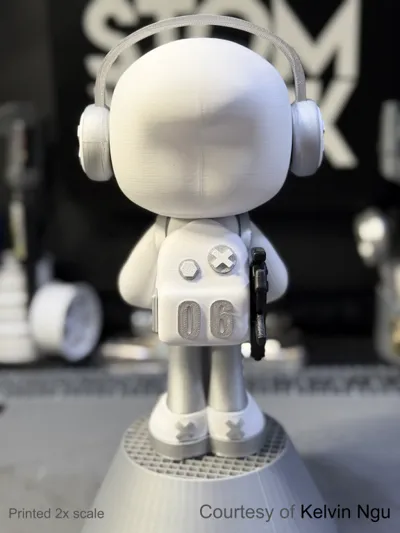
Building the backpack
Open the specific profile for the backpack and print out all the plates. It isn't required to remember any specific orientation of the parts based on how they are placed on the plates.
- Remove the supports from the pocket holes of the backpack. If you don't have fine needle nose pliers, the end of a paper clip will work to pry them loose.
- Press fit the side pockets in to the main backpack part. For correct orientation, the pocket pin should be at the top.
Glue the numbers on to the backpack. I recommend placing both numbers on for a test alignment before gluing so you know where they both need to be in order to be centred. Once happy with the alignment then glue them down.

- Glue the badges on the backpack
Then glue the badge emblems onto the badges. Feel free to put them at any angle you like.

Now glue the backpack on to the body.
Ensure it is centred vertically and at approximately the same height as in the photo. This ensures that the straps can touch so the actually look attached to the backpack.

Placing the straps is the trickiest part. I recommend testing how the need to be aligned so that the straps touch the backpack and sit snug and flat on the shoulders. Once confident with the required alignment, the place a dab of glue on the underside of the strap. It will flow down to the pointy tip which is desired. Place and hold until the glue dries ensuring it is aligned at the front and so the back is touching the backpack. First and foremost, ensure that it is aligned nicely at the front is this is the most viewed angle. The strap should be roughly horizontal over the shoulders. Once dry, glue the back of the strap to the backpack. Then repeat on the other side.


Double Congratulations!!!! You now have a full complete Mr Bone character. It was a bit of an epic to make this model printable without an AMS, so I hope you enjoy the finished result as much as a I do.
License
You shall not share, sub-license, sell, rent, host, transfer, or distribute in any way the digital or 3D printed versions of this object, nor any other derivative work of this object in its digital or physical format (including - but not limited to - remixes of this object, and hosting on other digital platforms). The objects may not be used without permission in any way whatsoever in which you charge money, or collect fees.
Comment & Rating (396)