Search models, users, collections, and posts

Apex Evo Walksnail Moonlight Camera Mounts

Print Profile(1)

All
X1 Carbon
P1S
P1P
X1
X1E
A1
A1 mini
H2D
H2D Pro
H2S
P2S
H2C
X2D
A2L

0.2mm layer, 2 walls, 15% infill
Designer
1.2 h
1 plate
5.0(1)

Open in Bambu Studio
Boost
15
18
14
4
54
15
Released 

Description

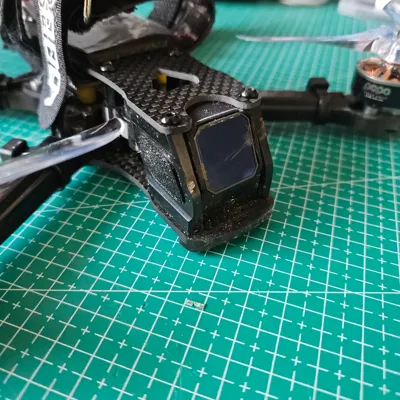
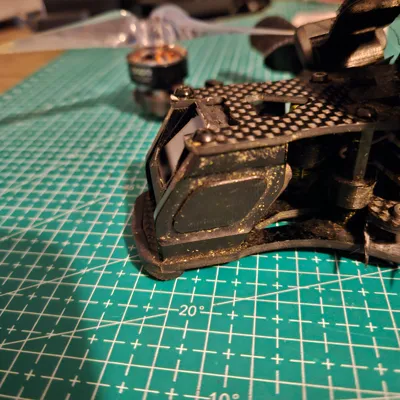
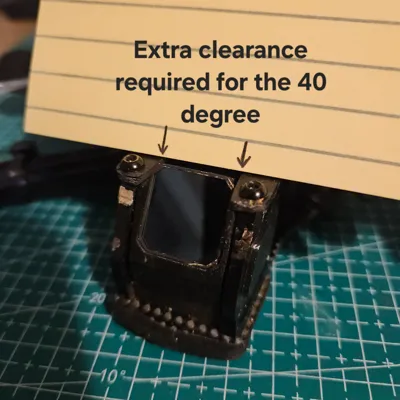
Walksnail Moonlight kit camera mounts for the 5" Apex Evo frame. Holds the camera with filter in a couple different uptilts. The original 30 degree sits flush(ish) with the aluminum nose pieces. The 40 degree will require you to file/cut some clearance into the top plate in order for the lens to fit, and the camera body will likely rest tightly on the bottom plate.


Recommended to print on its left or right side in TPU with supports of your choice, I used tree.

Comment & Rating (14)

(0/1000)

Really cool design! At 100% infill its surprisingly sturdy. I tried to modify it myself to make a 25 degree version, but it's not as clean as your original. If you get a chance, could you upload a 25 and 40 degree version also?
The designer has replied
0
Reply
Hello! I uploaded a 25 degree and 40 degree for you. I actually personally use the 40 degree, but please recognize that you will need to cut/file some clearance into your top plate in order for everything to fit. With such significant tilt AND the filter, it's all jammed in there pretty tight and not exactly "soft-mounted" any more.
(Edited)
1
Reply
Replying to @chom :
Thank you, I have been fiddling with the design a little bit, but I will try the new ones!
1
Reply
Replying to @derekwalters56 :
Nice work! If you're able to use a CAD program, here's how I make my camera mounts: 1) Create an accurate 3D model of your FPV camera (Walksnail for mine). You can save this and use it for every future mount you make for that size camera once you've got a good model. 2) Fine-tune the dimensions of the "ears" that will hold the camera mount into the aluminum nose pieces of whatever frame you've got. 3) Make the main body of the mount and combine those "ears" on the sides so you have one solid model that sits securely in the shape of the frame. 4) Use the camera model as a cutting tool in the center of the mount at whatever depth/angle you want. It's easy at that point to mess around with small adjustments and different up-tilt angles!
0
Reply
fantastic print, takes care of multiple issues all in one 👍👍 thanks for the upload!!
The designer has replied
0
Reply
Very cool, thanks for the comment!
0
Reply
Works well
The designer has replied
0
Reply
Happy flying!
0
Reply
Print Profile
0.2mm layer, 2 walls, 15% infill
Perfect fit, good TPU settings
The profile uploader has replied
0
Reply
Thank you for the rating!
0
Reply
Can someone help for a Walksnail Avatar HD camera?
0
Reply
No more

License

This user content is licensed under a Standard Digital File License.

You shall not share, sub-license, sell, rent, host, transfer, or distribute in any way the digital or 3D printed versions of this object, nor any other derivative work of this object in its digital or physical format (including - but not limited to - remixes of this object, and hosting on other digital platforms). The objects may not be used without permission in any way whatsoever in which you charge money, or collect fees.