Search models, users, collections, and posts

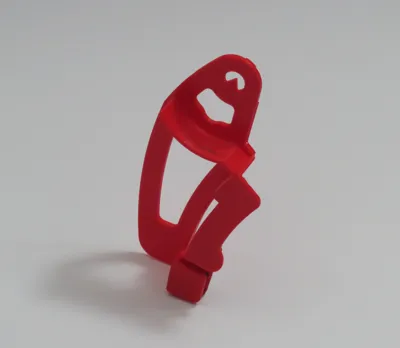
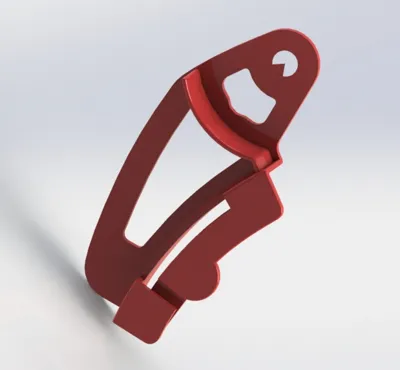
SRAM rear derailleur chain gap adjustment tool

IP Report

Print Profile(2)

All
P1S
P1P
X1
X1 Carbon
X1E
A1
A1 mini
H2D
H2D Pro
H2S
P2S
H2C
X2D
A2L

0.2mm layer, 2 walls, 15% infill
Designer
30 min
1 plate
4.6(75)

Improved print profile (easy support removal)
Designer
1.1 h
1 plate
4.7(51)

Open in Bambu Studio
Boost
321
970
142
61
1.9 k
1.5 k
Released 

Description

SRAM Rear Derailleur Chaingap Adjustment Gauge


The Sram rear derailleur adjuster allows you to correctly align the upper pulley of the rear derailleur on the Sram 12sp cassette. This item can be used on SRAM Eagle 50/52Z mechanical and electronic (axs) drivetrains.


The attached photo shows how to place it. For more information on the adjustment process, I've included the official Sram tutorial video.


This is a replica of the original Sram tool, modified for printability.


All you need to do is print this object in standard PLA.


Tool dimensions: 99mm x 53mm x 17mm


Comment & Rating (142)

(0/1000)

Print Profile
0.2mm layer, 2 walls, 15% infill
Very cool idea, unfortunately I had problems with the supports… I couldn’t remove them, had to reposition completely and print with tree support structure
The profile uploader has replied
Show original
profile
1
Reply
Hello, As others have had this problem, I will add a more efficient print profile. Thanks for the feedback
(Edited)
1
Reply
Replying to @TRAIL_Access :
Super👍🏻 Thank you
Show original
0
Reply
Print Profile
Improved print profile (easy support removal)
my print turned out a bit rough but I’m certain that’s more of a me thing. still figuring out how optimize my new P1S
profile
2
Reply
Print Profile
0.2mm layer, 2 walls, 15% infill
Nice model
profile
1
Reply
Print Profile
0.2mm layer, 2 walls, 15% infill
The print profile, regrettably, specified an extensive array of support structures, compelling me to reorient the component Nevertheless, the part itself proved to be a precise fit and proficiently fulfilled its designated function
Show original
profile
1
Reply
Print Profile
0.2mm layer, 2 walls, 15% infill
Works great, thanks!
profile
1
Reply
Print Profile
Improved print profile (easy support removal)
worked great! supports came off fine!
profile
1
Reply
Print Profile
Improved print profile (easy support removal)
Great print. Seems much less likely to break than the OEM one, which I've gone through like 5 of now! Thanks!
0
Reply
Print Profile
0.2mm layer, 2 walls, 15% infill
Came out good, but Support was too tight and broke of two pieces which I glued back on.
0
Reply
Print Profile
0.2mm layer, 2 walls, 15% infill
There was a slight issue with the support detaching, but it seems alright. I haven’t tested it practically yet
Show original
0
Reply
Print Profile
0.2mm layer, 2 walls, 15% infill
0
Reply
How did you get it to print at that angle please? I've tried changing the Threshold Angle in Studio but it still looks flat on the sliced version.
0
Reply
Replying to @rgeezy_a1 :
hello, In bambu studio on the first page,the prepare page, you can use the button where you can select on wich side the part must be placed on the build plate. i have shosen for that angle. If you still have a problem let me know, i wil take foto's how i did it. grtz
0
Reply