
Cyberpunk Mask - Wearable with Battery-Power LEDs

Print Profile(2)


Bill of Materials




Description
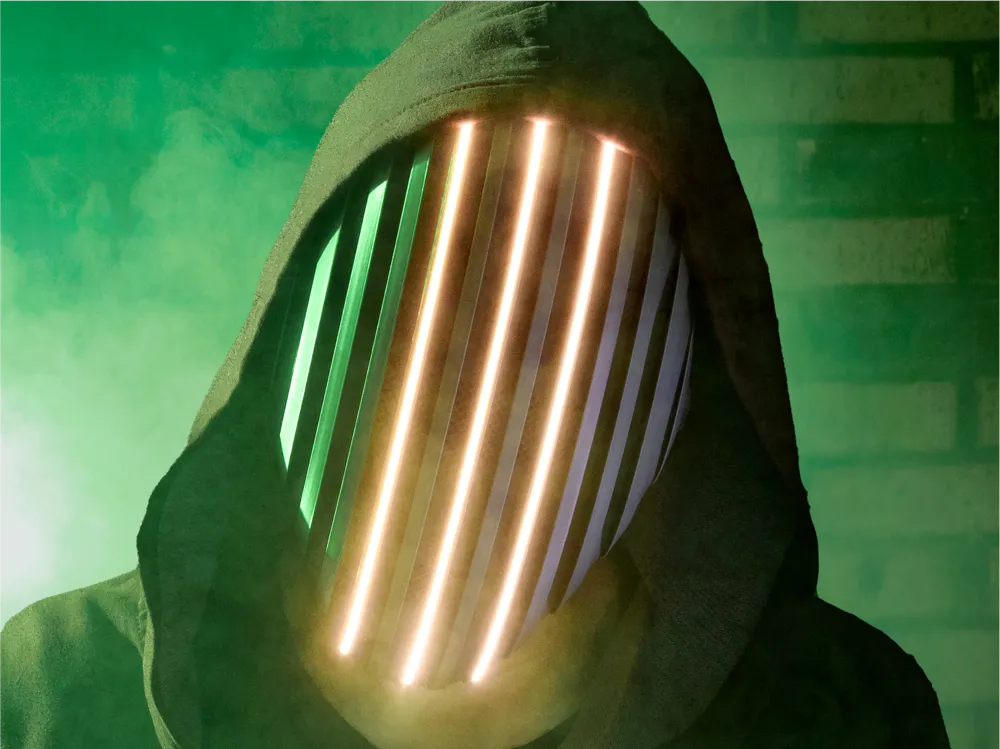
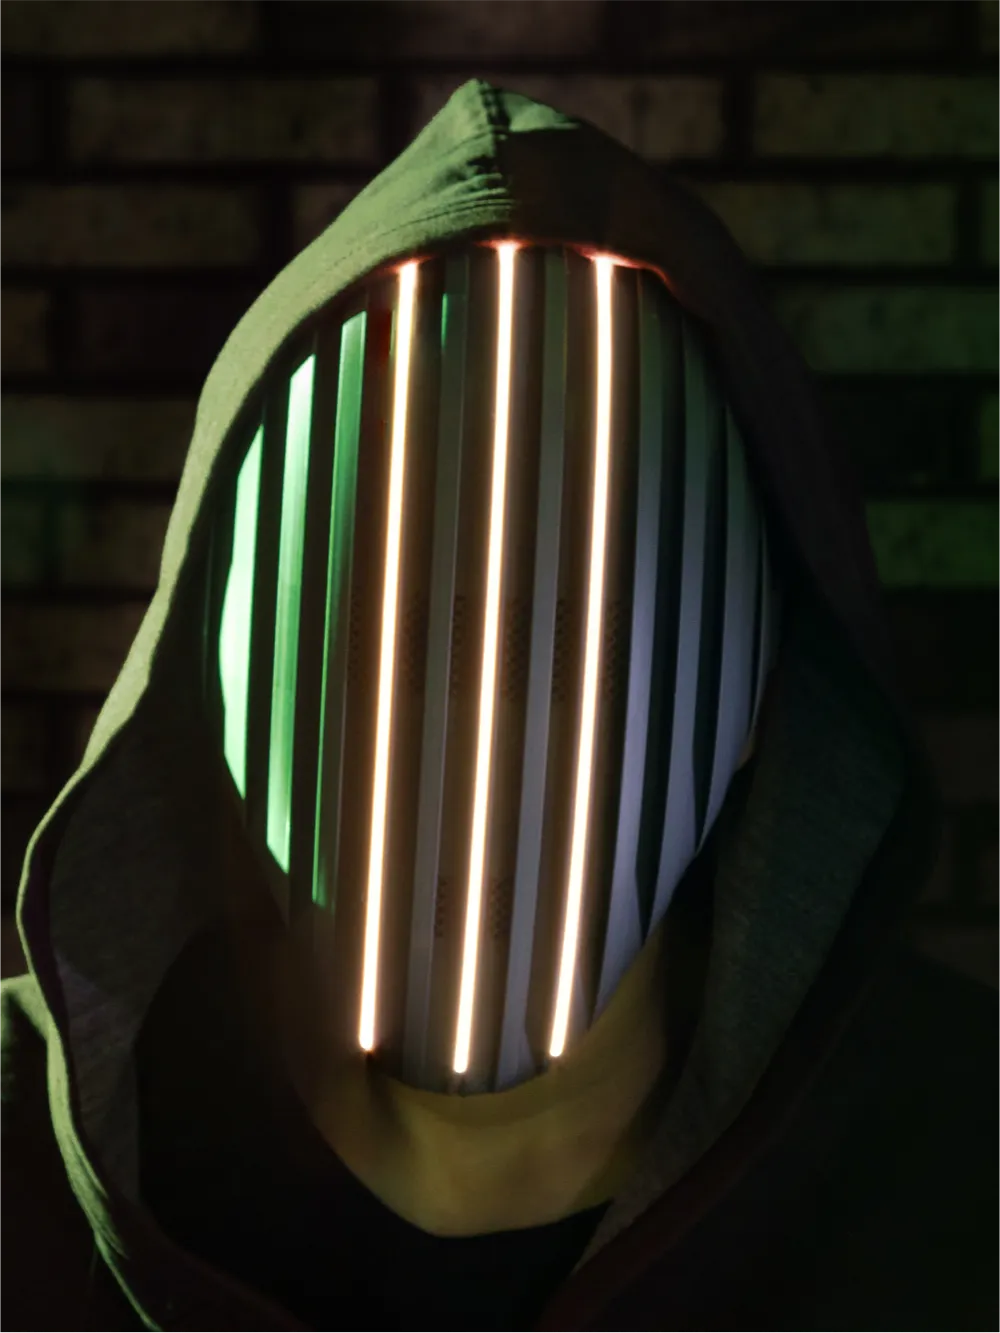
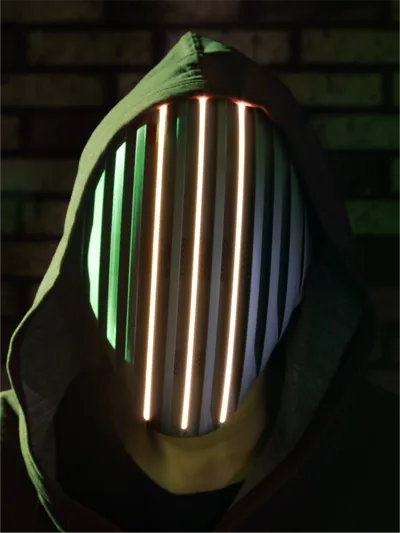
For this mask, my goal was to make something easy to assemble that could utilize a battery pack and LED strips. This is a face mask and works well with a hoodie to cover the wires and battery pack which can clip to your headband or clothes. Although you can see out of the front, this mask does have limited peripheral vision.
Measure & Fit
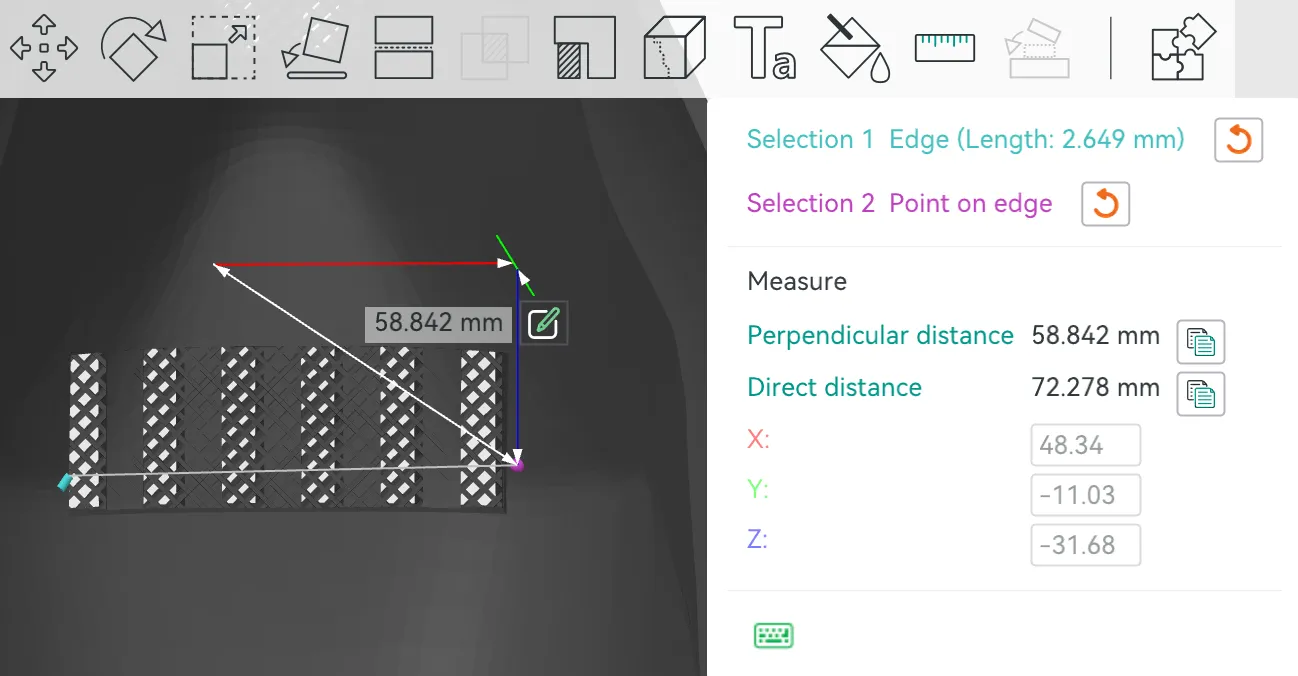
This mask was scaled to fit an average person but it's important to check that it'll work for you before printing! For minor adjustments and comfort, you can glue small pieces of foam to the interior of the mask.
Before printing, you can measure the mask in Bambu Studio to check the fit. It is recommended that you check the overall width, height & depth along with the width of the eye opening. To do this:
|  |
Printed Parts
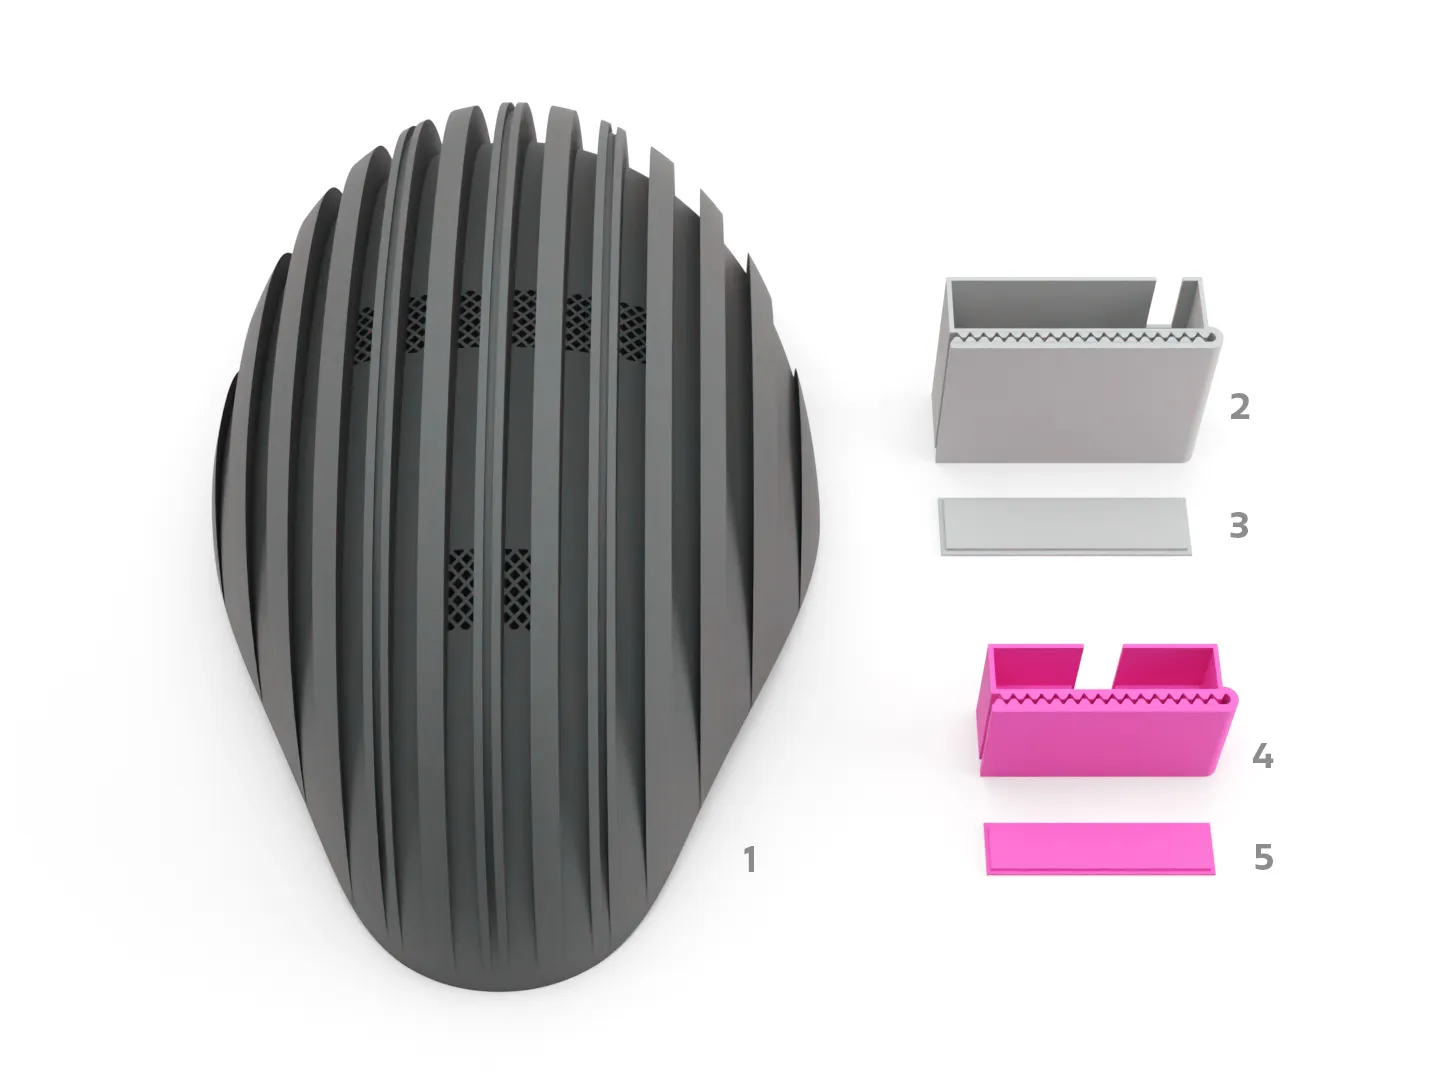
- Mask
- Battery Pack Base
- Battery Pack Lid
- Electronics Pack Base
- Electronics Pack Lid
Assembly
| Insert the LED strips through the back of the mask as shown. The circuit boards for each LED will fit in the shown slot. Be careful not to put too much stress on the strips during this process. | 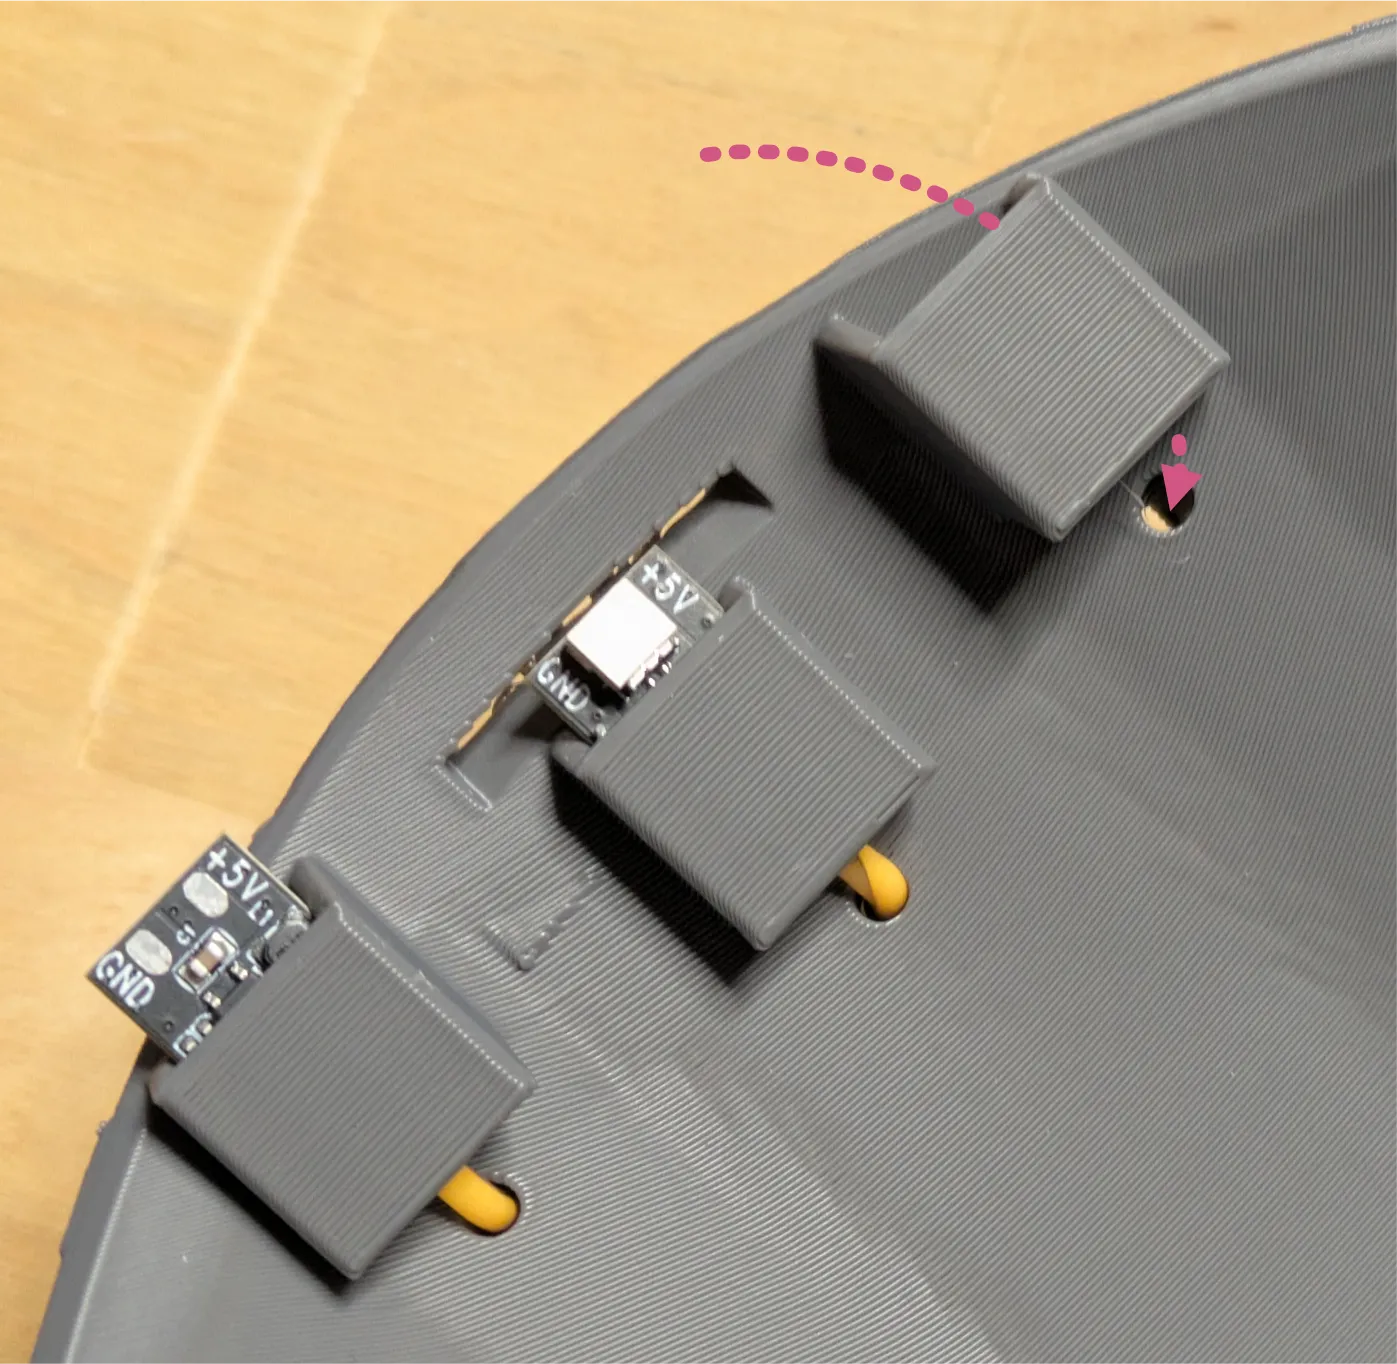 |
| Check the orientation of the LED strips to ensure that the front side will be facing out. | 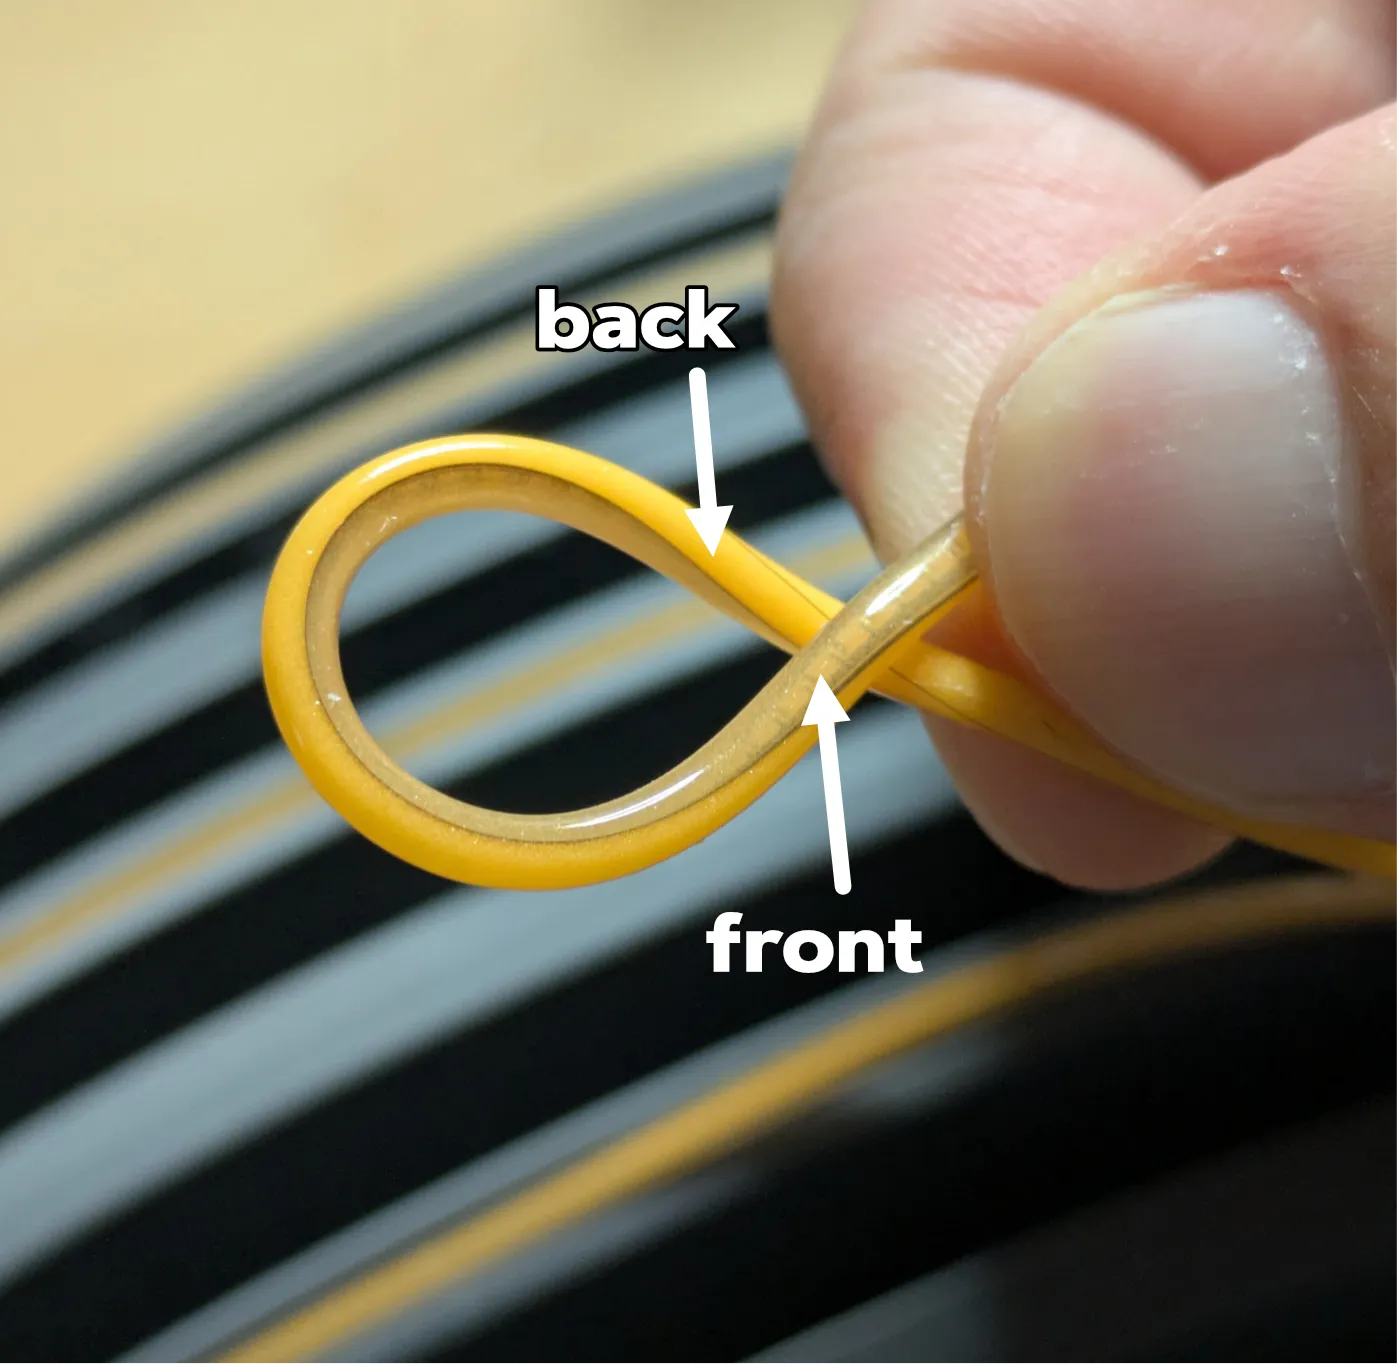 |
| Press the LEDs into the channels. Because the lights have a rubberized surface, a press-fit should be sufficient but glue can be used if needed. | 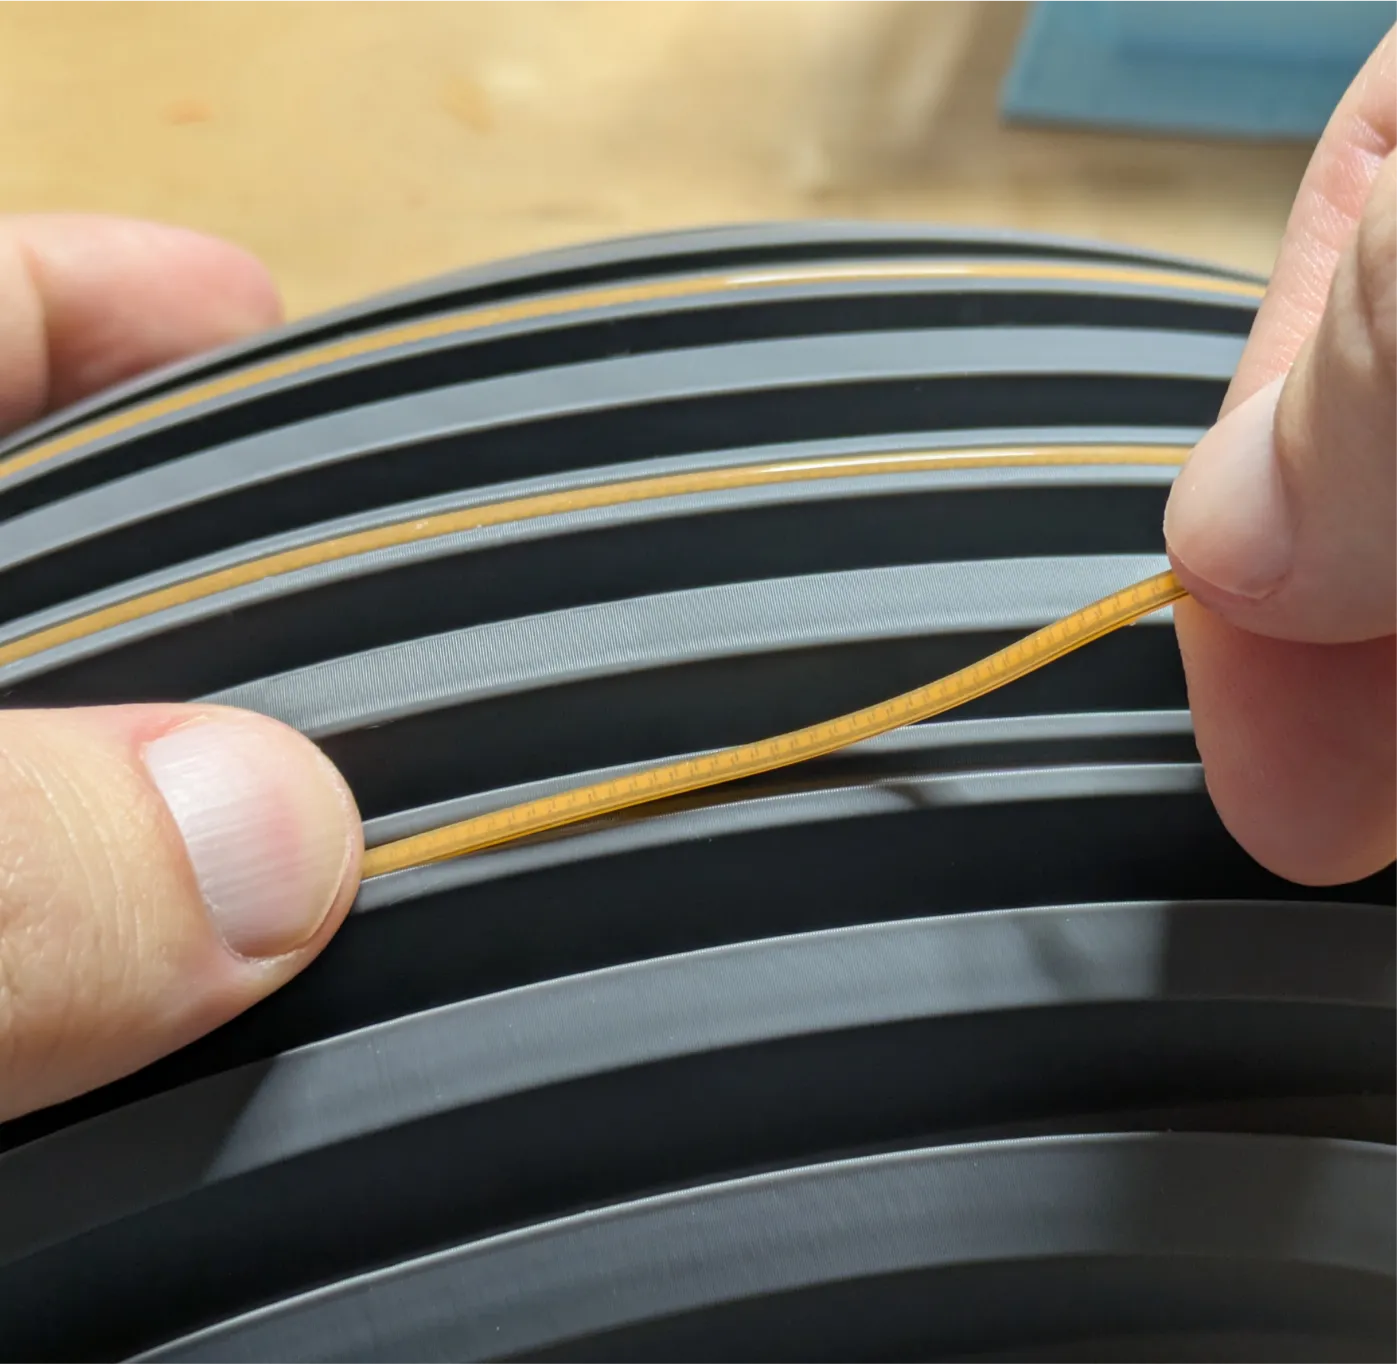 |
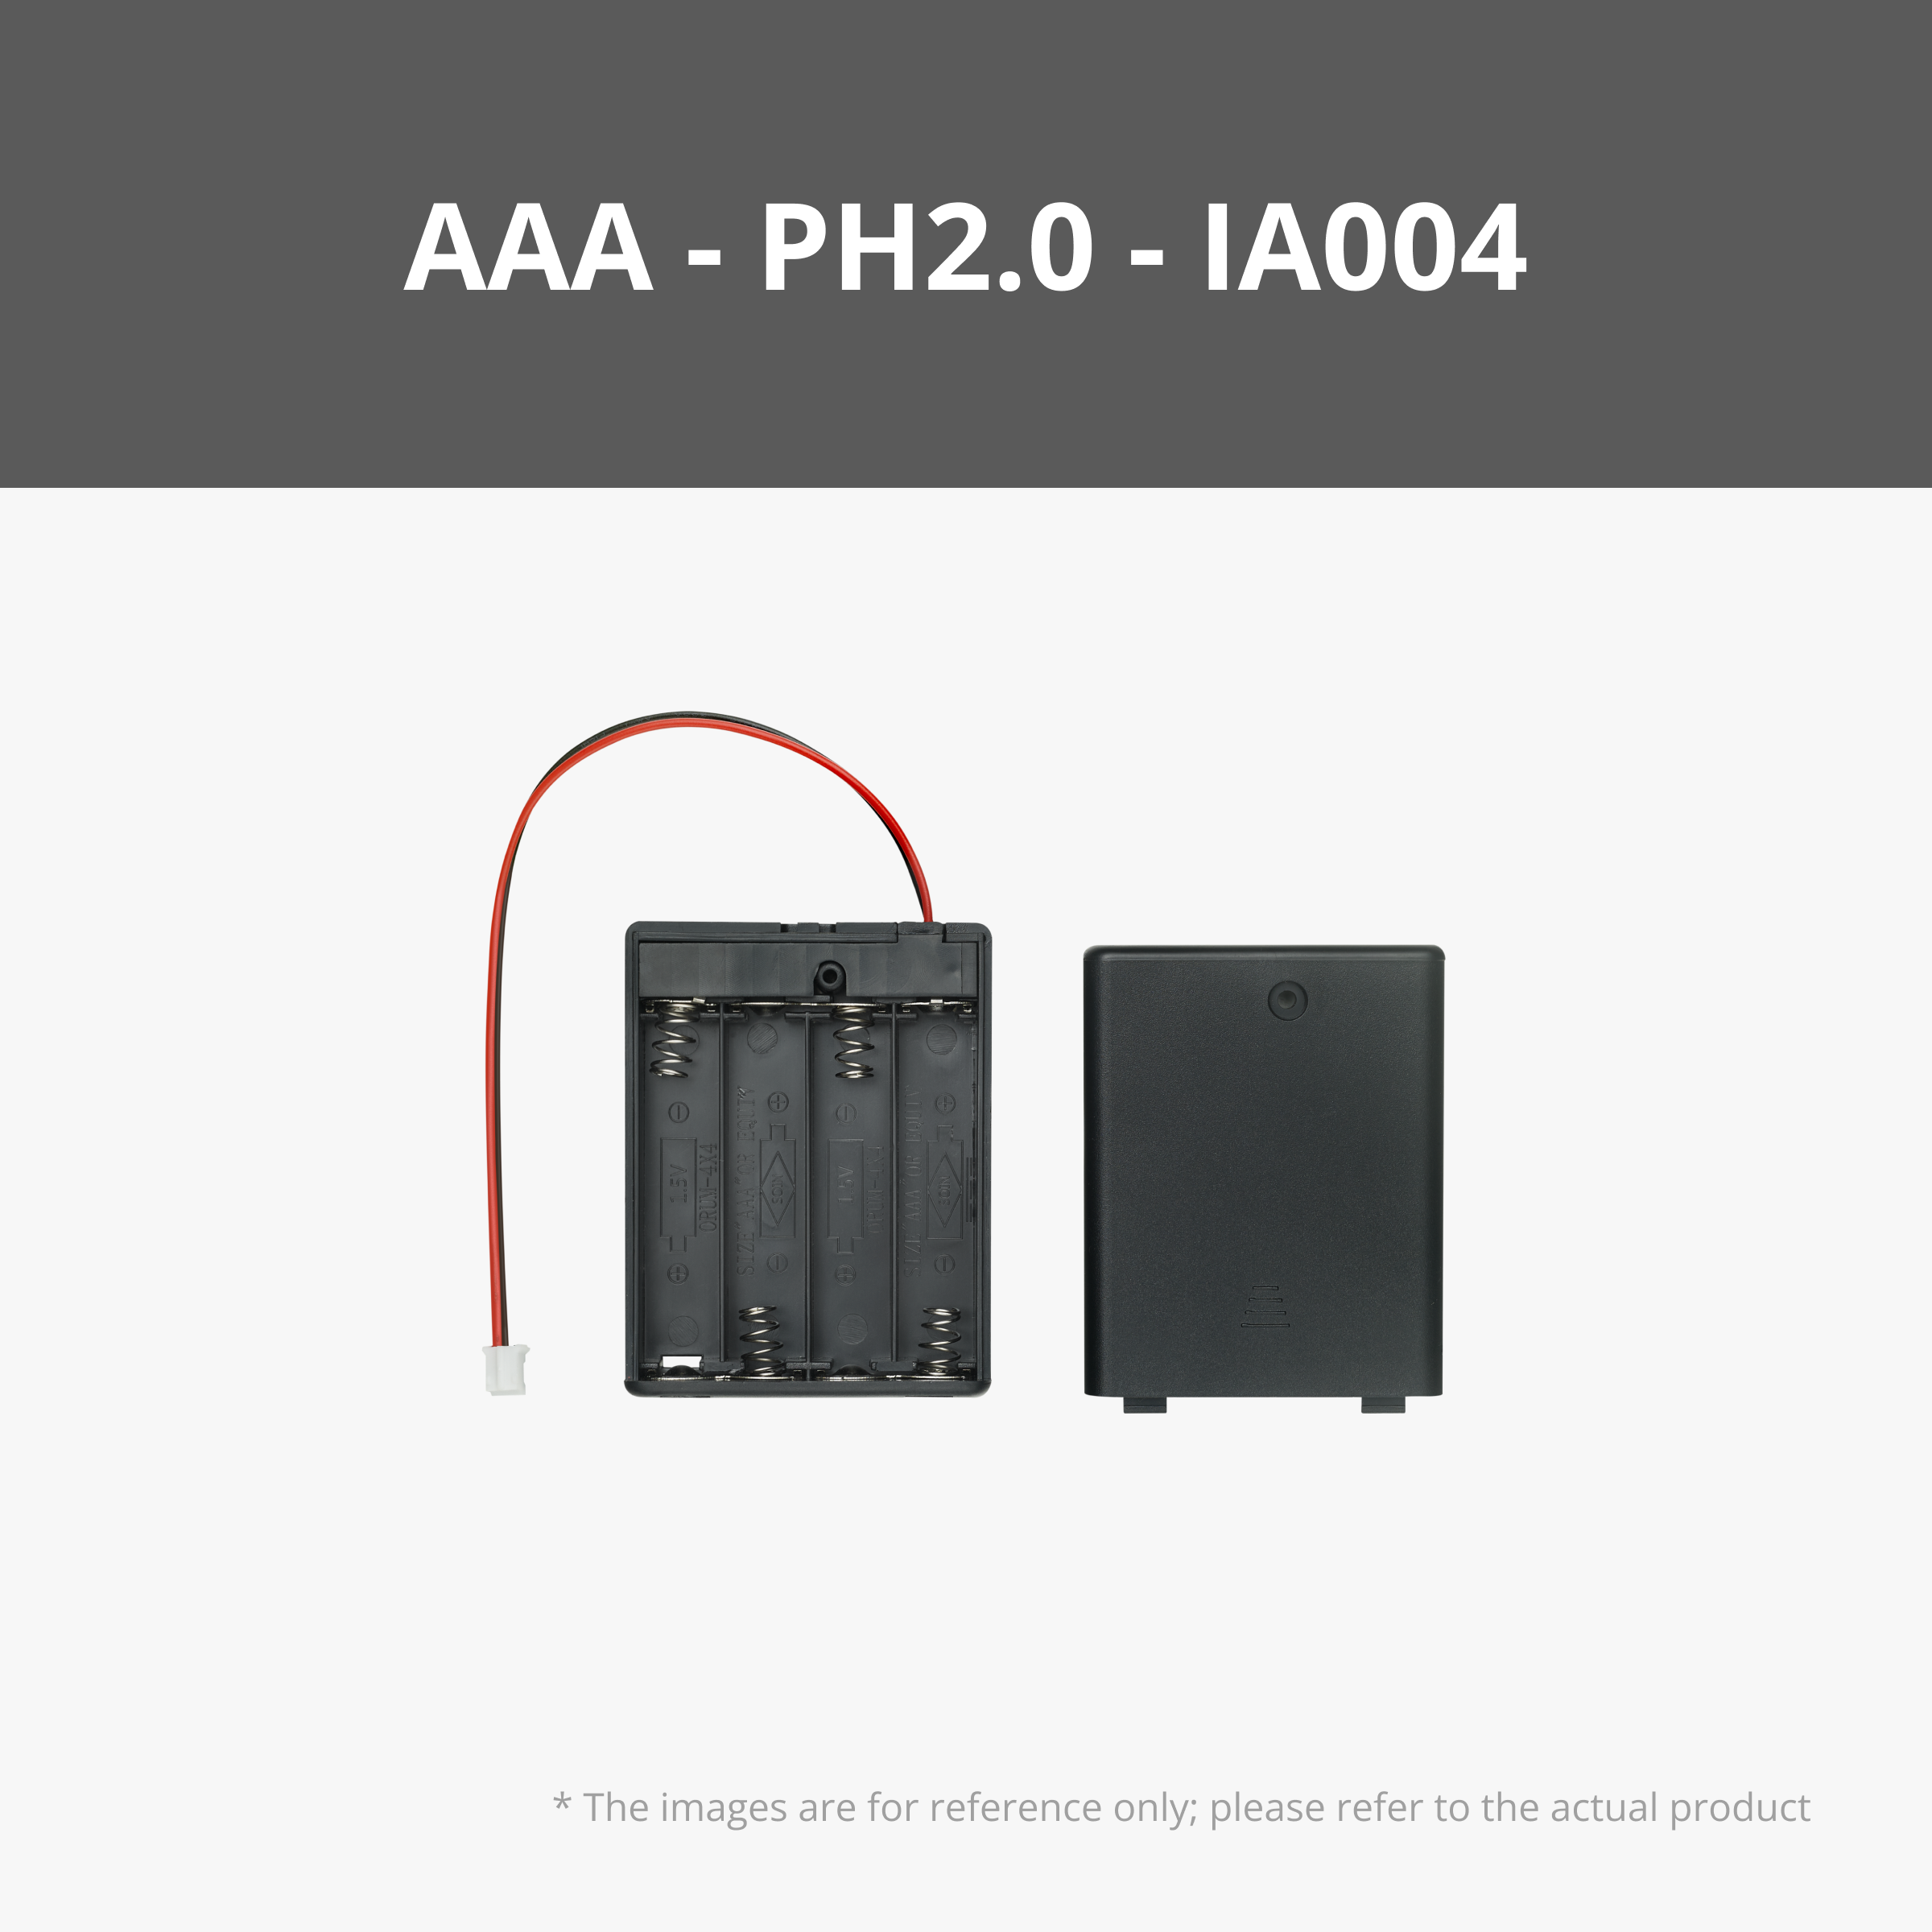
| Insert batteries and thread the cables through the battery pack base as shown. The power switch should be aligned to the gap at the side. | 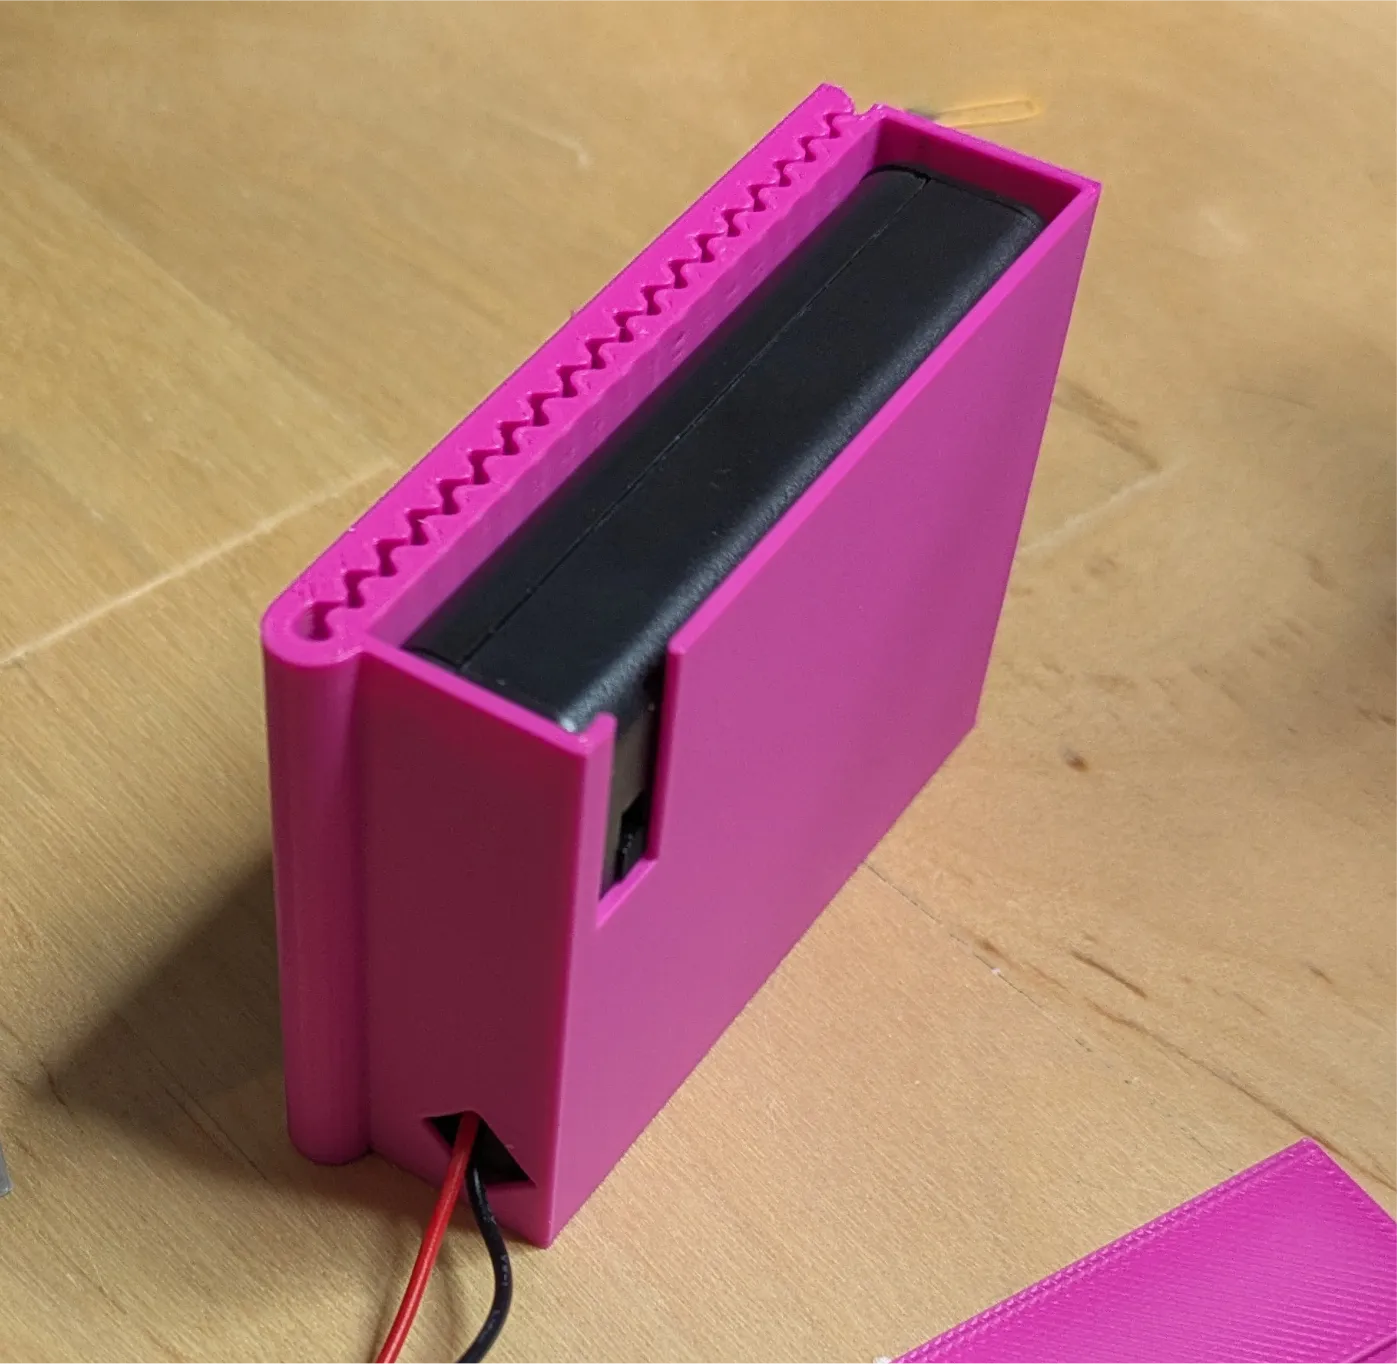 |
Attach all wires to the power distribution board.
| 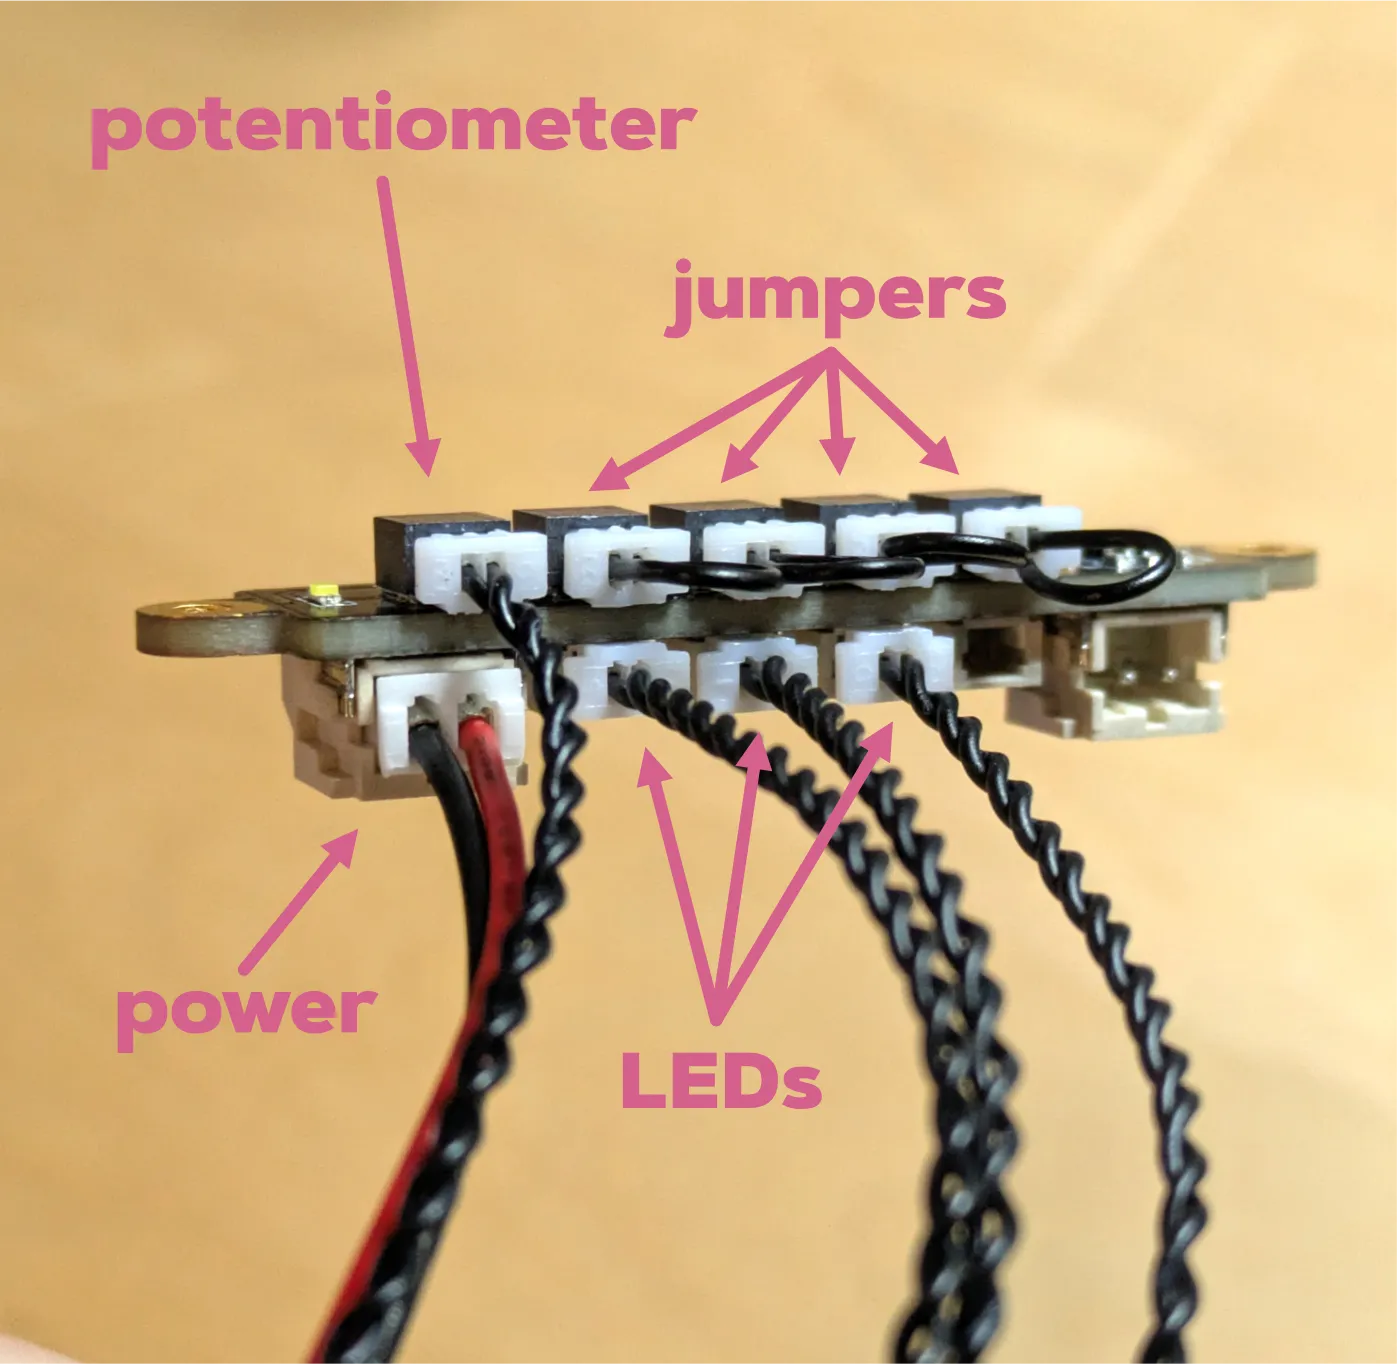 |
| Slide the potentiometer into the electronics pack and the power board on top - the wires can pass through the channel in the front as shown. | 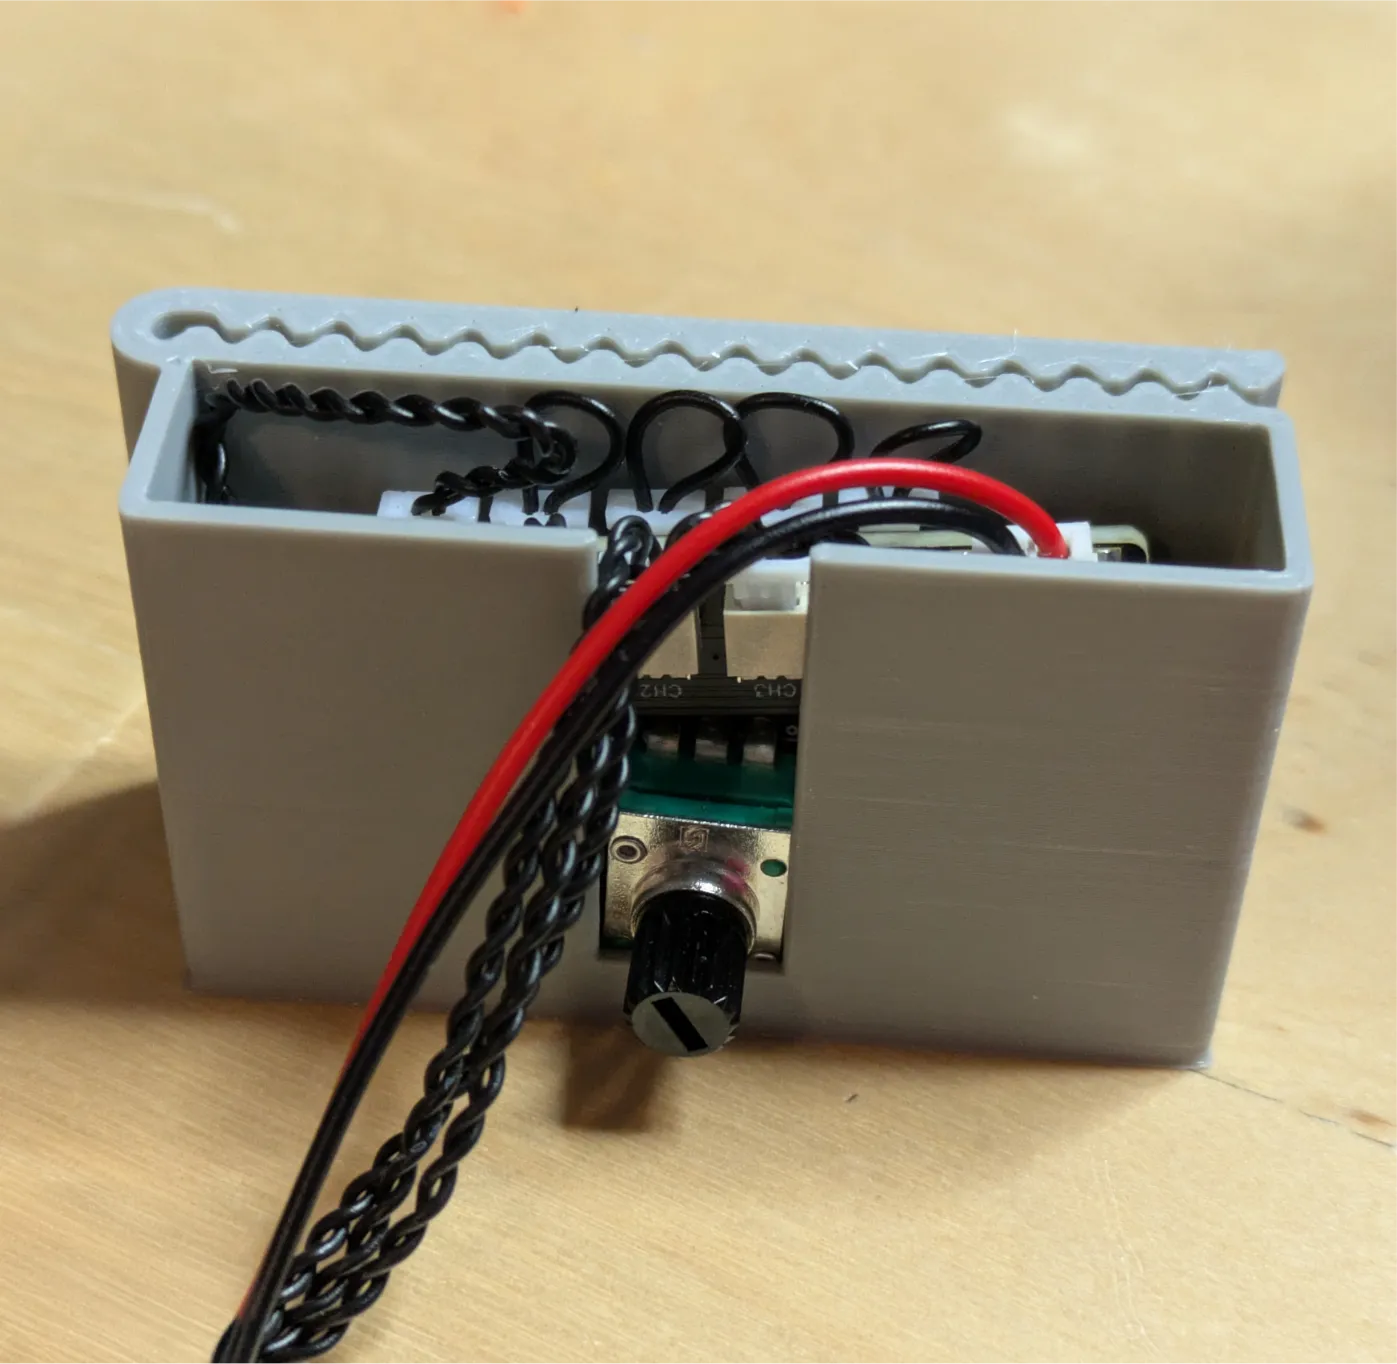 |
| Place the lids on each pack - the integrated clips can be used to attach the packs to your headband or your clothing. | 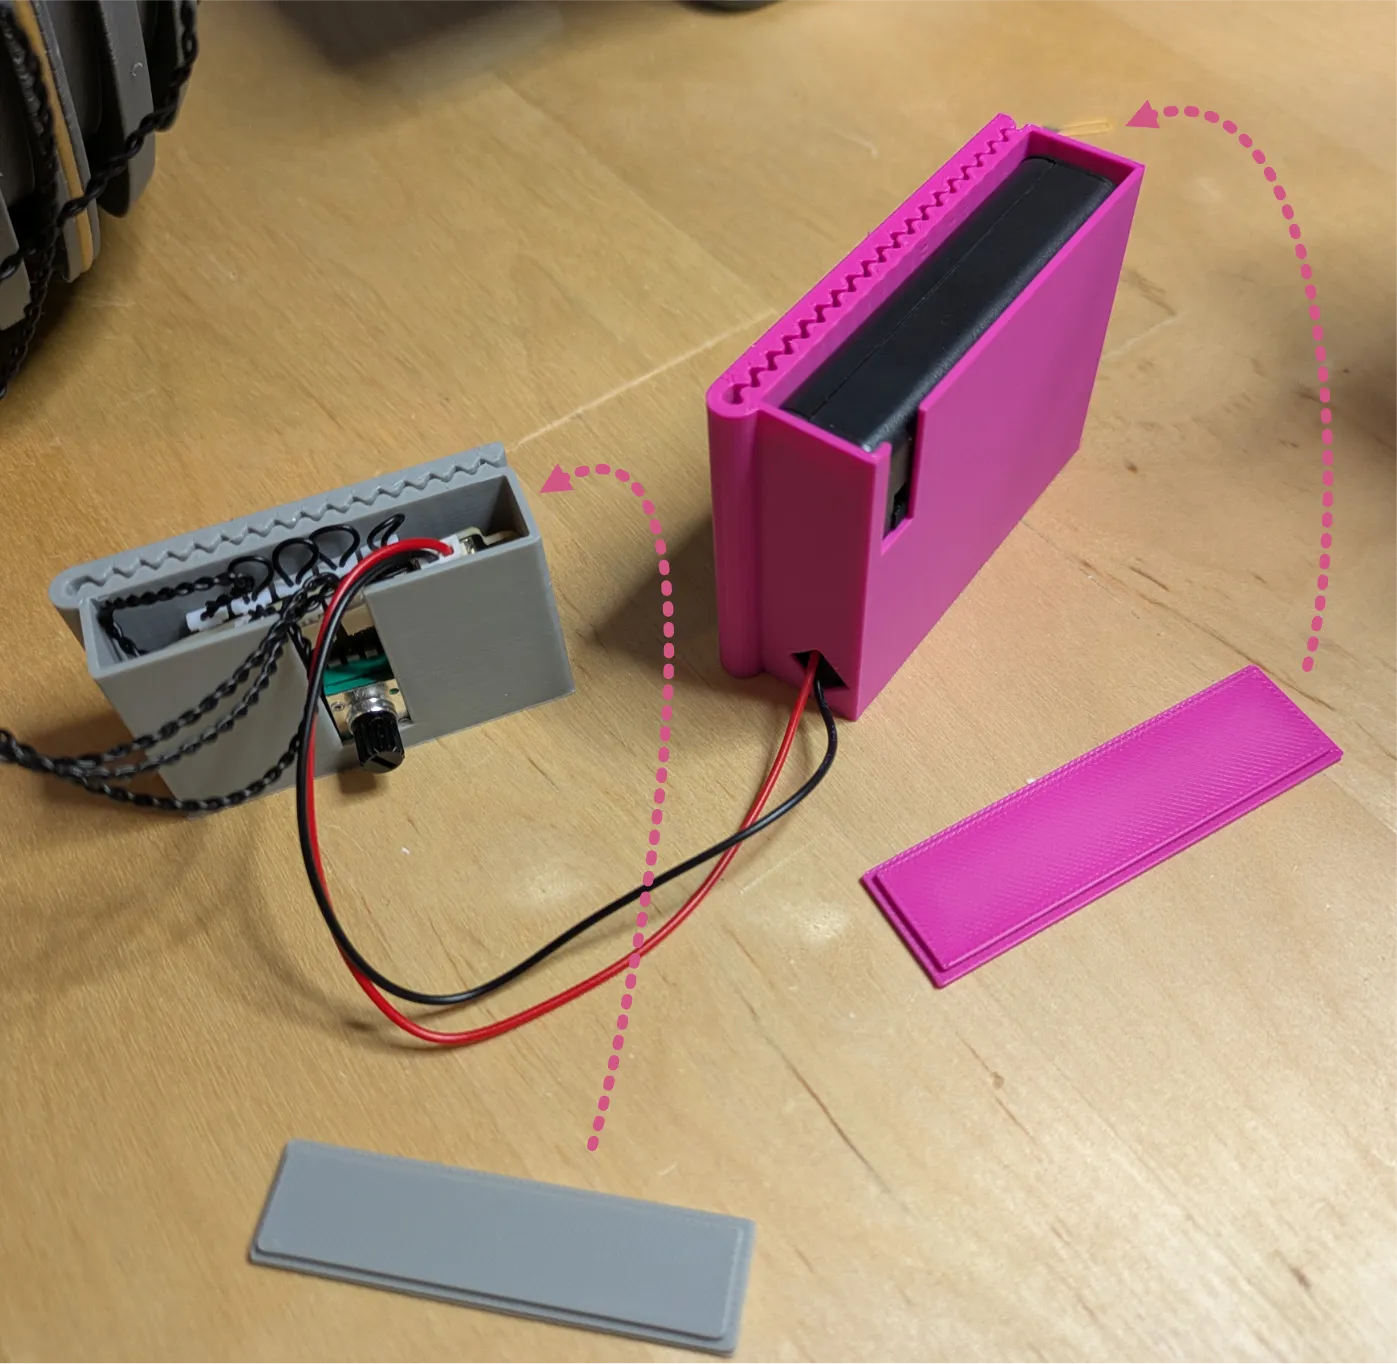 |
| Turn on the power to check that everything is working. If the lights don't work, double-check your connections on the power distribution board. | 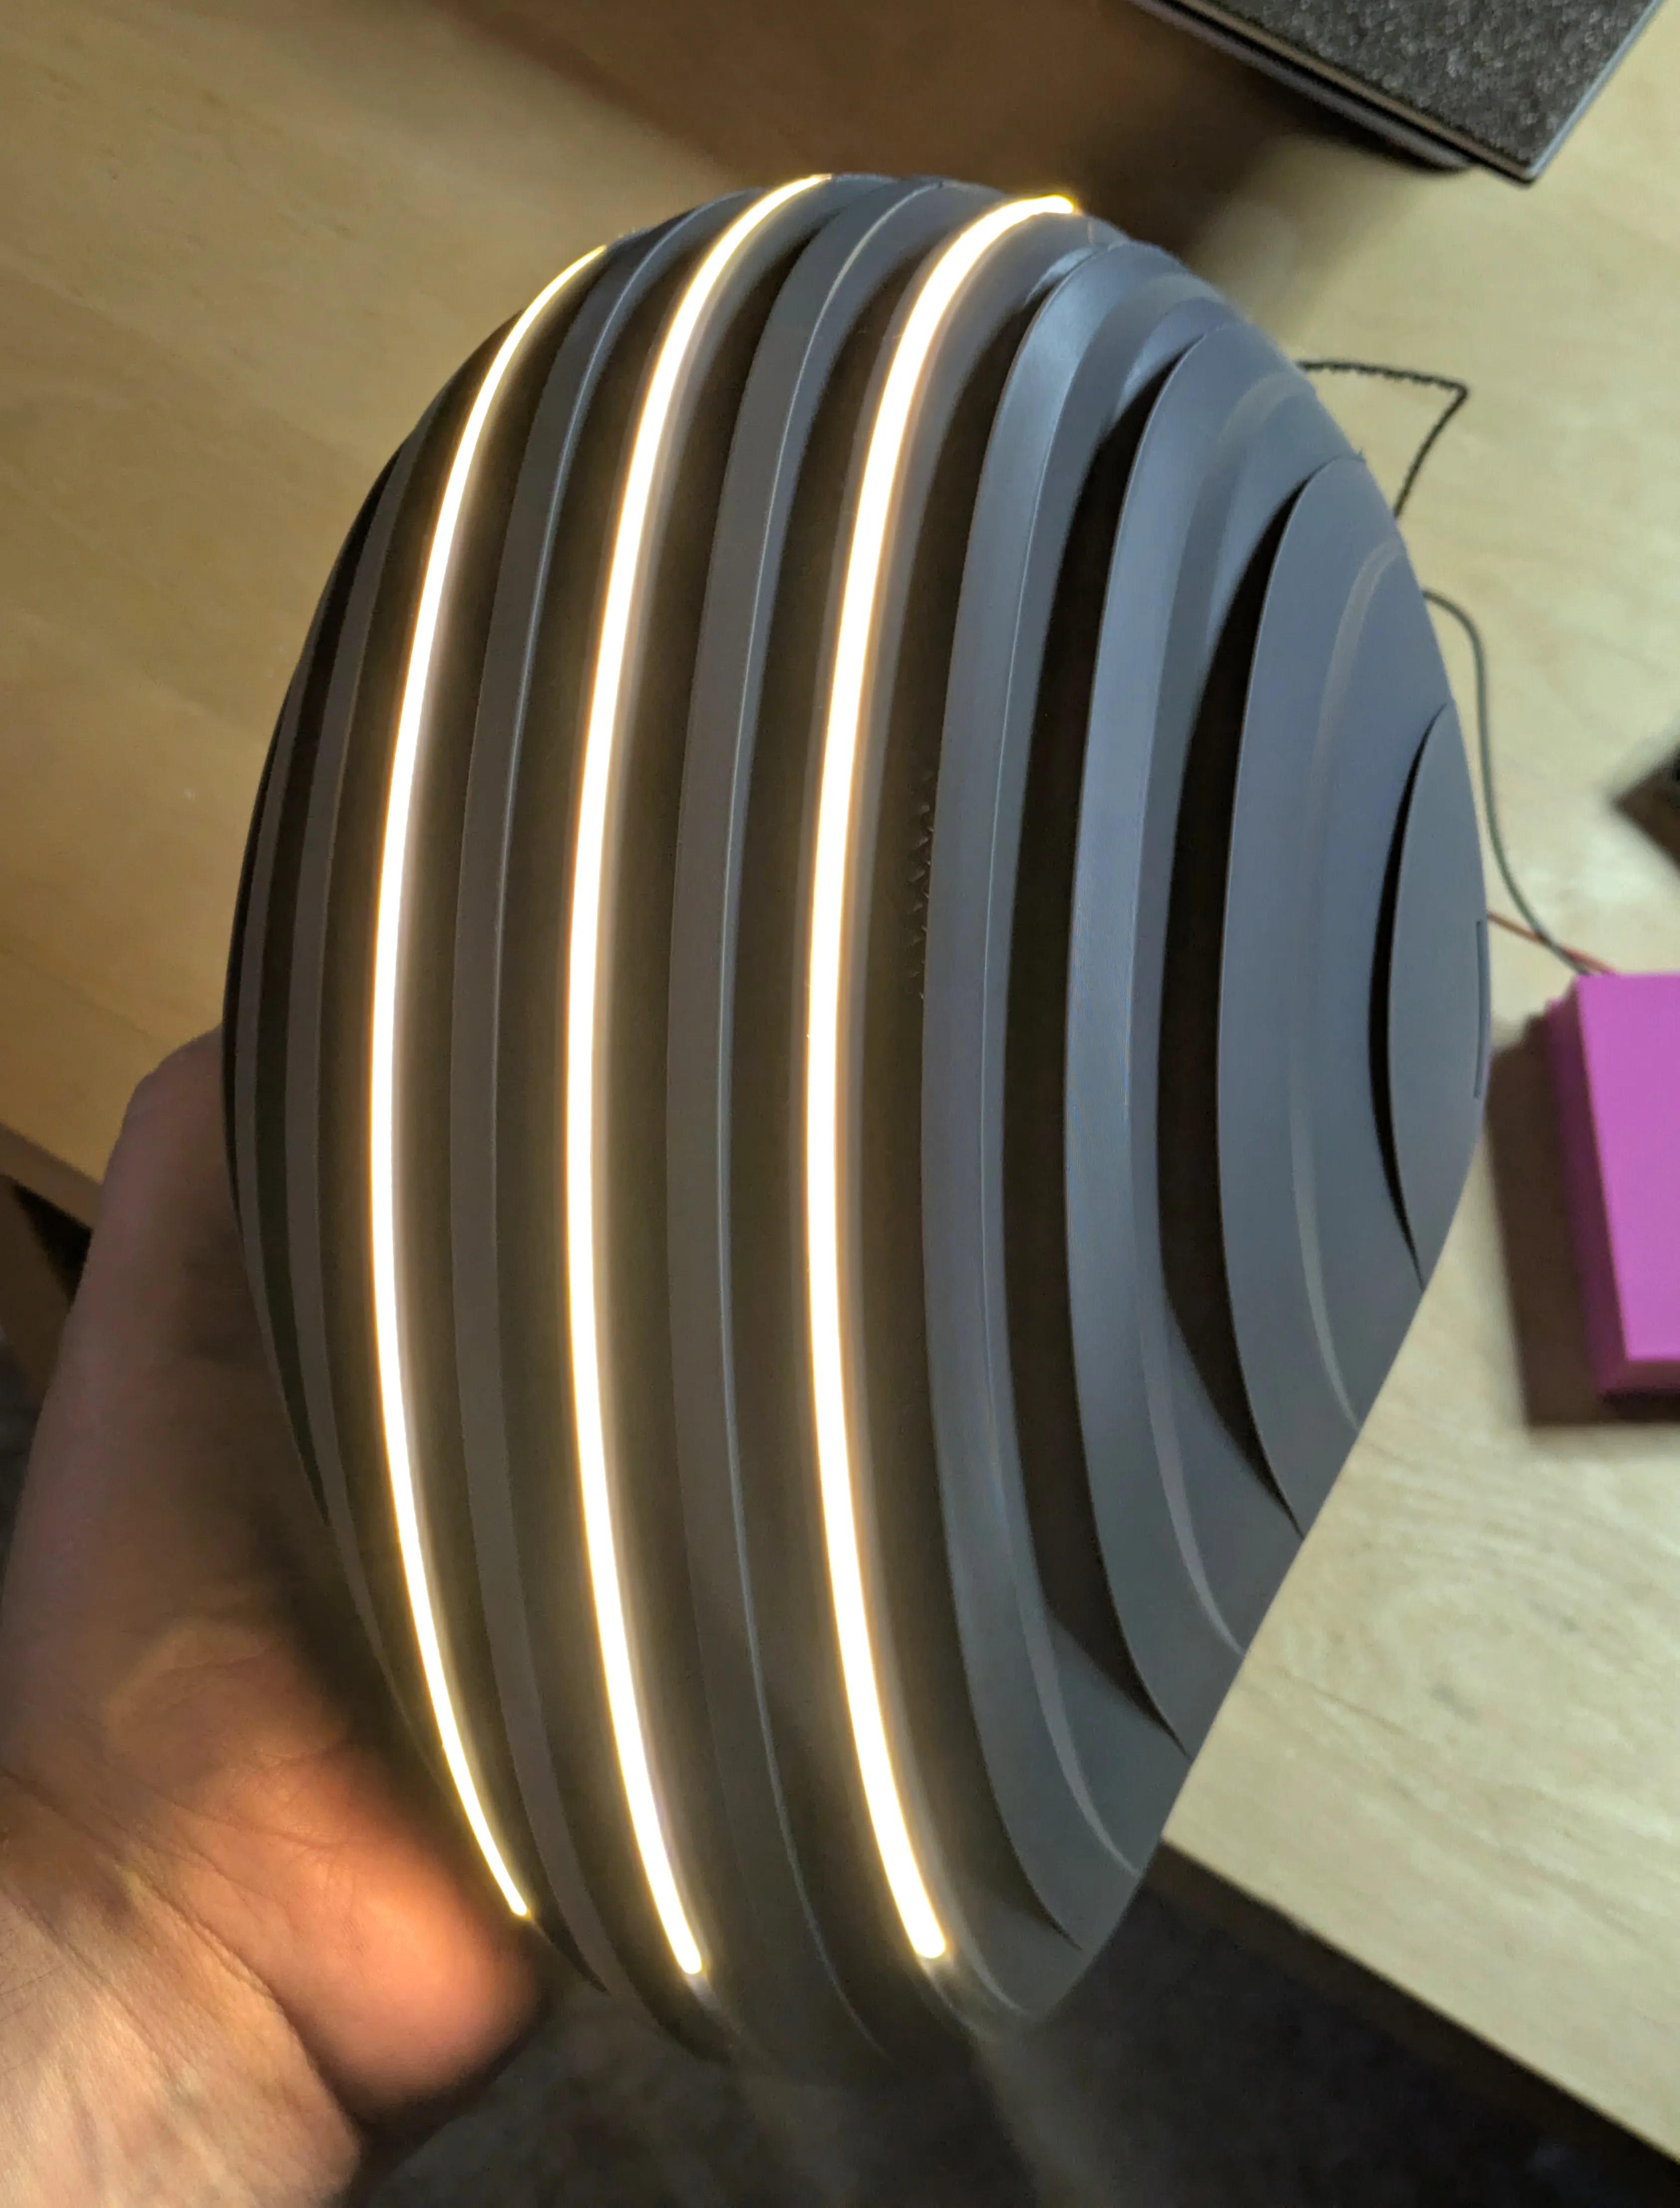 |
Printing Tips
- The supports in the profile worked well for me on a core xy device - I have not tested these using a bed slinger. If using a bed slinger, I would suggested slowing the speed or adding additional supports so that the mask is not shaken loose.
- Little post-processing should be needed. In my experience the supports removed cleanly and only required minor cleanup with a deburring tool.
- Scaling
- This model should scale up without any significant issues. The channels for the LEDs will be looser and may require glue as a result.
- Scaling the model down would likely cause issues with the LED channel fit along with the control board for the LEDs. You may be able to glue the LEDS on top of the channels in this case but I have not tested this process.
- The model shown in photos was printed with Bambu PLA Basic - Dark Gray
Boost Me (for free)
If you enjoy my models and would like to support me, please consider sharing a boost!
Membership
Want to sell prints of my models? This Commercial Membership grants you a license to all of my MakerWorld models!
I love creating models to share for free, personal use. If you enjoyed this model, please consider buying me a coffee or joining me on Patreon.
License

You shall not share, sub-license, sell, rent, host, transfer, or distribute in any way the digital or 3D printed versions of this object, nor any other derivative work of this object in its digital or physical format (including - but not limited to - remixes of this object, and hosting on other digital platforms). The objects may not be used without permission in any way whatsoever in which you charge money, or collect fees.


Comment & Rating (100)