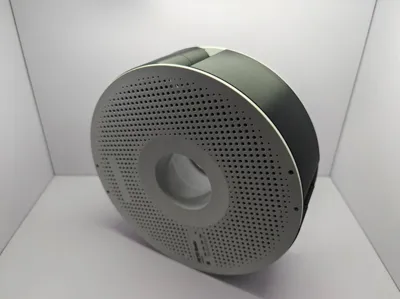
Bambu Filament Spool - Storage Box


Print Profile(1)

Bill of Materials
- 竹签bamboo toothpick x 8:
Description
This is a storage box designed for the official Bambu filament spool, comprising three components:
This is a storage box designed for the Bambu filament spool, the storage box consists of 3 parts:
- Bambu filament spool the Bambu filament spool
- The printed drawer the printed drawer
Connector (this design defaults to bamboo toothpicks, approximately 1.56mm in diameter; filaments may also be used, though the assembly hole dimensions will require adjustment) Connector (the design uses bamboo toothpick by default , diameter is about 1.56mm. Filaments can also be used, but the size of the holes in the assembly needs to be adjusted appropriately)

Four drawer styles are available:
There are 4 drawer styles:
- Single layer, single compartment one layer, one part
- Single layer, double compartment one layer, two parts
- Double layer, single compartment two layers, one part
- Double layer, double compartment two layers, two parts
For initial printing, it is recommended to fabricate a single-layer, single-compartment drawer to verify dimensional accuracy.
For the first time, I recommended to print a [one layer, one part] to see if the size is proper.
Assembly instructions follow:
The following is the assembly instructions:
Prior to assembly, dismantle the filament spool and remove the “key” from one spool half
Before assembly, the spool needs to be disassembled and the "key" needs to be cut
Before assembly, use the connector to clear the insertion holes, ensuring a snug fit
Before assembly, unclogging the hole with a connector to ensure proper tightness
- Commence assembly Start assembly
Assemble the first drawer and rotary shaft Assemble the first drawer and the rotating axis
Install the rotary shafts on either side of the first drawer as shown below (incorrect positioning may impede subsequent drawer shaft installation); partial insertion suffices.
Refer to the position showed in following diagram, insert the rotating axies on both sides of the first drawer (if the position is incorrect, the installation of the rotating axies of other drawers may be problematic), it does not need to be completely penetrated, just insert a part.
!!!Exercise caution during installation to avoid injury from connectors!!!
!!!Pay attention, prevent your hands from being hurted by the connectors!!!
- Subsequently install the remaining drawers assemble the left drawers
Install the retaining lugs (optional)assemble the knot (optional)
These lugs prevent excessive drawer looseness and apply pre-tension; in double-layer drawers, they prevent simultaneous extraction of both layers. Installation is optional.
The function of the knot is to prevent the drawer from being too loose and to apply preload to the drawer;In the case of two-layers drawers, the convex prevent the upper and lower drawers from being pulled out at the same time.Choose according to your needs.
!!!Ensure secure lug insertion for optimal effectiveness!!!
!!!Make sure the knot is inserted tightly enough, otherwise it won't work well!!!
!!!Exercise caution during installation to avoid injury from connectors!!!
!!!Pay attention, prevent your hands from being hurted by the connectors!!!
Complete enjoy!

Boost Me (for free)
Feedback is welcome; future iterations will encompass additional filament spool brands.
Your encouragement and support are greatly appreciated if this design proves beneficial.
Feedback is welcome, and there will be another brands design of filament spool-storage box in the future.
If this design can help you, I hope to get your encouragement and support.
A compatible stackable rack is available here: Bambu Filament Spool Stackable Holder
Comment & Rating (46)