
Miniature Disc Golf Basket

Print Profile(4)


Description

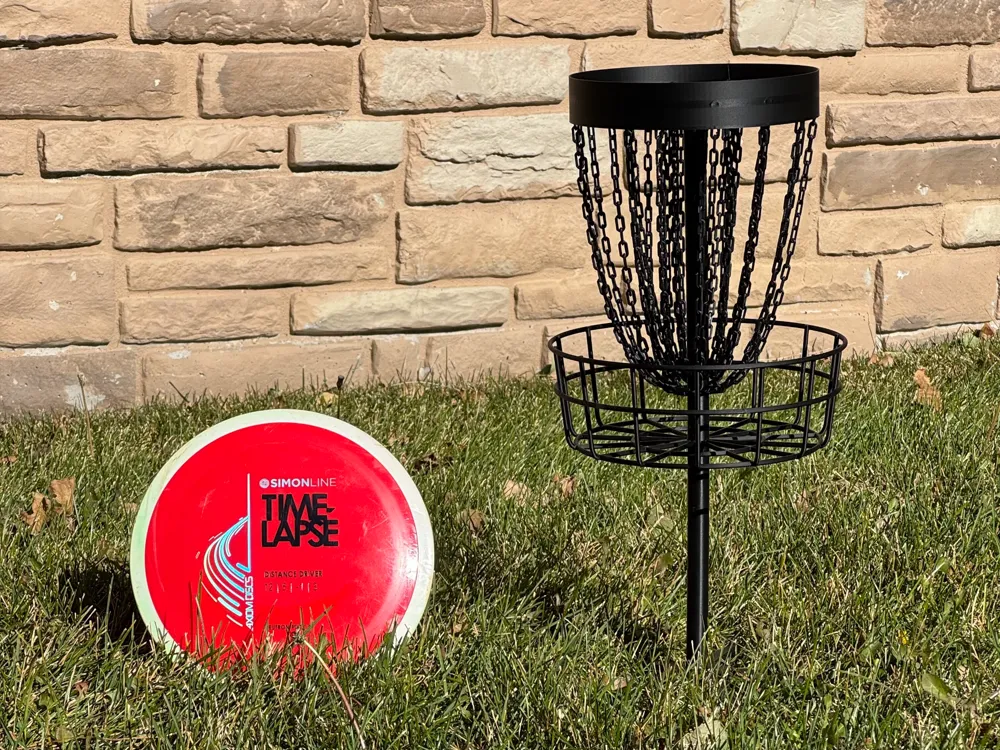
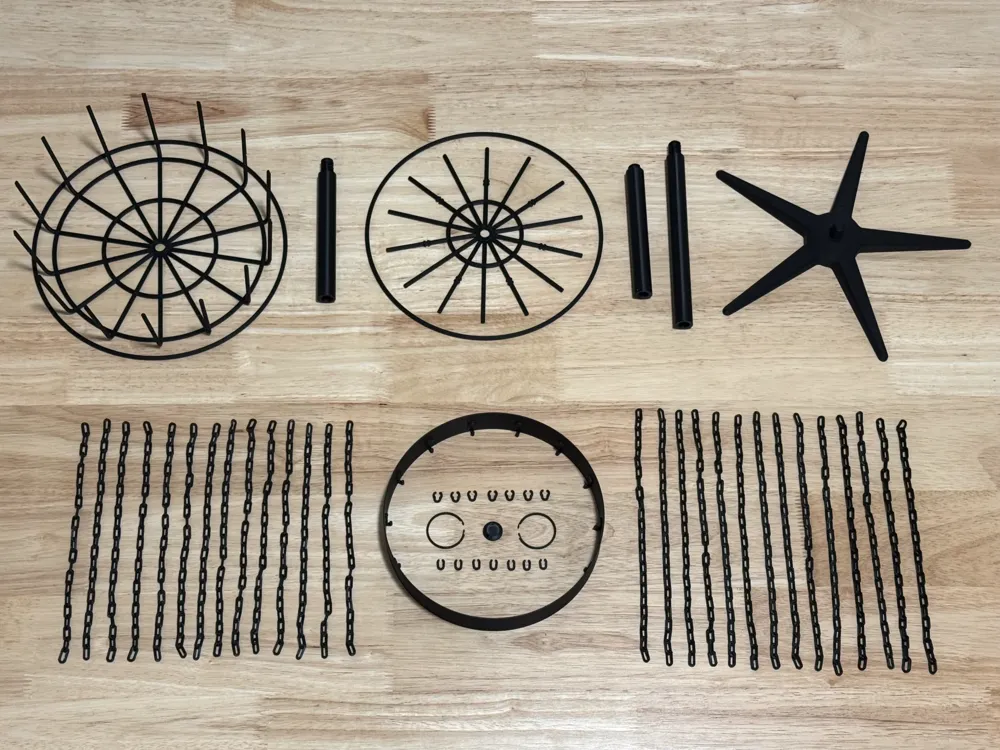
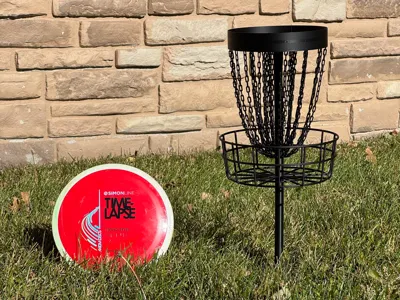
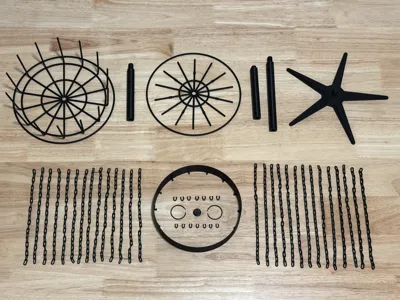
This is a fully 3D printed disc golf basket. The model is based off of the Innova DISCatcher Pro 28. It is printed at 30% scale to fit nicely onto a print bed and a desk! Every single piece is printed including the chains. There are 28 chains in total, 14 inner chains and 14 outer chains, with 22 and 24 links respectively. Thats 644 total links!
Print it out, assemble it, and and enjoy your new mini disc golf basket.
Below are guides for both printing and assembly.
Make sure to print some discs as well! These can be found by in the download dropdown under the STL/CAD files.
EDIT - New print profile for V2 with significant improvements:

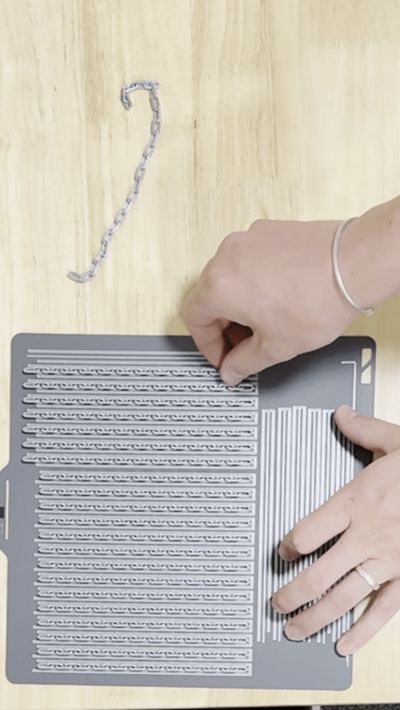
- Chains are much easier to print due to a custom brim that holds the chains to the bed, but allows them to be pulled off with no cleanup
- Basket and top are slightly thicker, making them sturdier and less likely to break
- Discs will print much cleaner, especially if printing in multiple colors
Printing
All prints should be really straightforward… maybe except for the chains.
Chains
The chains can be a bit tricky, especially if you don't have great filament. Due to their size, they require very good bed adhesion. In my case, this meant I needed a glue stick. I just used the basic purple Elmer's Washable School Glue which worked perfectly, however, I did have trouble with some rolls of filament. I'm assuming my filament simply wasn't dry enough. Even with a glue stick, I could not get a whole chain to print successfully. That said, since switching to a new roll of filament, I've had no issues printing the chains.
If you're feeling confident, try to print all 14 chains in one go. But be warned, once one chain fails, it often causes the chains next to it to fail so monitor it closely to make sure all of the chains are sticking. If you're having trouble, I recommend trying to print only 3 or 5 chains at a time until you have 14 inner chains and 14 outer chains. This will give you 15 chains and you will have one extra in case something goes wrong. Either way, it is best to monitor the chains as they print. Using the Bambu Handy app to skip chains that had failed was super helpful when I was printing them with poor filament.
You can do it! You just need dry filament, a glue stick, and a little patience. But seriously, how cool is it that we can just print chains!
Basket
The basket should print fine, however, it is delicate. So be careful removing it from the print bed and removing the supports. Once the two rings are attached (with glue) the basket will be much stronger and you shouldn't need to worry about it.
Assembly
I have made many iterations to make the assembly as easy, reliable, and printable as possible. The final basket is surprisingly sturdy and I am super proud of it. That said, there is probably some room for improvement and I am open to any suggestions.
Overview of steps
- Assemble the basket
- Attach all outer chains to a ring
- Attach all inner chains to a ring
- Clip inner chains to the top piece
- Attach the outer chains to the band
- Attach the top piece to the band
- Screw everything together from the base up
1 - Assemble the basket




Assembling the basket simply requires gluing the the two rings to the main basket piece. Start by placing a small bit of glue (I just used super glue) in each of the indents that are midway up each of the arms. Then place the basket inside of the smaller of the two rings and lift up the ring until it clips into the indents. Apply pressure at each of the joints to make sure the glue gets a good hold and the joints are tight. Once the middle ring is secure, repeat for the larger ring.
2, 3 - Attach all outer and inner chains to their rings

Be careful you don't mix up the chains. The outer (longer) chains have two extra links. All of the outer chains go on one ring and all of the inner chains go on the other ring. Grab one of the small rings and “thread” it through all 14 of the outer chains. Using a small dab of glue on the interlocking parts of the ring, glue the ring closed. Try not to glue any of the chains to the ring. Repeat for the inner chains.
4 - Clip inner chains to the top piece
MAKE SURE you attach the inner (shorter) chains. This part might require a little patience. Take note of the two different connectors. The U shaped connectors will attach chains between the small two raised edges on 7 of the arms of the top piece. You should have one extra of each connector just in case one breaks or something. The other connectors with the bulge will attach the other 7 chains to the other 7 arms where they intersect with the ring. I find it easiest to attach them one at a time going around in a circle, alternating back and forth between the two connection types. In the demonstration below, I first attach one of the connectors with a bulge to an intersection and then attach the U shaped connector between the raised edges of the arm.

Pro tip: To attach the connectors with the bulge to an intersection, slide it over the intersection sideways and then rotate it so the the chain hangs down below.
5 - Attach the outer chains to the band
These are much easier to attach than the inner chains. Simply place the last link over the hook and then rotate it so it hangs down. Again, its easiest to just go around in a circle. And if you're picky, make sure your chains aren't twisted so they hang prettier!

6 - Attach the top piece to the band
Line up the top piece so that each arm is above one of the C shapes. Wiggle it down as best you can until every arm is aligned at the opening of a C shape. This usually involves going around in a circle moving one arm a little bit closer. Usually after going around 2 or 3 times, you will have the arms all lined up at the opening of the C shapes. Then one at a time, gently move the end of each arm to the inside of the C. This is easiest by pinching the very end of an arm which will both pull the arm towards you and push the band away which should give just enough clearance to lock it in. Repeat going around the band until all arms are locked inside the C shapes.


7 - Screw everything together from the base up
Start with the base piece.
- Screw on longest post piece
- Screw on the basket
- Screw on the remaining post piece with the longer thread
- Screw on the final post piece which should have a short thread
- Screw on the band and top piece making sure that the post passes through the two rings
8 - Print some discs 🥏 and enjoy!
Boost Me (for free)
If you love disc golf, getting disctracted, or both!
License

You shall not share, sub-license, sell, rent, host, transfer, or distribute in any way the digital or 3D printed versions of this object, nor any other derivative work of this object in its digital or physical format (including - but not limited to - remixes of this object, and hosting on other digital platforms). The objects may not be used without permission in any way whatsoever in which you charge money, or collect fees.


Comment & Rating (142)