


Print Profile(2)


Bill of Materials

Description
Boost Me (for free)
I enjoy designing every day items and sharing them with the community here. If you like my designs, please consider leaving a review and a Boost. Your support is greatly appreciated!
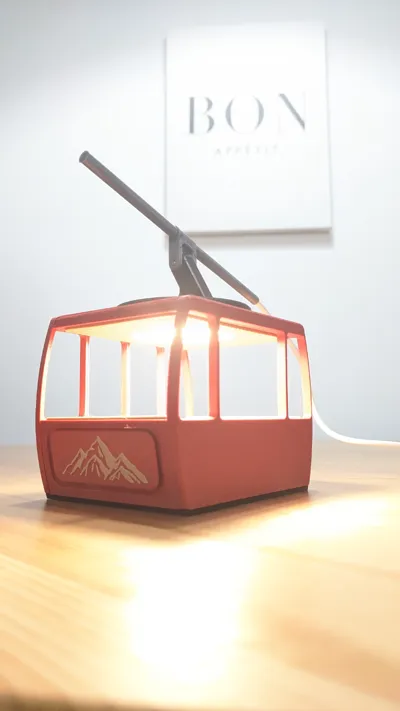
This is a small night light or desk lamp in the shape of a gondola made using the LED lamp kit from Bambu. Perfect gift for a friend that likes to ski or to add to your winter decor collection. You do not need an AMS unit to make this model, it was designed in multiple parts to be able to print it without AMS.
The only non printed parts you will need are:
- LED Kit
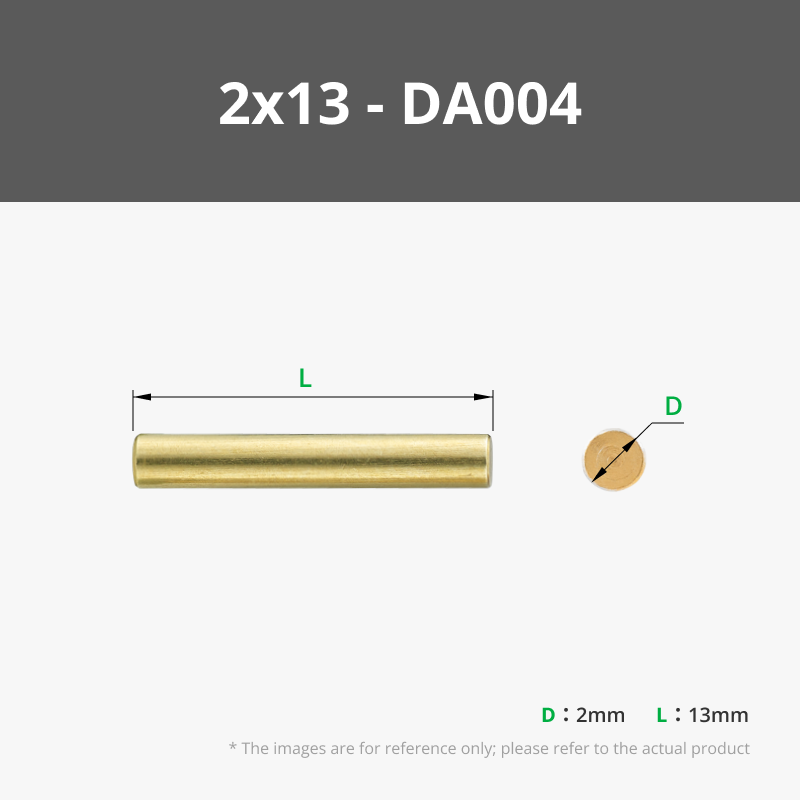
- One 2mm by 13mm pin
- Glue
Recommended colors:
- Black
- Red
- Light Beige (to simulate wood)
- Grey
General Print Info:
- The plates are seperated by color
- Part “Floor Frame” → Pause at layer 12 to change colors from black to red
- Part “Mountains” → Pause at layer 51 to change colors from red to black (or beige, both look good)
- Some components require support but none of the areas supported will be visible once installed so dont worry about the finish quality
Detailed Assemnly Steps:
- Glue the bench pieces to the main body
- Glue the “Ceiling” to the “Top Main Frame”
- Line up the bottom pins of the “Front Face” to the main body's holes, insert a bit of glue and press them together. DO NOT install the back face yet, you won't be able to install the roof if you do.
- Line up the top pins of the "Front Face" to the holes in the ceiling. Use a bit of glue and press them together. DO NOT try to take these two appart after you have inserted them together, you will break the pins (been there, done that).
- Line up the pins of the “Back Face” to the holes in the main frame and “Ceiling”, glue and press together.
- Insert the light from the LED kit
- Pass the USB end through the opening on the “Connect Plate”
- Install the “Connect Plate” in the ceiling opening. I do not recommend using glue as you will not be able to remove it afterwards to access the light if needed.
- Glue the “Cable Connect” and “Cable” Together (cable goes in the hole of cable connect)
- Use a 2mm pin to attach the “Cable Connect” to the “Connect Plate”, press fit.
- Press fit the light's cable into the slot along the “Cable Connect” piece to keep cleanly out of the way
- Drop the “Cable Cover” in place to hide the opening in “Cable Connect”
Enjoy!
License
You shall not share, sub-license, sell, rent, host, transfer, or distribute in any way the digital or 3D printed versions of this object, nor any other derivative work of this object in its digital or physical format (including - but not limited to - remixes of this object, and hosting on other digital platforms). The objects may not be used without permission in any way whatsoever in which you charge money, or collect fees.
Comment & Rating (38)