Lithophane with Battery


Print Profile(2)


Description
English:
LumiFrame Duo – The Illuminated Lithophane Frame for Wall & Tabletop
Illuminate your memories!
The LumiFrame Duo is a stylish LED frame with an integrated battery that dramatically showcases your 3D-printed lithophane images – both on the wall and on the tabletop. Thanks to the subtle LED backlighting, your photographs appear richly detailed with unique depth. Ideal as a gift, nightlight, or modern home décor.
🔋 Battery-Powered – No tangled cords, simply charge and place or hang anywhere
🖼️ Versatile – Usable as a wall hanging or table lamp
✨ High-Quality Design – Simple, modern, and elegant
🎁 Perfect as a Gift – For family, friends, or as a highlight in your home
🔧 LumiFrame Duo – Complete Assembly Instructions
(with LX-2BUPS & Dual USB-C charging ports, battery holders, 2x 2-Pin angled USB-C connectors)
⚠️ Important Safety Notice:
Assembly involves lithium-ion batteries, soldering, and electrical wiring. Attempt this only if you are experienced and know what you are doing. If in doubt, please seek assistance from a qualified person to avoid injury or damage.
Components:
- Printed parts of the LumiFrame Duo frame
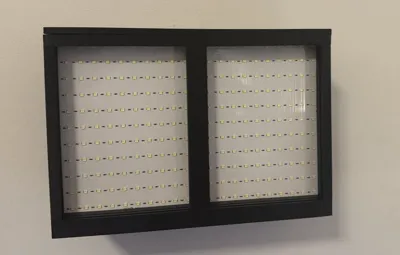
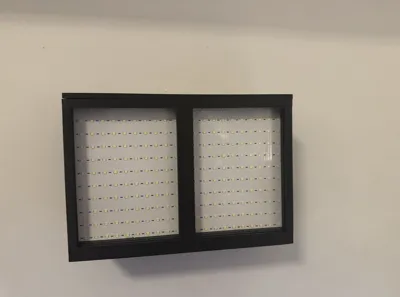
- LED board (for insertion)
- Two 18650 lithium-ion batteries (in holders on the LX-2BUPS, no soldering required)
- LX-2BUPS battery protection and charging board with USB-C input/output
- Two USB-C charging ports, mounted on the underside of the frame
- 2x 2-Pin angled USB-C connectors
- Switch
- Wires, soldering tools, hot glue
- 12x 6x3mm magnets (6 for the lid, 6 for the frame)
Assembly & Wiring Steps:
1. Prepare Printed Parts
Clean and adjust all parts, including the USB-C charging ports on the underside.
2. Secure Components in Frame
Securely attach the LX-2BUPS board, the switch, and the USB-C charging ports within the frame.
Plan and route the wires so they are not damaged or pinched during assembly.
3. Solder USB-C Charging Ports to LX-2BUPS (Important: Observe correct polarity!)
Solder the two USB-C charging ports on the underside directly to the +5V and –5V pads of the LX-2BUPS board.
⚠️ Pay attention to correct polarity to avoid damage or malfunctions!
These ports serve as the charging port for the batteries.
4. Wire USB-C Ports with 2x 2-Pin Angled USB-C Connectors (Power Supply for LED Board)
- Solder a wire from the UPS+ output of the LX-2BUPS board to one pole of the switch.
- From the other pole of the switch, solder wires to the positive (+) wires of both 2-Pin angled USB-C connectors.
- Solder the UPS- output of the LX-2BUPS board directly to the negative (–) wires of both connectors.
- These connectors will later be plugged directly into the LED board.
5. Insert LED Board
Slide the LED board into the frame; screws or glue are not necessary.
6. Insert Batteries into Holders
Insert the two protected 18650 batteries into the holders on the LX-2BUPS board – no soldering required.
7. Final Step – Connect Power Supply to the LED Board
Plug the 2x 2-Pin angled USB-C connectors into the power connections of the LED board.
8. Charge & Test
Charge the batteries by plugging a USB-C charger into one of the two USB-C ports on the underside.
Use the slide switch to turn the LED board on and off and check functionality.
9. Final Assembly
Mount 12x 6x3mm magnets:
- Place 6 magnets evenly on the lid.
- Attach 6 magnets to the corresponding positions on the frame to magnetically secure the lid.
Important Notes:
- ⚠️ This project involves batteries and soldering. Only proceed if you have experience. Otherwise, please seek expert assistance.
- Correct polarity when soldering the USB-C charging ports and power cables is crucial.
- Batteries are inserted into holders – no soldering to the batteries is necessary.
- The slide switch controls the power supply to the LED board and prevents unnecessary battery drain.
- Only plug in the USB-C cables of the LED board in the final step to avoid damage.
Boost Me (for free)
License
You shall not share, sub-license, sell, rent, host, transfer, or distribute in any way the digital or 3D printed versions of this object, nor any other derivative work of this object in its digital or physical format (including - but not limited to - remixes of this object, and hosting on other digital platforms). The objects may not be used without permission in any way whatsoever in which you charge money, or collect fees.
Comment & Rating (5)