HyperX Cloud Orbit S Hinge Fix


Print Profile(1)

Description
Summary
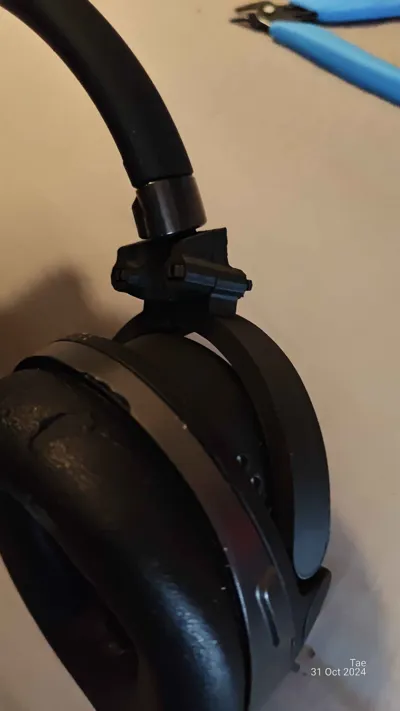
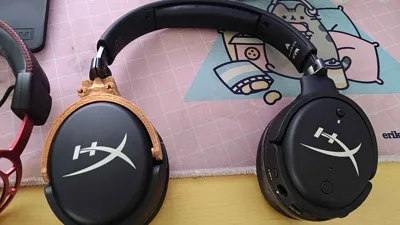
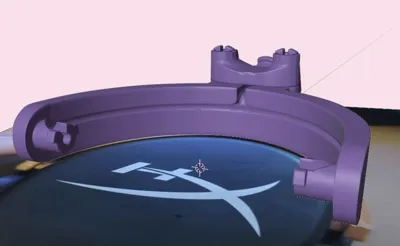
This print fixes the very annoying Cloud Orbit S hinge that breaks no matter how carefully you use it. It will eventually break over time due to a manufacturing error and poorly designed part.
I have attempted to remedy this flaw, and created this hinge replacement that should make it as easy as possible to fix your broken expensive headphones, as HyperX rarely ships replacements as they think the issue arrives from "wrongful use of the product".
I hope you like my fix, and that it will help someone fix their headphones :)
Boost Me (for free)
Please boost me if you liked this model as it would help me work on my CAD and 3d printing skills :)
Post-Printing
How to assemble:
- Print All Parts:
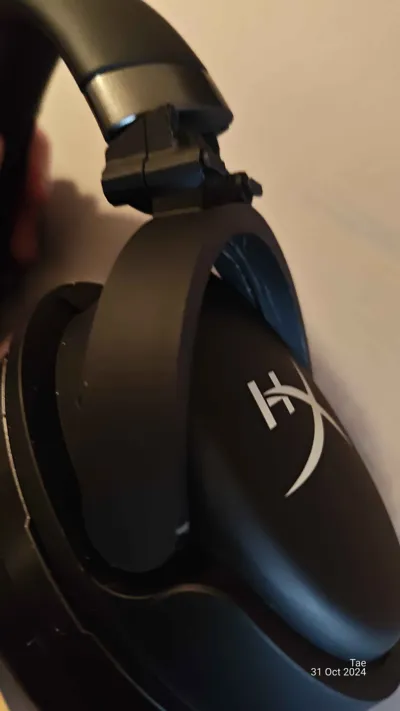
Ensure all parts are printed with the pins laying flat on the build plate during printing. - Separate the Earcups:
Use a credit card, guitar pick, or a similar tool to separate the earcups. - Remove the Broken Hinge:
Unscrew the screws on the inside of the earcups to remove the broken hinge.
Carefully use a knife or another cutting tool to cut off the plastic on the hinge surrounding the wire. - Detach the Hinge from the Headband:
Unscrew the hinge from the headband of the headphones.
Carefully cut the wire out of the hinge part as well. - Install the New Hinge:
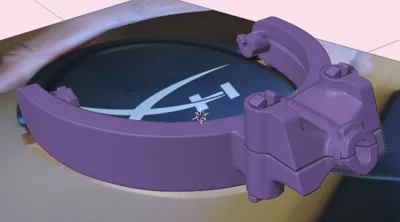
Feed the wire through the printed part.
Affix the wire inside the earcups, ensuring everything is securely in place.
Close the earcups with the new hinge installed. - Assemble the Hinge:
Place the top part of the new hinge over the bottom part, ensuring the wire goes through the small channel.
Use the pins to secure the two parts together. The optimal way to insert the pins is from the top to the bottom. - Complete the Fix:
Once the two parts are securely attached, place the new hinge inside the headband, completing the repair.
License
You shall not share, sub-license, sell, rent, host, transfer, or distribute in any way the digital or 3D printed versions of this object, nor any other derivative work of this object in its digital or physical format (including - but not limited to - remixes of this object, and hosting on other digital platforms). The objects may not be used without permission in any way whatsoever in which you charge money, or collect fees.
Comment & Rating (0)