
Saitek X-55 X-56 Rhino HOTAS Desk Mount Logitech


Print Profile(4)


Bill of Materials
- M3_Screw x 4: Per_Side_(8_Total)
- M3_MeltIn_Threads x 4: Per_Side_(8_Total)
Description
Summary
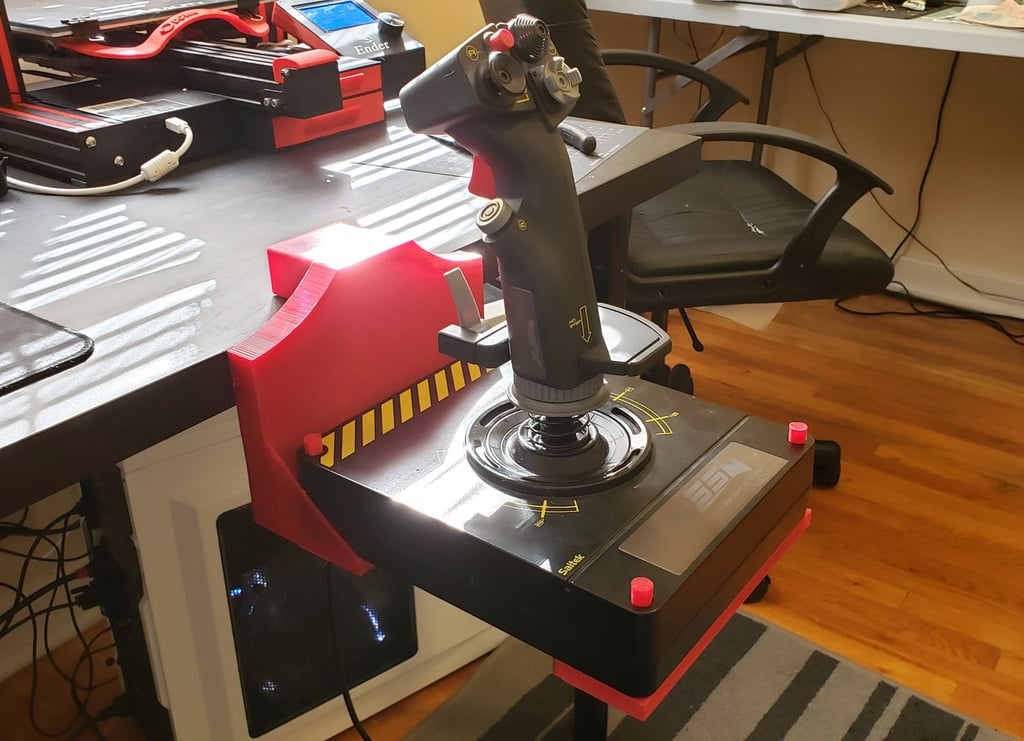
This is a modified Version of the X55/X56 Desk Clamps by netcrawl and iGavello.
- centered the hole for the cable
- added walls to the T-shaped part, to hold the base in place in addition to the printed screws
- added 15mm spacers to keep the base more secure during movements
- strengthened connection between front and back parts
- added a version without needed supports (needs extra M3 screws and threads instead)
- changed rounded edges to chamfered ones, to improve printability
- changed desk thickness to 26mm, to allow 25mm tables to fit more easily
- Increased thickness of side walls for studiness
- moved side walls slightly, to fit the throttle more easily
Supports are only needed for the Version without extra screws. If you print the split up version, you won't need supports, but M3 screws and M3 screw threads instead.
If the joystick-screws are too fragile, you can also use M6 screws for this, just be careful when screwing them in, to not deform the threads (unless you also use melt-in threads)
Print Settings
Printer Brand:
Bambu Lab
Printer:
A1
Rafts:
Doesn't Matter
Supports:
Only for Version 2
Resolution:
0.2mm
Infill:
8-30%, 3-7 Walls
Filament: Bambu Labs PLA worked for me - if you want to be extra safe, use PETG
Notes:
I recommend printing with 3-5 walls. I printed the bigger parts with 8% Infill and 3 walls and the screws with 30% and 5 walls. I recommend printing the clamp parts (if you print version 1) with 5-7 walls and 8% infill.
If you are using the print Profiles I uploaded, you won't need to worry about any of that.
Parts needed for Version 1 (per controller side):
1x Main_clamp_upper_for_screws.stl
1x Main_clamp_lower_for_screws.stl
1x Main_noclamp_for_screws.stl
4x Joystick_Bolt.stl
2x Desk_Bolt.stl (I recommend using the shortened version)
1x Main_T_With_Walls.stl
Parts needed for Version 2 (per controller side):
1x MainBody_NoScrews.stl
4x Joystick_Bolt.stl
2x Desk_Bolt.stl (I recommend using the shortened version)
1x Main_T_With_Walls.stl
Post-Printing
Version 1: Screws
Version 1 needs 4 M3 screws and threads to join Main_noclamp_for_screws with clamp_upper and clamp_lower. Insert melt-in threaded inserts into the two clamp parts, screw the M3 screw through Main_noclamp into the clamps.
Because of this, no supports are needed.
Needs superglue to fuse the main part and the T-shaped part together
While not technically needed, I'd still recommend supergluing the clamp parts to the main part, in addition to using screws.
Version 2: No Screws
Version 2 needs no screws, but supports instead
Still needs superglue to fuse the parts together
If you Print Version 2, there are no additional Parts needed, except for Superglue.
This remix is based on

License



Comment & Rating (63)