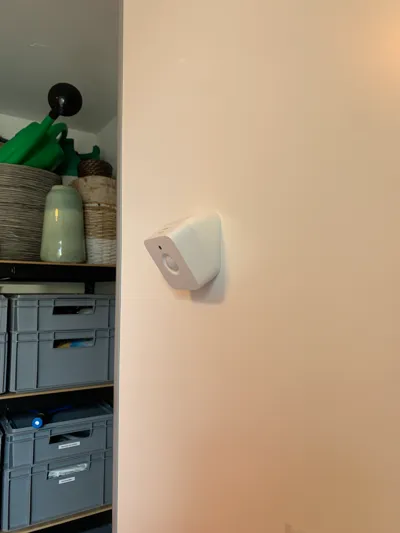
Wall mount for Philips Hue Motion Sensor (15-85°)


Print Profile(17)


Description
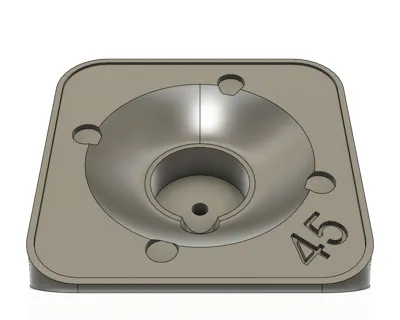
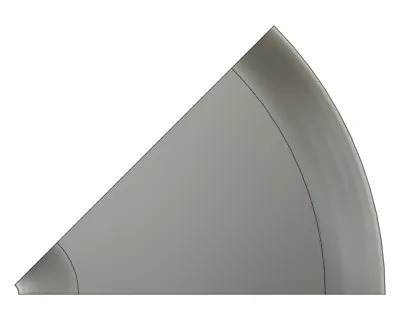
I am excited to share this design of a wall/ceiling mount for a Philips Hue motion sensor (indoor). With this mount you can position your motion sensor at a tilted angle (horizontal or vertical) using either a single screw or magnets. I have published a print profile for each of the following angles:
- 15°, 20°, 25°, 30°, 35°, 40°, 45°, 50°, 55°, 60°, 65°, 70°, 75°, 80° and 85°
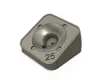
I have also published one print profile with all these angles on a single build plate. Each mount is labeled, so you can easily identify the angle of your print.
Boost Me (for free)
If you like my design, I would highly appreciate if you would support my work with a boost.
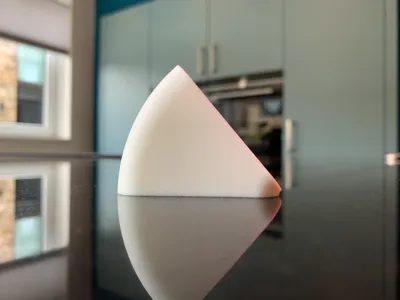
While similar mounts are available for this motion sensor, many are either bulky or have a fixed angle. I decided to design this mount from scratch with a contemporary approach. The result is a sleek, modern design that perfectly follows the shape and contours of the motion sensor.
Required hardware:
You can use the following hardware that came with the motion sensor.
- Center magnet (with the white rubber)
- Short screw (to fix the center magnet)
- Long screw (to fix the mount)
NOTE: If you have the latest version of the Hue indoor motion sensor, you also need a 3 mm spacer for the center magnet (which has a 7mm thickness instead of 10mm). I have published a print profile which includes a 3 mm spacer that you can 3D print. If you have a center magnet of 10mm thick, you don't need a spacer. Read my additional description on how to identity your version.

ASSEMBLY:
Step 1: Fix the mount
Secure the mount to your wall or ceiling with one of the following two options:
- Use the long screw that came with your sensor (or a similar screw).
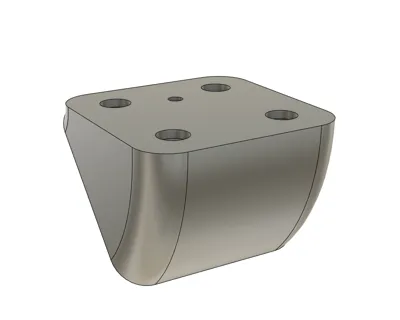
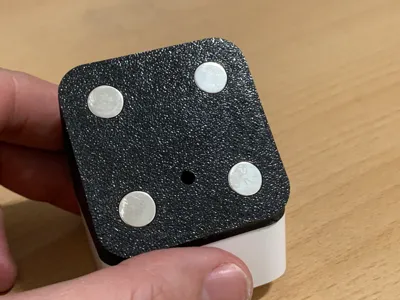
- Attach two or four Ø10×3 mm magnets to the bottom plate for a non-permanent installation.
NOTE: When using a screw and depending on the angle you choose, it’s best to first secure the mount to the wall/ceiling before attaching the center magnet. Because the white rubber of the center magnet may be in the way for your screw and screwdriver.
Step 3: Attach the center magnet
Screw the magnet (with the white rubber) into the center of the mount using the short screw, as illustrated below:

Step 3: Attach the sensor
Simply place the motion sensor onto the magnet in the center of the mount, as illustrated below.

FILAMENT:
I printed this design with PLA Basic (white) from Bambu Lab. But PLA Matte or any other brand/type of filament will work just as well.
ADDITIONAL INFORMATION:
Please read the following information carefully before you print:
- The 15°, 20°, 25°, 30° and 35° angles have a slightly lifted bottom plate.
- The 70°, 75°, 80, and 85° angles have no screw hole. These can only me mounted with magnets.
- As I have published multiple print profiles. One for each angle, and one print profile which includes all angles (ranging from 15° to 85°).
If you only need to print a few of them, with Bambu Handy or Bambu Studio just de-select the objects (mounts) that you don't want to print, as illustrated below:
Bambu Handy:
Bambu Studio:
- You can change the orientation of the angle (from vertical to horizontal) by rotating the mount 90° on the wall.
- Philips Hue has released two version of the indoor motion sensor. This design supports both versions. The version can be recognized as the follows:
- The initial version has a “PHILIPS” logo on top. It has a reset hole/button that requires a pin. And its center magnet has a 10mm thickness.
- The latest version has a “Hue” logo on top. It has a rubber reset button. And its center magnet has a 7mm thickness.
If your center magnet is 7mm thickness you need to use a 3mm spacer. I have published a print profile which includes a 3mm spacer, which you can position in the magnet hole before you mount the center magnet. See following photo for illustration:

- A 7mm center magnet has enough magnetic strength. But if you don't find this enough, you can purchase an 3mm magnet (with a hole in the center) as a replacement for the spacer.
- The hole to mount it to the wall/ceiling is always at the same position, whatever the angle you choose. You can safely drill a hole on the wall/ceiling. If you decide to change to another angle, the hole will always be at the same position. Unless you rotate the mount 90°.
- I have set the wall thickness to 3. A thickness of 2 is also fine, but with white filament at certain light conditions, light might shine through which you are be able to see your infill.
- You can mount your sensor with a screw to the wall or ceiling. But you can also glue two or four Ø10x3 mm magnets to the bottom plate. Ensure that the positive- and negative pole of magnets are oriented to the same direction. Best is to screw the center magnet in place and position your magnets in a way that they are attracted to the center magnet.
FEEDBACK & SUPPORT:
Thank you for checking out this design! I’d love to hear how you used this mount — feel free to share a photo and leave your feedback in the comments.
While I may not be able to accommodate every unique angle or design variation, I’m happy to consider specific modification requests. If you have one, let me know, and I’ll see what I can do. Some dimensions or angles are easy to adjust, so I’m considering creating a special print profile for custom requests. No promises, though!
NEXT PROJECTS:
I am currently working on another variant for a corner mount. I already finished the initial design. I must finish some final testing and do some fine-tuning. I also started with some other ideas and designs for Philips Hue products. Follow me to stay updated on new uploads.
UPDATES:
- 03-01-2025: I updated the design to version 1.1. The design has some slight fine-tuning updates. I changed the holes on the bottom plate to support larger/stronger Ø10x3mm magnets. for extra magnetic force. I added a 70° and 80° angle, to support angles ranging from 15° to 85°. The first print profile now includes all mounts with an angle ranging from 15 to 85°. This version now also includes a 3mm spacer to support initial version of the motion sensor, which has a center magnet with a 7mm thickness instead of 10mm. No worries, if you previously printed v1.0, it is fine. Just double-check if you need the spacer.
- 30-12-2024: I noticed that, depending on the version of your motion sensor, Philips Hue delivers two thicknesses of the center magnet. The old (initial) version 10mm thick, and the new (latest) version is 7mm thick. So, one of them is 3 mm thinner. No worries, my design supports both thicknesses. In case you have a thinner magnet (7mm instead of 10mm), I've published a print profile which includes a 3 mm spacer that you can 3D print.
License
You shall not share, sub-license, sell, rent, host, transfer, or distribute in any way the digital or 3D printed versions of this object, nor any other derivative work of this object in its digital or physical format (including - but not limited to - remixes of this object, and hosting on other digital platforms). The objects may not be used without permission in any way whatsoever in which you charge money, or collect fees.
Comment & Rating (94)