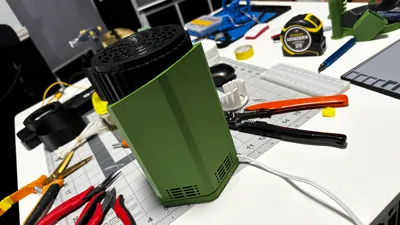
Fan Outershell for Soldering Fume Extractor


Print Profile(1)

Description
Looking for a fan for the soldering fume extractor by One Maker Show. However, no fan equivalent was available in the US. so bought this fan from Amazon (Link - https://www.amazon.com/SAILFLO-Booster-Bathroom-Basement-Greenhouse/dp/B07J5VN82X/ref=sr_1_4?crid=27SX810ZXXRV2&dib=eyJ2IjoiMSJ9.R4MaDzmsBRsQcAxMduIrF1mBhX_nxlJHJQH_HmSJ_eDDU4dmPCKmnPDd-uDZdOa8a2F8RNp4gjS8GsX2YE8qZTtaXKpNG3xlcLJYELYlOPlSDjuuKIDJYcpNtxARf3Kc7gU2dKqIprr7qpArmaA-7Dt43DiTa4d5Xt1uu0EAbXH_Ztw82HpqA8Y1gXdLSBaFjKyL55P-4IpigzVYsUO_OS9E7bTsTog20UK8QMl1aCPVTi8symgr382wwjkgrhTt-8tL3Av1v3mgXQN-iQZxWZhJFZiv1TSlbCCrkwGU2pg.0QSY9qx19rLkiZzSkKZzg7HXEdtkXwBIaOBfNNnK1H4&dib_tag=se&keywords=sailflo%2B4inch%2Bduct%2Bfan&qid=1729998868&sprefix=sailflow%2B4inch%2Bduct%2Bfan%2Caps%2C74&sr=8-4&th=1)
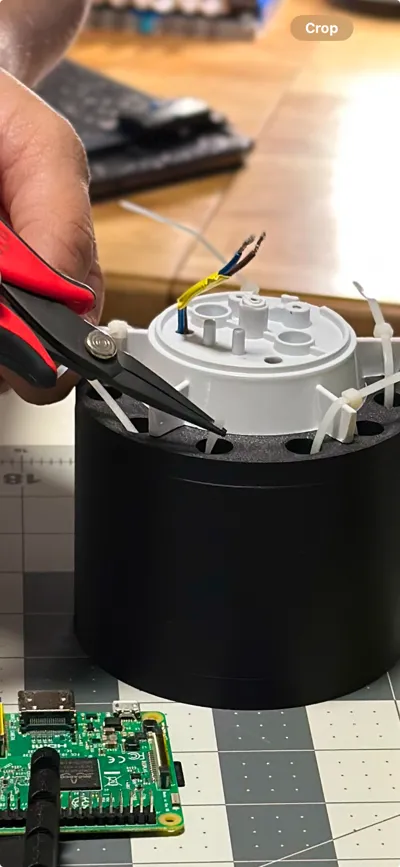
Once I got it. Please follow the below instructions- I have destroyed the fan. removed/cut the wiring and then. Printed this profile and reconstructed the fan. Just used zip ties so the fan unit is not moving inside. You need to have complete outer shell removed. I used flush cutters (larger and smaller) to remove the complete shell. only the top blades remain with the fan. everything else is going to trash.
Once the print was complete. I removed the wiring completely. Open the top by removing the screw. You have 4 more screws to remove. two that keep the wires in place and cut the wire twist connectors and remove the wiring. now remove the two screws on top of the motor unit to completely dis-assemble the fan.
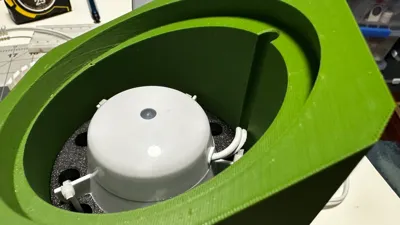
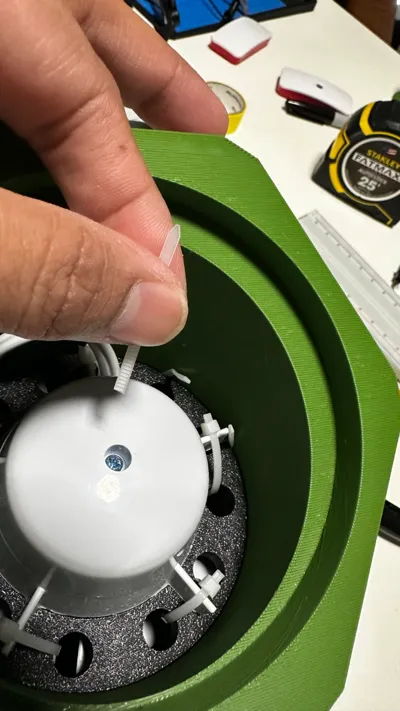
Note: I used the cut zip tie pieces as shims so that the entire unit won't slide inside the extractor unit.
Now assemble it back with having the print profile as shown in the pictures under documentation.
This was fun!
Comment & Rating (7)