Tasmota Air Quality Meter


Print Profile(1)

Bill of Materials

- 0.96in_i2c_display x 1: https://www.amazon.com/gp/product/B08RYSVG5Y/ref=ppx_yo_dt_b_search_asin_title?ie=UTF8&th=1
- esp8266_d1_mini_usbc x 1: https://www.amazon.com/gp/product/B0CDQ15JH7/ref=ppx_yo_dt_b_search_asin_title?ie=UTF8&th=1
- pms5003T x 1: https://www.amazon.com/Peirdom-PMS5003T-Temperature-Humidity-Detection/dp/B0DGWX7JJH/ref=sr_1_11?crid=2FJXAY4LZW8ZH&dib=eyJ2IjoiMSJ9.YEBdEHwF_ed_LggazGuvRZszeoT_gPaxLZEh5USsVmwalYFVaY55VYmcGQfDPqJsZLAeqvRcFTS7Zd8KhHezf2UnRKZHqdCD2dOkDWMsIjRMsS0lDz1Fvfrc-m_UVrnf0uDdJR6ZMK4X7Jq4vjLUn2B9_1ru0vXRKzJpUUGLdIbZjbilswHR0-a66l9uDrv8.bY24xcci9m3hCG1NWQcw7srh9_XFc9AZiz8xj-6_4pQ&dib_tag=se&keywords=pms5003t&qid=1729879404&sprefix=pms5003t%2Caps%2C189&sr=8-11
Description
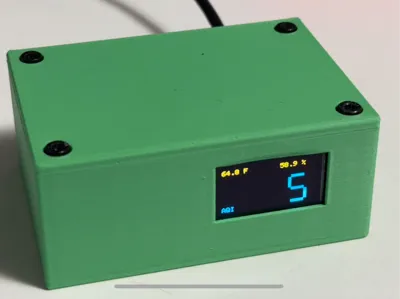
Tasmota Air Quality meter based on a esp8266 d1 mini clone with usb-c, a PMS5003T and a 0.96in OLED display. Total cost is under $30.
Ordering Parts
- The D1 mini can be found on amazon in 3-5 packs for ~$4 each
- There are several variants of the 0.96in I2C OLED display. The ones without headers soldered in work best. ~$2.20
- You could use the PMS5003 module but it lacks temperature and humidity. I get the PMS5003T from eBay ~$19.30
- m3x6 hex socket head cap screws
Soldering
- The screen needs ground and 3.3volts. Connect Screen SCL to D1, and SDA to D2
- The PMS5003T ribbon cable pin1 is black and faces the middle of the module when plugged in.
- Pin1(black) goes to 5v on the D1
- Pin2(red) goes to GND
- Pin3(red) goes to D6
- Pin4(black) goes to D5
- All others can be cut short and are not needed.
- Note: The D1 has a single GND hole, and you need to solder two wires to it at the same time

Tasmota
You will want to compile your own Tasmota because this needs a sensor and a screen. I use platformIO on the CLI, but there are other options. See https://tasmota.github.io/docs/Compile-your-build/ Copy user_config_override_sample.h to user_config_override.h, and add the following:
#undef USE_DISPLAY
#define USE_DISPLAY
#undef USE_UNIVERSAL_DISPLAY
#define USE_UNIVERSAL_DISPLAY
#undef USE_PMS5003
#define USE_PMS5003
#undef PMS_MODEL_PMS5003T
#define PMS_MODEL_PMS5003T
#undef DSP_ROM_DESC
#define DSP_ROM_DESC ":H,SSD1306,128,64,1,I2C,3c,*,*,* :S,0,2,1,0,30,20 :I AE D5,80 A8,3F D3,00 40 8D,14 20,00 A1 C8 DA,12 81,9F D9,F1 DB,40 A4 A6 AF :o,AE :O,AF :A,00,10,40,00,00 :i,A6,A7 #"
If you are in the US you can get Fahrenheit with:
#undef TEMP_CONVERSION
#define TEMP_CONVERSION true
I also like to put my WiFi and MQTT details in this file as well. Compile and flash your device. I use this command: platformio run -e tasmota --target upload --upload-port /dev/cu.usbserial-11130
In Tasmota Config, set Module Type to Generic 18. Then set the following:
- D2 - I2C SDA
- D1 - I2C SCXL
- D6 - PMS5003 Tx
- D5 - PMS5003 Rx
- D0 - Option A, 3
Here is what I type on the console to set one of these up:
- Displaymodel 17
- # This makes the PMS last longer by sleeping for 5min between readings
- Sensor18 300
- # This sets PST Timezone, switch for whatever you want
- Backlog0 Timezone 99; TimeStd 0,1,11,1,2,-480; TimeDst 0,2,3,1,2,-420
- Hostname [whatever]
- Devicename [whatever]
- Friendlyname [whatever]
- TelePeriod 60
- Topic [mqtt topic]
- Rule1 on tele-PMS5003T#US_EPA_AQI do DisplayText [f4s2x24y16p-3]%value% endon on tele-PMS5003T#TEMPERATURE do DisplayText [f0s1x0y0p-6]%value% F endon on tele-PMS5003T#HUMIDITY do DisplayText [f0s1x80y0p-6]%value% % endon on system#boot do DisplayText [f0s1x0y56]AQI endon
- Rule1 1
Comment & Rating (3)