Nasal Snuff Sniffing Bullet (Dry Snuff Tobacco)


Print Profile(2)


Bill of Materials

Description
Boost Me (for free)
Hi there! If you have a spare boost, I’d be so grateful for your support. While bigger creators often get lots of attention, boosting smaller creators like me truly makes a big difference. Your boost would help me keep sharing unique, niche models for everyone to enjoy. Thank you so much for considering it—it means the world! 🙏💖
Membership
Commercial License Membership For Resellers Available
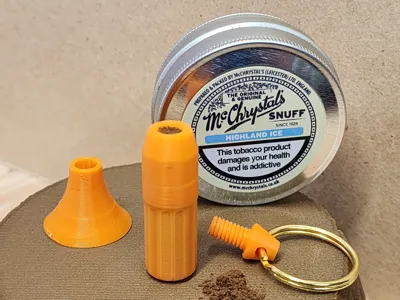
Travelling? Need an emergency pinch of snuff on the go?
This great snuff bullet is great for all dry nasal snuff tobacco. Easy to use and effective.
This profile prints each part separately. This consists of 3 parts for bullet and 1 filling funnel -
- Part - Main Body Capsule (Light Blue)
- Part - Fill Cover (Grey)
- Part - Threaded Cap (Dark Blue)
- Filling Funnel (Lavender)

Instructions:
Printing -
- The profile has easy to remove support for the “Main body capsule”
- Don't print too fast. We want the threads to be good. My profile works very well.
- Print in orientation I setup as this will allow for proper fitment.
- The 3 parts for bullet use .16mm layers and the funnel is .24mm
- This profile prints each part separately
- Use dry filament. I used PLA+ and works great. Other filaments may need settings adjusted.
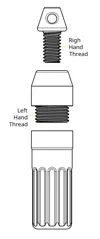
Assembly -
- The threading on “Main Body Capsule” to “Fill Cover” is LEFT HAND THREADING. This was done to avoid thread separation when opening Cap to use.
- The threading on “Cap” to “Fill Cover” is standard RIGHT HAND THREADING.
- Use any split ring key-ring you have laying around.

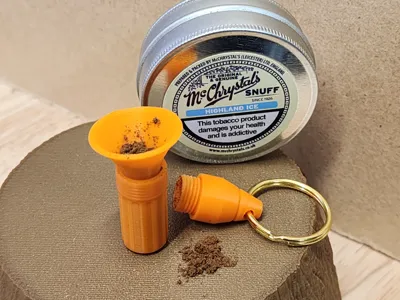
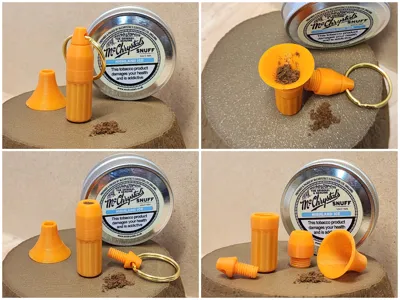
HOW TO USE -
- Separate the Main Body Capsule from Fill Cover
- Insert Funnel and fill with your favorite snuff up until the internal threading
- Put Fill cover back on
- When ready to use
- Remove threaded cap
- Cover opening with finger
- Tip capsule over to bring snuff to hole and flip over so snuff does not fall out
- Insert in to nostril and sniff it up! (Try going easy at 1st to make sure you don't snort too much)
- Replace threaded cap when done
- Print some extra Fill covers so you can replace as this touches nose.
Relax and enjoy!
If you print this model please rate and like. If you really like it please give me a boost.
Thanks!
Boost Me (for free)
Hi there! If you have a spare boost, I’d be so grateful for your support. While bigger creators often get lots of attention, boosting smaller creators like me truly makes a big difference. Your boost would help me keep sharing unique, niche models for everyone to enjoy. Thank you so much for considering it—it means the world! 🙏💖

Documentation (1)
License
You shall not share, sub-license, sell, rent, host, transfer, or distribute in any way the digital or 3D printed versions of this object, nor any other derivative work of this object in its digital or physical format (including - but not limited to - remixes of this object, and hosting on other digital platforms). The objects may not be used without permission in any way whatsoever in which you charge money, or collect fees.
Comment & Rating (44)