Makita RT0700 Festool with micrometer adjustment


Print Profile(4)


Description
Boost Me (for free)
I learned from the community and freely share my projects with it! If you wish to support me, please boost me! I share my final work with you, but countless test prints went into it
Hello
I am sharing my latest project, which I believe is unique on Maker World (I think).
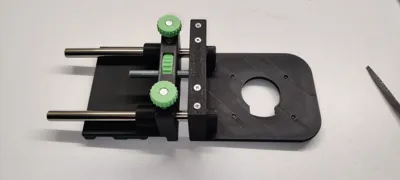
It is an adapter for Festool tracks, allowing the use of a Makita RT0700 trimmer with micrometer adjustment. In fact, any trimmer can be used; simply adapt the base plate with the holes.
An M8 screw and knob advance the trimmer's base plate section, eliminating the need to move the guide for wider cuts.
Two small knobs (green in the photo) on top secure the steel bars once the correct measurement is set.
All green-printed parts are adjustment mechanisms (similar to Festool's approach :-) )
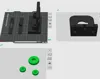
Assembly is somewhat complex, requiring additional components (shown in the photos). The list is as follows:
2 x 10mm diameter steel rods, length as needed
1 x M8x50 or larger hex head screw
8 x M3x18 countersunk head screws
2 x M4x30 hex head screws
2 x M4x25 round head screws with Allen key drive (black screws in the photo)
1 x M8 nut
8 x M3 heat-set threaded inserts
4 x M4 heat-set threaded inserts
N.B: The project is based on my Festool track and printer tolerances. Measurements may slightly vary.
WARNING: The instructions contain incorrect measurements for the 8 screws and inserts; these are M3, not M2!!
Any advice is welcome, and a boost never hurts ;-)
N.B: If you need to use it with a different trimmer, no problem; send me the hole dimensions, and I will adapt the base plate!!
UPDATE:
I've added another print profile to use Makita's plunge base, providing greater stability and adjustment ease!
This profile eliminates the need for threaded inserts as the screws will directly thread into the plastic!
Ciao
Documentation (1)
License
You shall not share, sub-license, sell, rent, host, transfer, or distribute in any way the digital or 3D printed versions of this object, nor any other derivative work of this object in its digital or physical format (including - but not limited to - remixes of this object, and hosting on other digital platforms). The objects may not be used without permission in any way whatsoever in which you charge money, or collect fees.
Comment & Rating (131)