BOX WITH HINGE


Print Profile(1)

Description
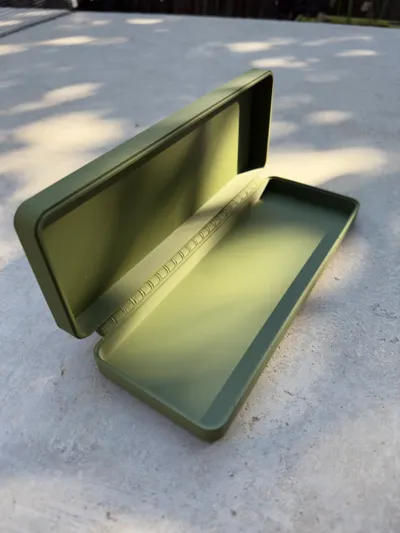
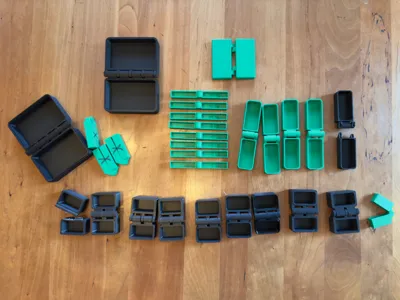
I designed a 3D-printed box with simplicity and functionality in mind, using almost exclusively whole numbers to keep the design straightforward. I incorporated 45-degree overhang angles throughout the model to avoid needing support structures during printing. This allows for clean prints without the hassle of removing supports.
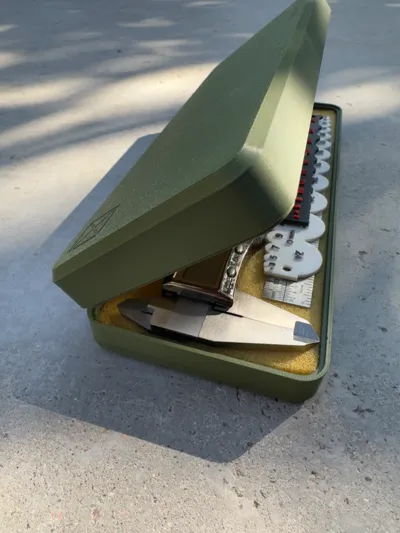
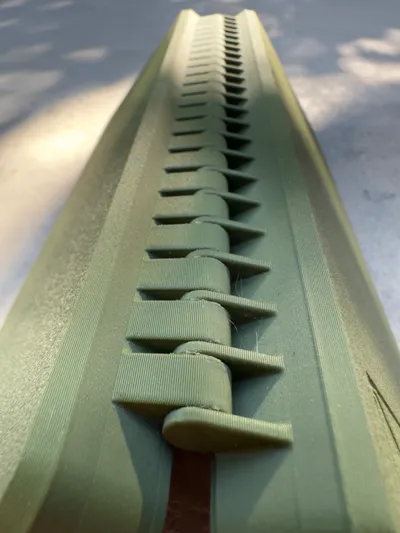
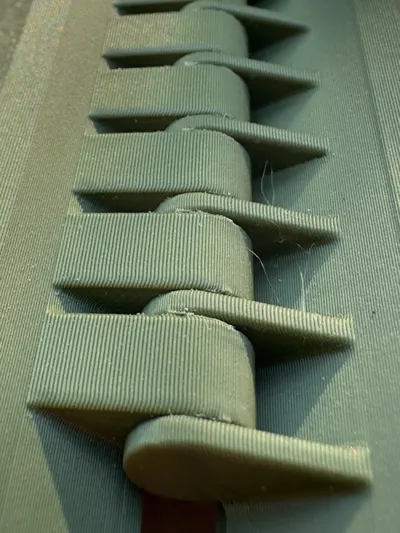
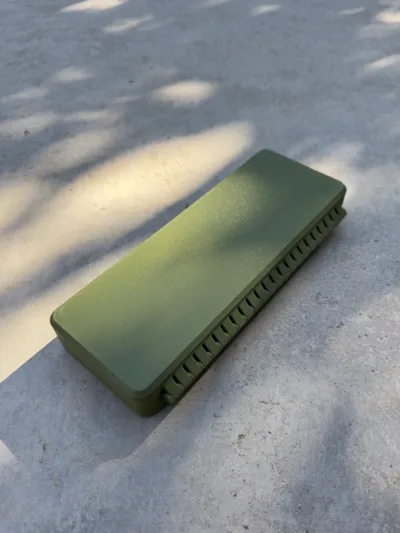
The tolerances in the hinges are extremely fine—just 0.1 mm (100 microns)—to showcase the precision and accuracy of the printer. While only a few individual hinges are needed on each side of the box, I placed them down the entire length of the box. This was both a design choice and a way to emphasize the printer's ability to handle intricate details.
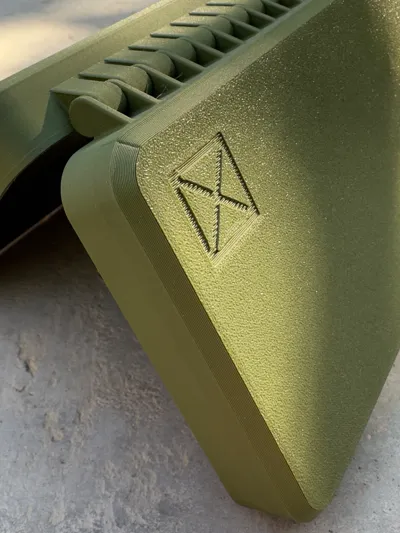
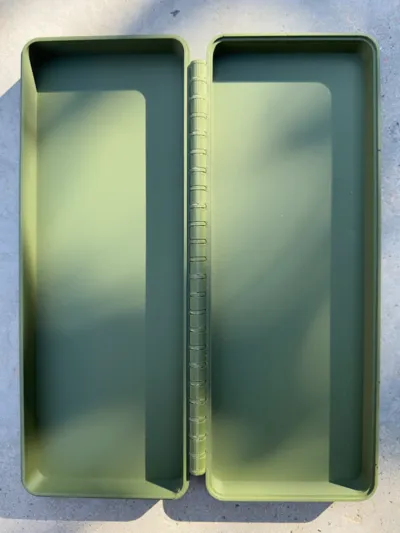
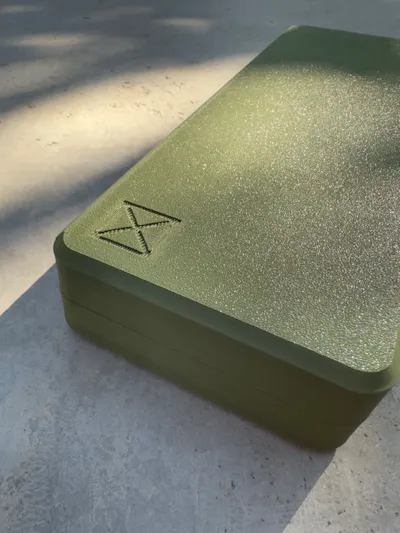
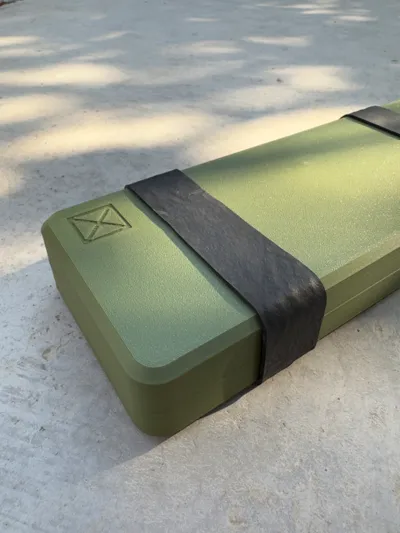
The box is perfectly symmetrical around the hinge axis, which allowed me to add a simple design in the top right corner. This feature helps orient the box correctly when opening, preventing accidental spills of tools or gear.
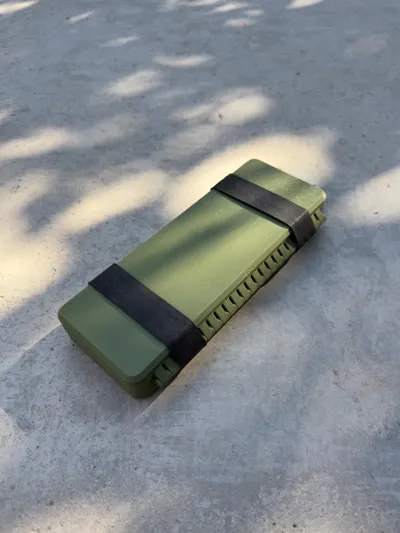
While the tongue-and-groove mechanism creates a strong friction fit to keep the box securely closed because of the 350 degrees of seal, the box is waterproof as far as I can tell, although I don't have a pressure chamber to simulate depths. Still, I predict that at pressure, the expanding gas trapped inside would pop the pieces apart). I also wrap it in two industrial EPDM rubber bands (These bands provide extra protection, ensuring the box stays closed in my backpack. They also add a non-slip grip and protect the box from damage when placed on rough surfaces. This simple yet effective solution gives me peace of mind that the box won’t accidentally open during transport.
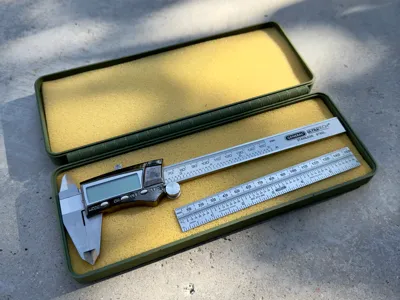
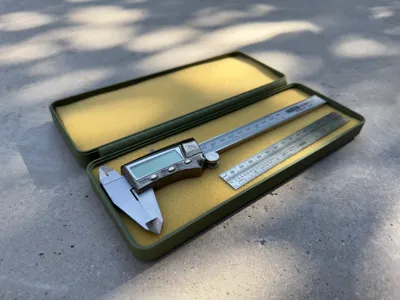
The internal length of the box is just over 9.4 inches, designed to perfectly fit a standard 6-inch caliper, making it an ideal tool storage solution. When using the box for the first time right off the printer, it’s essential to break in the hinge slowly. Due to the box's length and the tight tolerances in the design, the hinge may feel stiff initially. However, it will pop free and become buttery smooth with gentle use.
While applying lubricant to PLA hinges is possible, I prefer to leave it as-is. The hinge works perfectly right off the printer without needing extra treatment.
I recommend using a layer height of 0.2 mm or less during printing. With thicker layer lines, the tolerances can change, making the hinge stiffer than intended. The entire print is done in less than five hours, costing around $5 in material, and for me, it’s worth every penny.
I hope others appreciate the symmetrical beauty of this well-thought-out design, which combines functionality, elegance, and modern technology.
License
You shall not share, sub-license, sell, rent, host, transfer, or distribute in any way the digital or 3D printed versions of this object, nor any other derivative work of this object in its digital or physical format (including - but not limited to - remixes of this object, and hosting on other digital platforms). The objects may not be used without permission in any way whatsoever in which you charge money, or collect fees.
Comment & Rating (20)