
Cosplay Calipers


Print Profile(7)



Description
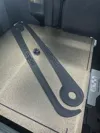
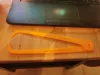
Here is my Cosplay Caliper tool I designed after seeing Nikko Industries awesome video explaining how he made his with foam. I figured I'd take that same concept and make it 3D Printable.
I've also shared the Tinkercad file. Feel free to modify it further and share your tweaks!
Here is a video explaining the process
*UPDATE - I added a .3mf file for Bambu Lab Printers - Quick 1 hr print on the X1 or the P1P
This thing was made with Tinkercad. Edit it online https://www.tinkercad.com/things/h387ngVeYoE
Thanks for watching!
Uncle Jessy
Print instructions
Unassociated tags: how to measure, Nikko Industries
Category: Hand Tools Print Settings
Printer Brand: Creality
Printer: CR-10
Rafts: No
Supports: No
Resolution: .2 mm
Infill: 10-20%
Notes:
This was designed to be printed on a 300x300 build volume printer, however, it can be scaled to any print bed size.
After printing snap the parts together and then take your measurements.
How I Designed This
Workflow
I initially designed the outline in Adobe Illustrator > Exported to SVG > Edited in Fusion 360 > Exported to STL > opened the file in Tinkercad and further modified the file for printing.
License



Comment & Rating (1607)