Halloween Magic Rune Circle - Vegvisir


Print Profile(1)

Bill of Materials


Description
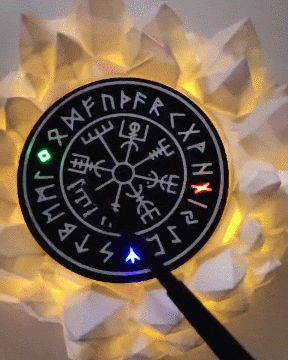
This magical runic circle allows you to cast spells like a real wizard or witch on Halloween or every other night at Midnight. Unleash your best curses accompanied by wicked laughter, wave a magic wand over the runic magic disc, and light up the symbols without any switch!
Poisoned apple not included.
-----------------
Warning: If you are new to 3D printing, this project might be too complex for you.
Instructions:
MAGIC CIRCLE VEGVISIR
First, print a "Magic Circle Vegvisir Bottom" to test the size of your LEDs and the diameter of the plugs that go into the holes. The LEDs are tiny magnet-activated LEDs that you find described in the Materials section.
If everything fits correctly, you might want to add the "Magic Circle Vegvisir Top" and glue it on using a suitable adhesive (I use “Colla 21”).
Alternatively, you can print the entire complete object “Magic Circle Vegvisir Assembled”.
MAGIC WAND
You can use and modify any wand. I used the customizable Harry Potter magic wand designed by DYI Wizard, who does not wish to have remixes of their work published. Therefore, I am only sharing a compatible wand tip I redesigned with a cavity inside, where you can insert small magnets during a slicer pause. Please like his beautiful design.
Be sure that your slicer left the pause I programmed, or add one yourself at the layer 591 (layer height 0.2), together with a brim at the base.
CRYSTAL DRAGON NEST
This design is not mine, and the creator, Carver Maker, does not want any remix to be published. Therefore, I am only sharing the resizing instructions and a modifier you can add in the slicer to create your crystal circle. Please like and boost his beautiful design.
Download the file and join the two parts together in the slicer:
Center the holed cylinder in the middle of the crystal nest.
Create a Boolean mesh adding part 1 (the crystal nest)
to Part 2 (the holed cylinder)
or
Rightclick with the mouse on both the selected objects and chose "merge" from the menu.
(one or the other should work on your files/slicer).
Screenshot 1
First, resize the Crystal Dragon Nest (non uniform):
x 220 y 220 z 77.79

Screenshot 2
Join the two objects as shown or with the merge command.

Now there's enough space for this remote controlled 16-color RGBW Puck light that you will place upside down in the hole, and for the Magic Disk Vegvisir on top of it.
Materials:
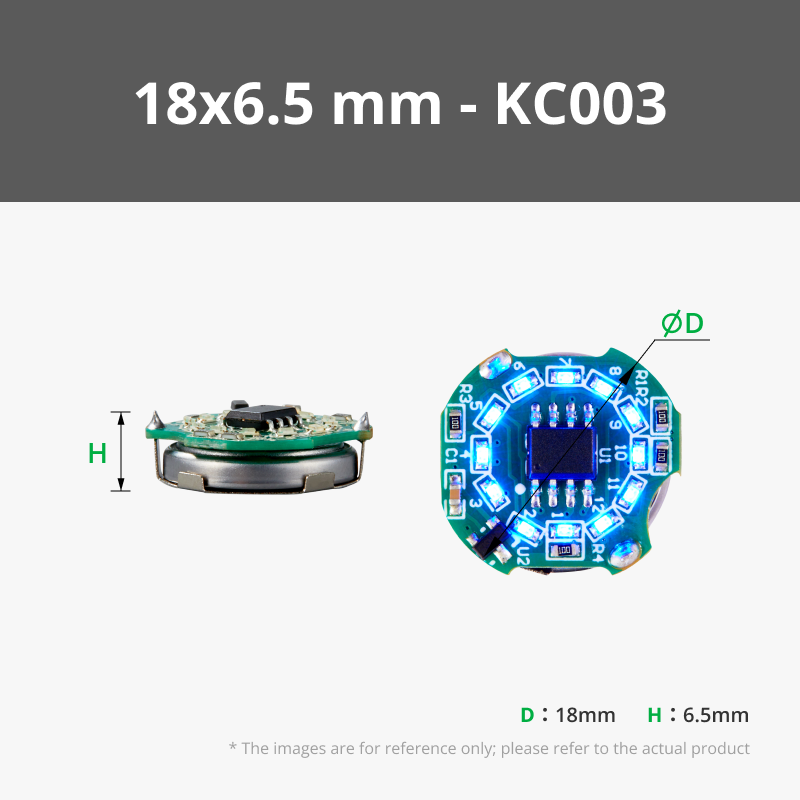
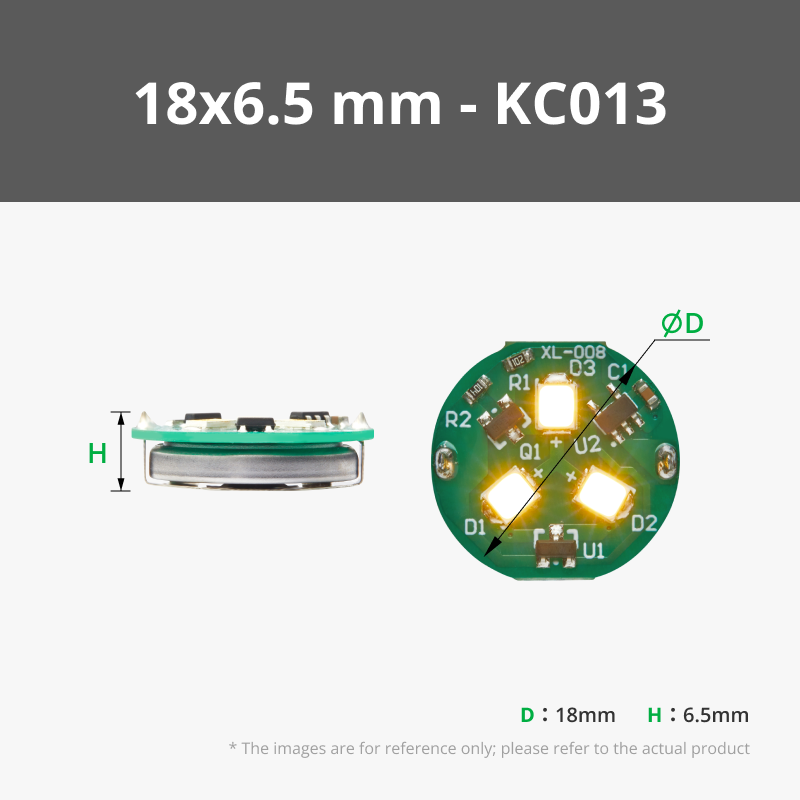
For the Magic Circle Vegsvir you need 3 LEDs of this kind: Single LED Magnetic Control Switch Light in the colors you prefer.
And 2 LEDs of this kind: Ring LED Magnetic Control Switch Light or Y Shape LED Light with Magnetic Control Switch.
For the Crystal Dragon Nest you need this remote controlled 16-color RGBW Puck light.
For the magic wand you will need magnets. Size and number depends on the wand you chose. In my compatible wand tip you can place 5 round magnets of this size (3x1mm).
Filament and infill:
I highly recommend using white filament to outline the symbols on the Magic Circle Vegsvir, black or a dark/contrasting opaque color for the body of the object, and leaving transparent filament in the inner layers beneath the white. This way, you’ll achieve a glowing effect without the LEDs being visible under the symbols. Infill 15% is enough.
For the Crystal Dragon Nest, I recommend using white: clear enough to transmit light but not so clear that it shows the infill. The infill I chose for this object is the "Lightning" 15%, as it looks more “crystal-like” and doesn't have regular geometric patterns.
For the magic wand, preferably use black or silver to cover the tip that contains the magnets. Use a 20%-30% infill or higher to add weight and make it easier to estract the collapsible part. Finally, you may want to add some “Colla 21” or similar glue to reinforce the tip.
Comment & Rating (1)