LED Light Strip Channel System for Surface Lightin


Print Profile(5)


Bill of Materials

Description
Boost Me (for free)
If this model worked out for your project, consider tossing me one of your free boosts. This side hobby is for my granddaughter's future college fund.
UPDATE - I've posted an updated profile with the recessed channel for the Hue strip. Look for the print profile that starts with "Special Request". Note - only plate 8 is modified with the recess. It will work with the existing corner piece models. It will be a tight fit, if you start by putting one edge in, at one end and then pinch the second edge in, then you should be able to work it down the length. You have to get it positioned right at the start as you won't be able to slide it after.
UPDATE - If you don't have PLA Support material, change the support settings as follows:
Change “Support/raft interface” to “default”
Change “Top Z Distance” to 0.2
Change “Interface pattern” to “Default”
Change “Top interface spacing” to 0.5
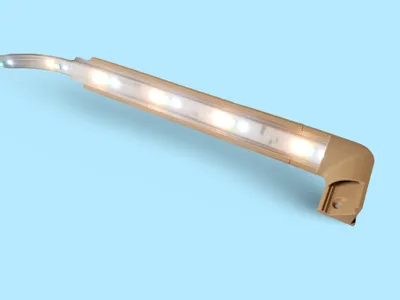
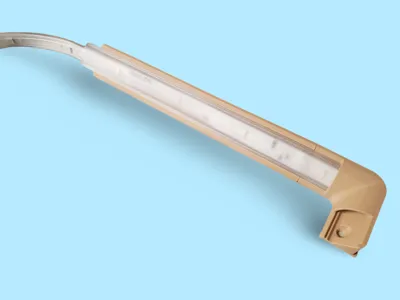
I've created a modifiable LED light channel system for kitchen under cabinet surface lighting. It has straight pieces, corner pieces, and a translucent diffuser lens cover. The channel accepts a light strip up to 15mm wide, like a Philips Hue strip, and holds it at a 45 degree angle.
The lens covers print flat on a textured plate to act as a diffuser. They flex to a curved shape when snapped into place. They have thickened edges to mate to the channel. Just make sure to install them with the textured surface to the outside.
There a couple options for the straight pieces: with screw holes and without. Without screw holes you'd use double sided mounting tape.
To modify the length of the straight pieces without screw holes and lens pieces you simply scale the length to your desired length. On an X1C you can print a channel up to 337mm when rotated on the plate 45 degrees.
To modify the straight pieces with screw holes, is a little more complex so I'm attached a step=by-step instruction.
I've setup a few plates with common length pieces, like a max 337mm channel and lens, and a straight piece that fits between two corners for the return run along the depth of a 12" cabinet.
Because cabinets come in so many widths you need to modify the others to your desired lengths.
Documentation (1)
License
You shall not share, sub-license, sell, rent, host, transfer, or distribute in any way the digital or 3D printed versions of this object, nor any other derivative work of this object in its digital or physical format (including - but not limited to - remixes of this object, and hosting on other digital platforms). The objects may not be used without permission in any way whatsoever in which you charge money, or collect fees.
Comment & Rating (99)